In this video tutorial, learn some tips, tricks, and advice for getting better drone photos and videos of fall landscapes and foliage.
In this tutorial, we’re going to cover some tips and guidelines for shooting fall landscapes with a drone. These principles should help give us the “highest probability of getting good shots.” So, in theory, you can break any of these recommendations and still get good shots.
But, overall, these tips should help you achieve better fall foliage imagery.
Time of Day
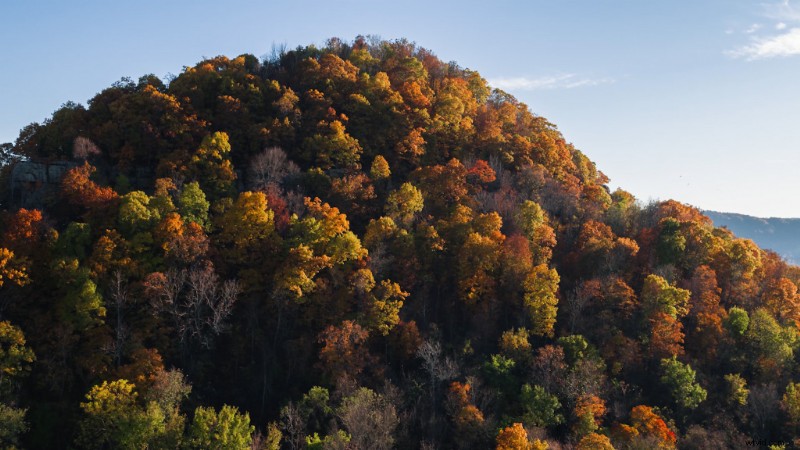
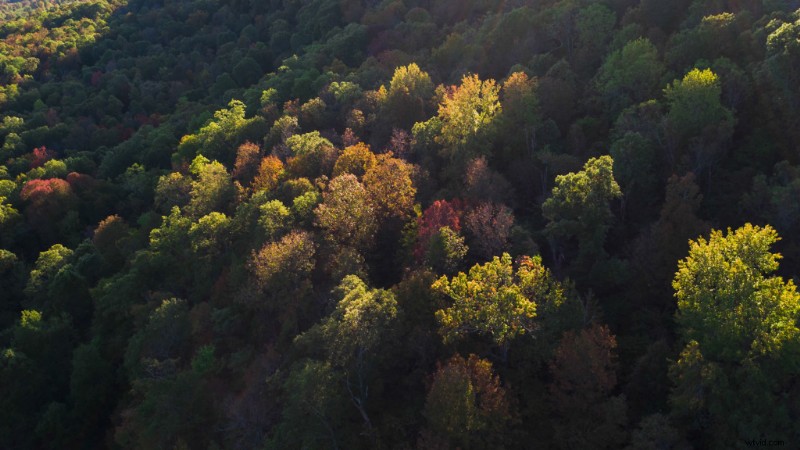
Try shooting in the late morning or early evening, when the sun is casting light at more of an angle. This will give you more interesting shadows and contrast, which is nice for helping the color of the leaves stand out.
You’ll also get some nice gradients of color on each tree, going from bright to darker color tones.
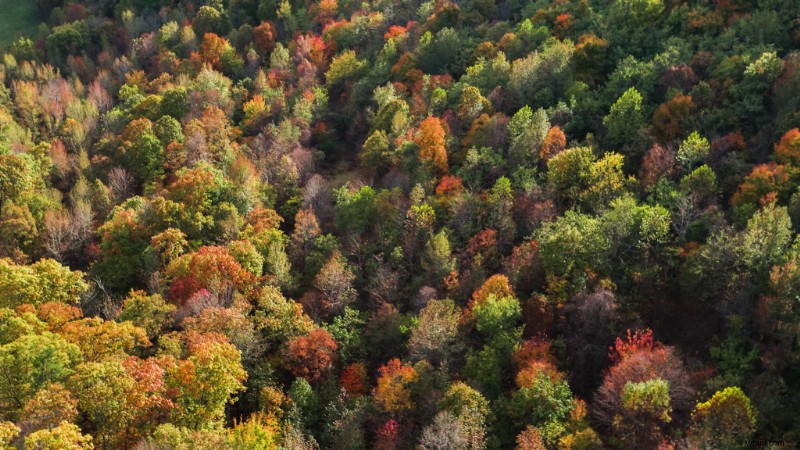
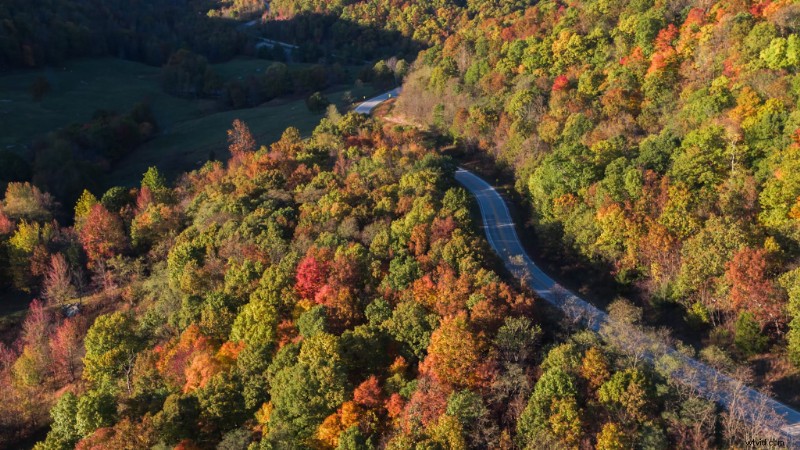
Shooting Angles
When it comes to shooting angles, I prefer parallel, towards the sun, or top-down. Filming parallel to the sun will provide you with the colorful gradients mentioned earlier. So, the sun is either to the right or the left of the drone when you’re shooting.
Filming towards the sun will allow the trees to be backlit, which will illuminate the colors of the leaves. This will give you the most contrast possible. Just be mindful of lens flares and the highlights clipping.
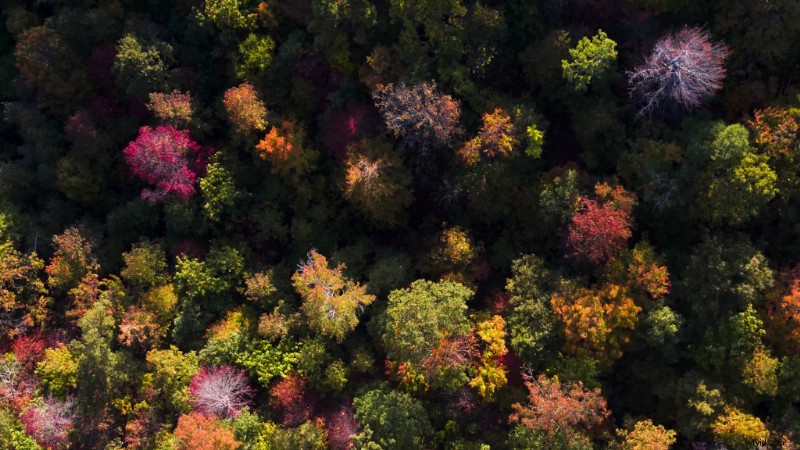
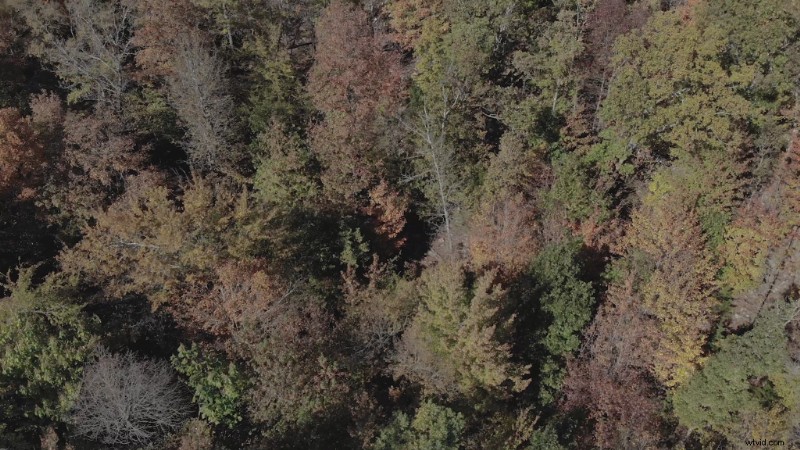
Finally, there’s top-down. This is when the drone camera is facing straight down at the terrain below. This can give you some excellent contrast with the darker ground floor terrain beneath the trees.
Sky Conditions
As far as sky conditions, the clearer the better. Clear skies will give you the most light, and you won’t have to wait on clouds to pass by if they’re blocking the sun.
In a situation where it’s overcast, I’d recommend filming at mid-day. This is because the light is going to be diffused by the clouds, and midday is when you’ll have the most possible light.
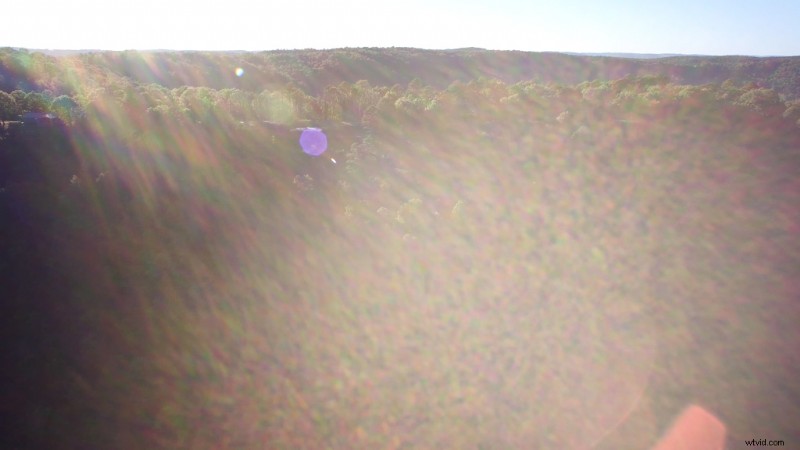
Avoid Lens Flares
Try and avoid lens flares, as they will wash out your image. (Unless you specifically want a flare in the shot for stylization.)
Particularly avoid flares on video footage, as it easily becomes too washed out to recover much color in the trees. With RAW photos, you can usually push them a lot more to recover some of that color.
Polarizer Lens Filter
Use a polarizer lens filter if you have one. The top side of most leaves have a “sheen-like” quality to them, which can reflect a lot of light. This can blow out the highlights of your image. You can cut this light down by using a polarizer.
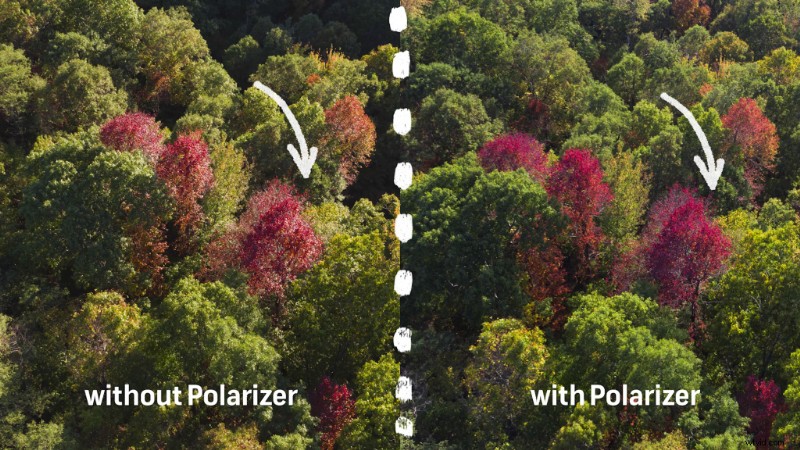
You’ll want to do a few tests, as it can take some time to dial in a polarizer on a drone. If you want to know more about using different lens filters with drones, check our video tutorial: Why You Need Lens Filters for Your Drone.
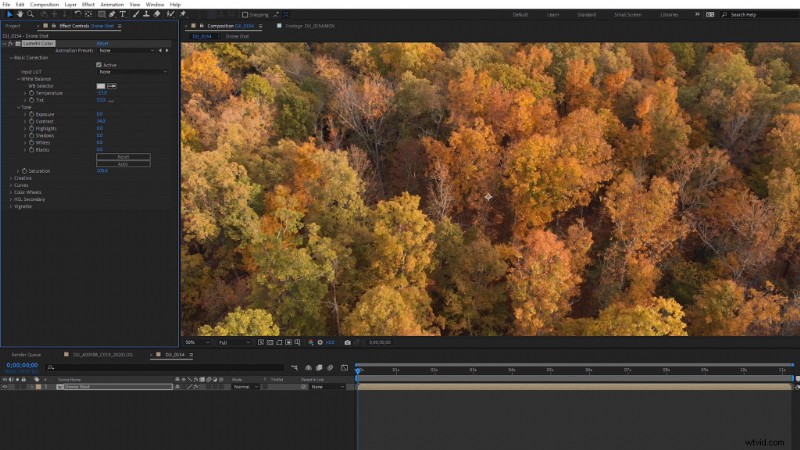
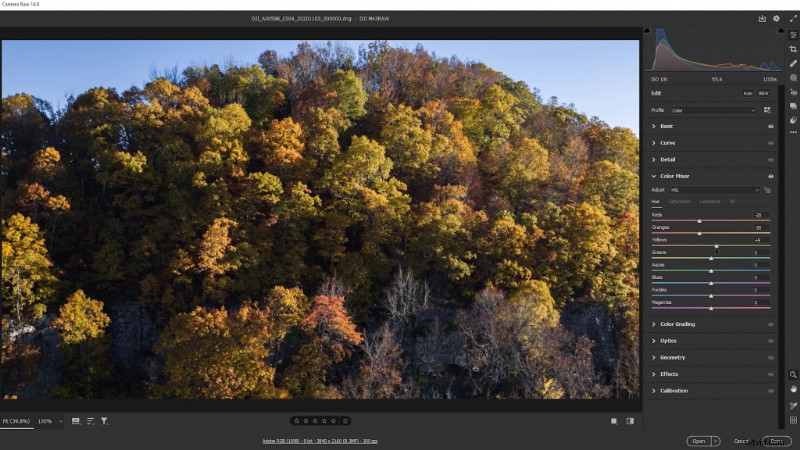
White Balance
When it comes to camera settings, by far the most important is white balance. I recommend dialing this in manually each time you shoot. With RAW photos, you can easily adjust the white balance in post.
But, for video footage, dialing in the right white balance is critical. Trying to correct the white balance in post on fall footage almost never looks quite right. It also often gives the leaves an unnatural color tint.
Don’t Film in a Flat Log Profile
If your goal is colorful fall footage, don’t film in a flat log color profile. Yes, a flat color profile will give you more dynamic range, but that isn’t really our goal with fall footage. It’s the vibrant color of the leaves.
Yes, you can dial flat footage back in during post, but I don’t recommend trying to fight that battle. The footage quality from most drones isn’t ideal for a lot of post work. The footage is usually h.264, at a relatively low bit-rate, when compared to most modern cameras.
I’d recommend filming in the default or natural color profile. Not shooting flat will also make it easier to monitor how leaf colors are really going to look when you’re filming them.
Make Yellows More Green
When it comes to editing in post, you may have a tendency to pull the greens closer to yellow. However, I actually recommend you try the opposite of that. Pulling the greens to yellow can start to blend all of the colors together.
Instead, experiment making the yellows a bit more green and making the greens a touch darker. More often than not, this can make things look a lot more natural.
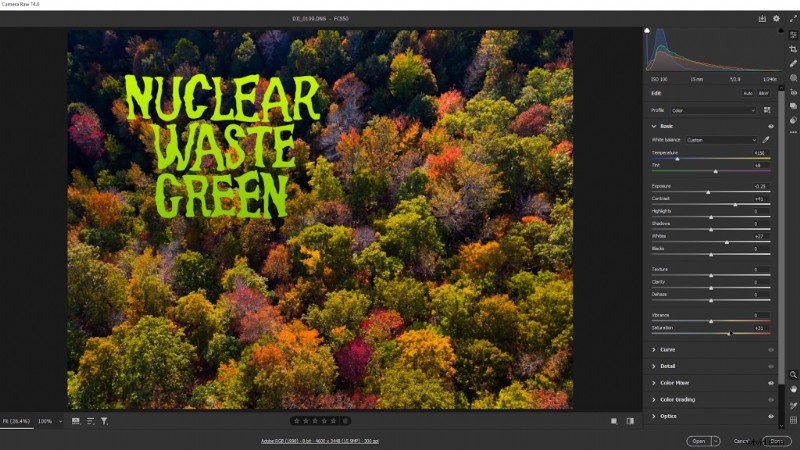
Increase Vibrance Instead of Saturation
When it comes to boosting colors, try increasing the color vibrance instead of saturation. Increasing the vibrance tends to be more subtle and pleasing to the eye. Boosting the saturation can often lead to “nuclear green” color tones that look very unnatural.
Even More Drone Tips
Now that you’ve learned the best drone tips for filming fall landscapes, check out 7 Ways to Enhance Drone Shots in Post-Production. These creative tips are nice for increasing the production value of your drone edits.
Interested in the tracks we used to make this video?
- “Sakura Dragon” by Hybridas
- “Start New Game” by Montee
For more footage advice, tips, and resources, check out these articles:
- Free Templates, Forms, and Resources for Documentary Filmmakers
- A Guide to Common Aspect Ratios, Image Sizes, and Photograph Sizes
- 100+ Free Mographs, Elements, and Assets for Video
- How to Make Videos Look Better in 30 Seconds
- Tips and Tricks for Storing Video Gear
Cover image via Rad Radu.