Don’t shift your entire schedule just because of sunlight. Here are a few handy solutions for using the bright midday sun to your advantage.
Ah, those long, bright, hot, sunny days. At the time of writing this, we’re just a few weeks out from the start of summer 2021. And, given the turbulent nature of summer of 2020, I’m sure many (like myself) are looking forward to a somewhat calmer summer. However, while the strong, midday sunshine is nice for soaking up vitamin D, it’s not entirely ideal for filmmaking.
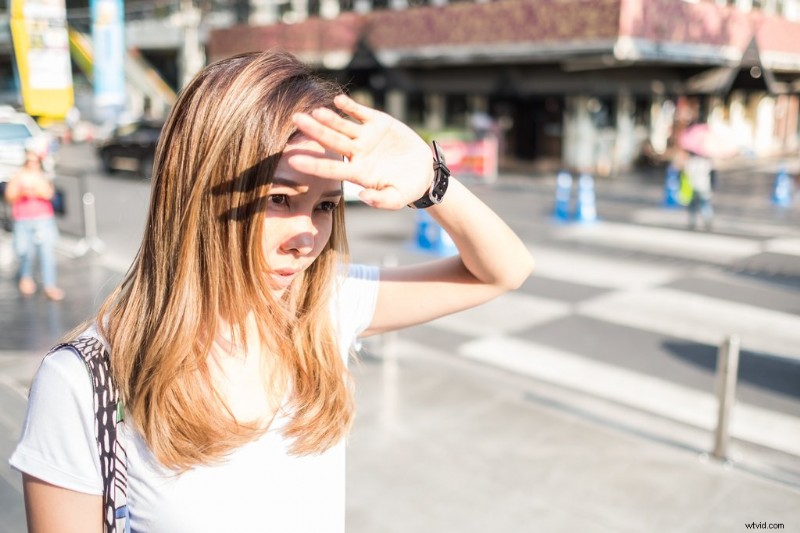
I say entirely, but that’s not wholly accurate. The thing is, at a no-to-low budget level, without diffusion, the bright, midday sun is an eyesore when filming conversational scenes. Midday light is extremely harsh and bright. As a result, it can create shadows and contrast that aren’t aesthetically pleasing.
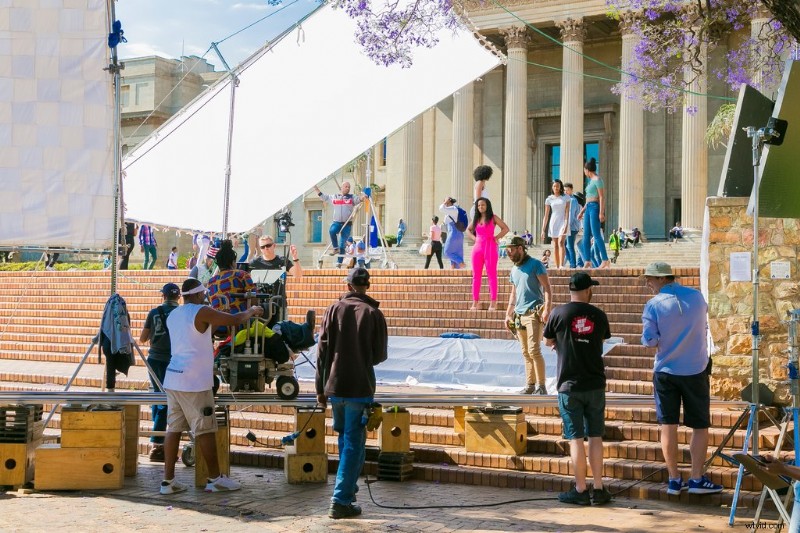
If you’ve ever seen a behind-the-scenes image of a production taking place under the midday sun—like the image below—you’ll see a wide variety of grip tools that either diffuse the light, or block the sun completely.
At a low budget, or if you’re just creating content yourself, this isn’t always an option. As a result, we usually shift our plans to film at another time.
Well, don’t push your schedule back to the late afternoon just yet. There are still plenty of ways you can use the bright, midday sun to your advantage. And, I promise you, I’m not about to recommend using a reflector!
Use Foliage for Interesting Shapes
I love to cast dynamic shadows on my talent’s face. If we’re filming inside I’ll set up either a gobo or scatter gel to project shapes into the scene and onto the talent. When filming outside, I’ll look to replicate this with foliage.
If you film later into the day or at golden hour, the direction of the sun softens the shadows. In most cases, it also angles out at a direction where it doesn’t fall directly onto your talent. This is because the sun is sitting closer to the horizon instead of directly above.
If you’re shooting in bright sunlight in the middle of the day, the sun will cast hard light directly onto the foliage and project hard shadows onto your talent.
Take a look at this example. We have an older man smelling the blossoming tree buds. The shadows paint a beautiful mosaic of light and dark tonal regions on his face. This image just wouldn’t be as visually interesting if we had filmed later in the day, or perhaps removed the shadows by blocking the sunlight.
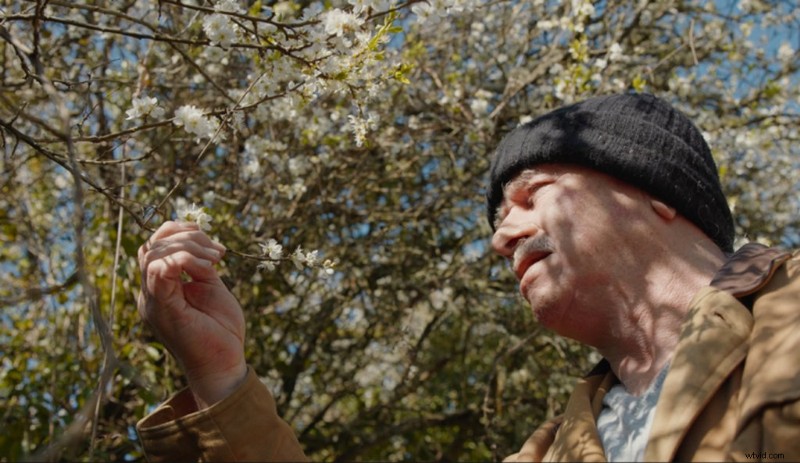
Therefore, if possible, look to take your location under a tree or near foliage that extends above the talent.
And, even though you’re in the shade, you’re going to want to expose your image more for the bright streaks coming through the branches and not the shadows. If you expose for the shadows, you may end up clipping the highlights on the actor’s face.
Pockets of Forest Light
Running from the above suggestion of using tree branches to create dynamic shadows, let’s look at how direct sunlight can help you create better imagery when filming in forests.
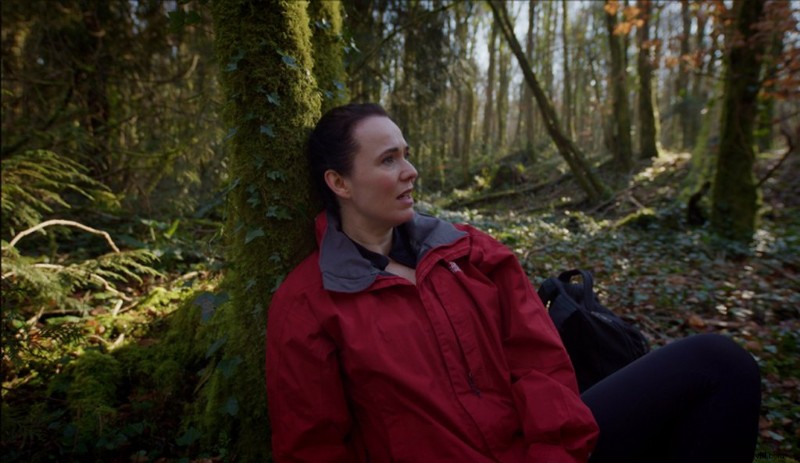
An initial problem I find with filming in densely packed forests at a low-budget standpoint (meaning no additional lights) is that the location can sometimes appear flat. There’s often no tonal separation between the foreground (your talent) and the background (the location). In the still below (from a 2015 project), we can see there’s no real contrast to the scene.

However, if you were to film when the sun is at its peak, the sunlight is likely going to penetrate through the trees and create pockets of light within the forest. I’m not going to suggest placing your talent within these pockets of light. Instead, use the light to create visual tonality throughout the image.
For example, in this shot, the pockets of light from the midday sun hitting the background creates a visually appealing image, which would have otherwise been somewhat dull without the addition of the light streaks.
In these circumstances, because the overall area of the forest is going to be darker, you don’t want to expose the bright pockets as recommended in the first tip, as your talent may fall into too much darkness. Instead, you want to meter the exposure on your talent, then meter the light pockets and expose midway.
Bright Highlights in a Dark Environment
Ok, admittedly, this tip is going to depend on your location. In my example, I’m shooting outdoors in an old castle. I’m sure many of you don’t have one of these local to you.
However, this can be used in open caves, ruined buildings, castles, etc. Essentially, an enclosed structure that doesn’t have the entirety of its roof. We’re outside, but also inside. Like I said, it depends on location.
When filming in these locations, I like to expose my talent in the dark ambient area of the enclosed space, then have the actor walk into an area where the intense, midday sunlight is hitting. The exposure value of the sunlight will likely be strong—that’s ok. Don’t worry about lowering the exposure. We want to show the contrast between the dark environment and the bright sunlight.
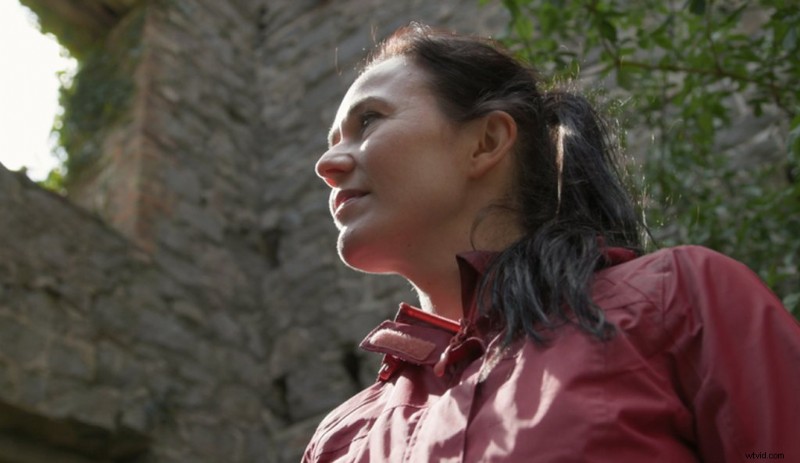
Of course, make sure that the highlights aren’t clipped. But, to demonstrate the contrast, I like to keep my highlight values (when looking at the scope) just under where it would fall out of legal values. This keeps the highlights safe but hot.
Additionally, you want to make sure you’re angled at a position where the sunlight is acting as a far side key. That basically means that the sunlight is highlighting the side of the actor’s face that’s away from the camera. If you were to film at the opposite angle, the sunlight would become too overpowering and distasteful.
Make Use of Those Beautiful Midday Skies
On the topic of filming in direct sunlight, Brown states the following in his book Cinematography: Theory and Practice:
As filmmaking and photo websites warn not to film in direct midday sunlight, it can often feel like without grip tools, filming in direct sunlight is equally destructive as filming in the rain. And, I admit that I’ve also become desensitized to the notion of waiting for the evening sun before going out on a photography walk.
However, there are several other things that you can film in lieu of an actor. The most obvious being the beautiful, daytime landscape. While filming directly towards the sun isn’t preferable due to clipped values within the sky, facing away and filming the landscape will offer you a sea of beautifully saturated colors.

The brighter the light, the greater increase of saturation. And, by filming in bright sunlight in a rural landscape filled with greens, yellows, and blues, you’re going to obtain beautiful colors that aren’t found during the early or later parts of the day.
Additionally, if you’re filming a cloudless day, get the most from that blue sky by using a polarizer filter. If you’re not too sure what that is, I have a tutorial just for you!
Yes, it’s not ideal to film conversational scenes with no diffusion or flags. At a no-to-low budget, you might want to rule this out. However, as shown, there are plenty of other avenues you can explore while using the power of the midday sun.
For more sunlight tips and advice, check out these articles:
- Video Tutorial: Learn How to Create Sun Stars with This Quick Tip
- What Does a Circular Polarizer Do?
- Spring Color Palettes 2021: 10 Color Trends to Spark Joy and Creativity
- The Photographer’s Guide to Attaining Hygge in Your Images
- Everything You Need to Know About Neutral Density Filters
Cover image by Bucha Natallia.