Coming up with new ways to shoot long exposure photography can be a challenge. In this tutorial, let’s discuss working with electroluminescent wire.
It’s something that doesn’t come naturally to me, but I’m always actively trying to find inspiration. As I was browsing online, I came across pictures from photographer, Nicolas Rivals. When I first came across these, I loved them. I wanted to know everything about them and how he did it.
I did some research and came across some lights called “Electroluminescent Wire.” When I compared photos from the wire to those of Rivals, I made the connection — these must have been the lights he used.
When I took a second look at Rivals’s pictures — this time from the standpoint of “How’d he do that?” — instead of a fanboy point of view, I was instantly overwhelmed. I wasn’t sure how he mounted the lights, and I’m still not 100 percent confident I figured out his method. But through trial and error, I found a simple process that makes a close enough approximation.
What You Need to Take These Photos
The light is electroluminescent wire. It’s a thin copper wire coated with phosphor that emits light when you pass a current through it. It’s lightweight, flexible, and certain portions are waterproof. I purchased it on Amazon for $6.
The next thing you need is tape. I used gaff tape, and it worked great.
Third, you need two stands. They don’t need to be anything special; you just need something that you can tape the light to. I just grabbed any of the two that were around the studio.
The last thing you need is another person to help you. When pulling the stands to make the light into a straight line, the stand you’re not holding might fall, or the light might rip off from the tape. Also, taking long exposures alone in the dark isn’t fun.
How to Take the Photo

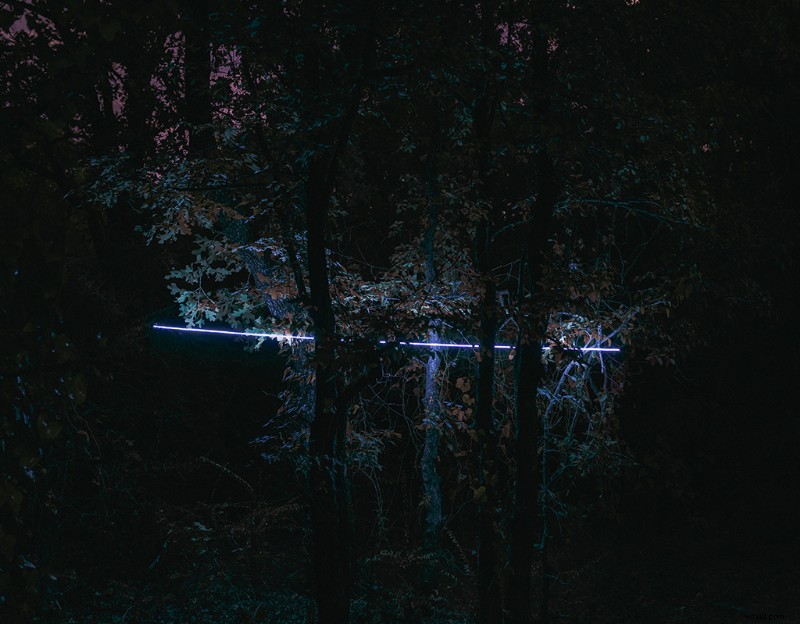
So, the first thing you’ll want to do is find a location that’s dark and will look cool with this light composition. Once you find the spot, tape each end of the light to a stand or a tree branch. Play with the look, and once you feel like you got what you like, take the shot! For every picture, I had the shutter open for thirty seconds and tried not to crank the ISO up too high. It’s really that simple. Just keep at this style and, just like everything else, it’ll start to look a lot cleaner. There’s not much to the process, but trying to master it is tough. Here are some tips to help you out.
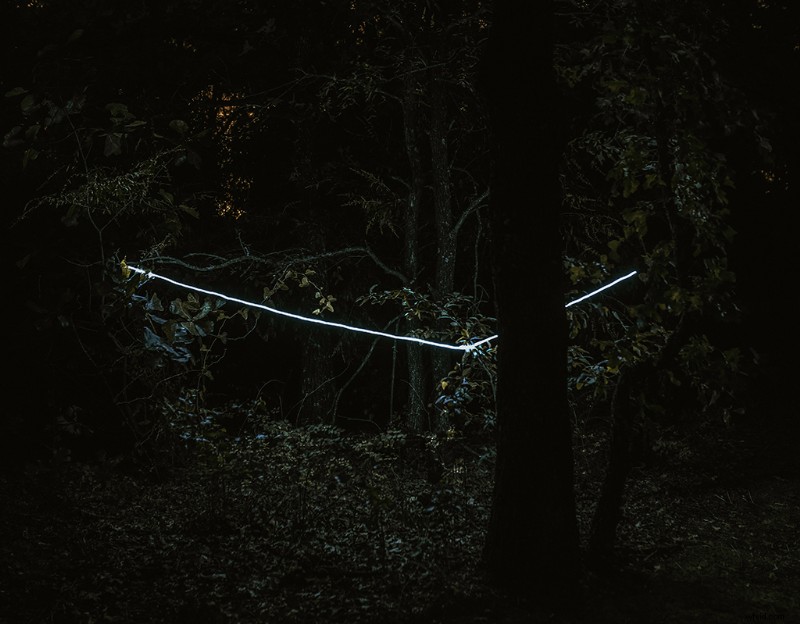
1. Have a Surface Nearby
Since this light isn’t that bright, we need to create the illusion that it is. The closer the surface, the more light it’ll catch, making your light source seem brighter.
2. Don’t Put this Light in an Open Area
While shooting, I thought this would be a great idea, which is why in one of the shots in the video, you see the light set up in an open space. When I finally took the picture, my excitement for the shot quickly went out the door. When the picture finished processing, all I saw was the light and a black void with some barely lit leaves.
3. Shoot in a Dark Area
Since the sensor is exposed for thirty seconds, it’ll make any light seem way brighter than it actually is. So, to avoid this, make sure the EL wire is the only light source.
4. Play with Levels
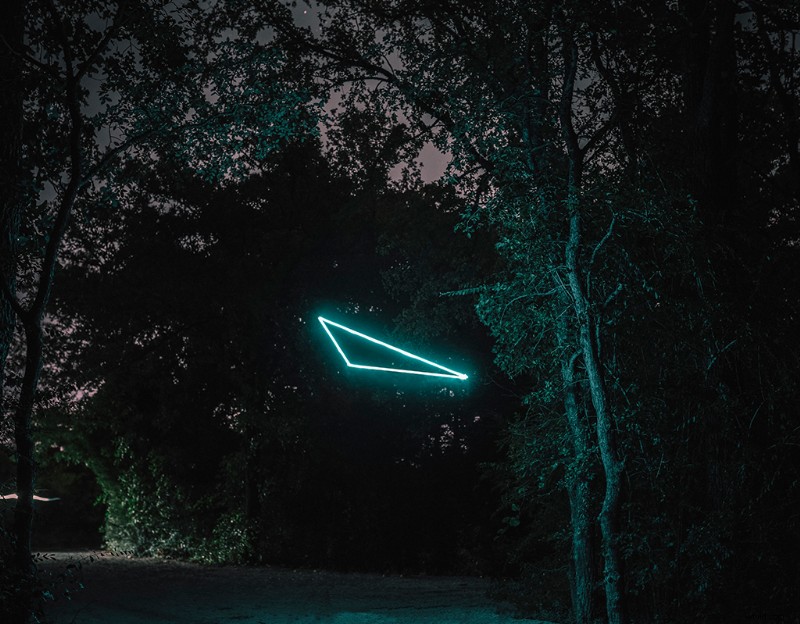
In one of the shots, I made a triangle, just like the one I saw by Rivals. While shooting, I learned that all points of light need to be at different distances and heights from the ground and the camera. This creates a more interesting, three-dimensional look.
To wrap things up, I can say this shoot changed the way I view long exposures. It doesn’t always have to be about capturing light in motion. With one frame, long exposures can be minimal, while still telling a story. I had a lot of fun setting up these shots, and after the whole process, I feel like I grew as a photographer. Go out and have fun with this style! Hopefully it inspires you as it did me.
Interested in the tracks we used to make this video?
- “The World Above” by Nick Petrov
- “Minimal Hop” by Tiny Music
- “Cold String” by Tiny Music
- “Living Digital” by Ulas Pakkan
- “Sneaky Devil” by Sunshine Music
- “My Old Piano” by Magnetize Music
Looking for more photography tutorials? Check these out.
- 6 Tips for Portrait Photography Using Natural Lighting
- Film Stock 101: The Cinematic Magic of CineStill 800T Photography
- Tutorial: How to Get the ’80s Aesthetic in Your Photos
- Trying Out Large Format Photography with the Intrepid 4X5 Mk 3 Camera
- Video Tutorial: How to Master the Art of Night Photography