Part 1: Adding Audio to a Project in Premiere Pro
Before you begin, be aware that adding a background score—such as a 15 MB track—will increase the final file size by the same amount. To keep the output manageable, use targeted compression or transcode settings after the audio is attached.
Premiere Pro’s dedicated Audio workspace offers a streamlined workflow for importing, reviewing, and attaching sound to your clips. Follow these steps to get started:

Step 1 – Open the Audio Workspace
Navigate to Window > Workspace > Audio to display the audio‑specific tools.
Step 2 – Enable the Media Browser
In the Audio workspace, click Window > Media Browser to reveal the Media Browser toolbar, which lets you browse your file system directly within Premiere.
Step 3 – Import Your Audio File
Locate the desired audio file in the Media Browser, right‑click (Windows) or control‑click (macOS) to open the context menu, and choose Import. If you want the audio to be physically copied to your project folder, keep the Ingest box checked.
Step 4 – Add Audio to the Timeline
Drag the imported audio clip from the Project panel onto the audio track of your sequence in the Timeline panel. Premiere automatically aligns the clip’s start with the playhead position.
Step 5 – Trim the Audio
Use the Razor tool or drag the clip edges to trim the audio to the desired length, just as you would edit a video clip.
Part 2: Adjusting Audio Levels in Premiere Pro
Fine‑tuning audio levels is essential for a polished final product. Premiere Pro provides both clip‑level and track‑level controls via the Audio Track Mixer.

Step 1 – Open the Audio Track Mixer
Navigate to Window > Audio Track Mixer and select the sequence you’re working on. The mixer displays each audio track as a vertical channel.
Step 2 – Preview the Audio
Use the playback controls at the bottom of the mixer panel to play, pause, or stop the audio. This allows you to hear the effect of any adjustments in real time.
Step 3 – Adjust Volume Sliders
Move the slider for each track up or down to increase or reduce its volume. Aim to keep the loudest peaks between –6 dB and +3 dB to avoid clipping while preserving headroom.
Step 4 – Fine‑Tune Clip Gain (Optional)
Right‑click the audio clip in the Timeline, choose Clip Gain, and set a specific decibel value if you need a uniform level change across a clip.
Tips for Optimal Audio Quality
- Maintain a consistent audio level: keep all tracks within the –6 dB to +3 dB range.
- Use audio transitions (e.g., cross‑fade) to smooth abrupt changes between clips.
- Export with an appropriate audio codec (e.g., AAC at 320 kbps) to balance quality and file size.
Part 3: Adding Audio to Existing Video Files (Using Filmora)
For editors who prefer a more intuitive interface, Wondershare Filmora offers a quick way to merge audio with video. The steps below illustrate the process, which is similar to Premiere but requires fewer steps.
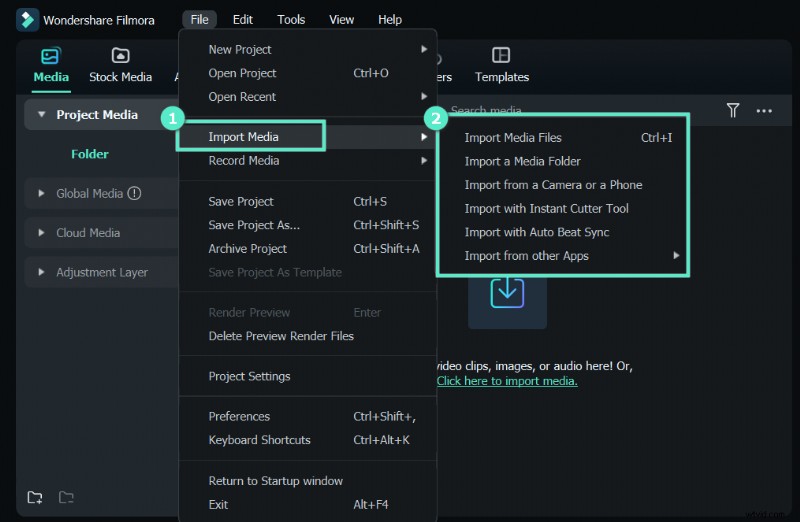
Step 1 – Import Media
Open Filmora, click Import or drag your audio and video files into the Media panel. Supported formats include MP3, M4V, MPA, WAV, and WMA.
Step 2 – Merge Audio & Video
Select the video clip in the Timeline, hold Ctrl (Windows) or Cmd (Mac) to pick the new audio track, right‑click the selection, and choose Merge audio & video. Filmora analyzes the files and creates a new merged file named with a “Merged” suffix.
Step 3 – Export the Final Project
Once satisfied, export the sequence in your preferred format. Filmora automatically preserves the original files, ensuring no loss of source data.
Conclusion
This guide walks you through adding and adjusting audio in Adobe Premiere Pro and offers a brief alternative using Wondershare Filmora. With these techniques, you can enhance any video project with professional‑grade sound, creating a more engaging viewer experience.