Master the art of ambisonic audio mixing in Adobe Audition
Editing ambisonic tracks shares many principles with stereo and mono work, but requires a few extra settings and a clear understanding of the channel layout. This guide walks you through opening, mapping, processing, and exporting ambisonic files in Audition, ensuring you hear every channel and achieve the best results for immersive sound.
Opening Ambisonic Files in Audition
Start by importing your ambisonic file: File > Open or drag the file into the File Panel. Ambisonic audio typically contains four channels (W, X, Y, Z), though some files may expose more.
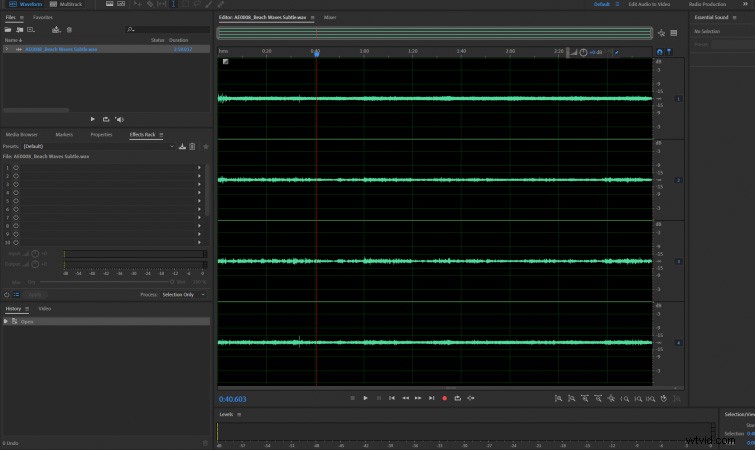 Ambisonic files usually display four audio channels.
After selecting the file, you will see four distinct channels. Playback will often reveal only two audible streams because the remaining channels haven’t been assigned to speakers yet.
Audio Channel Mapping – Hearing Every Channel
To hear all four components, map the 3rd and 4th channels to your available speakers. Navigate to Edit > Preferences > Audio Channel Mapping.
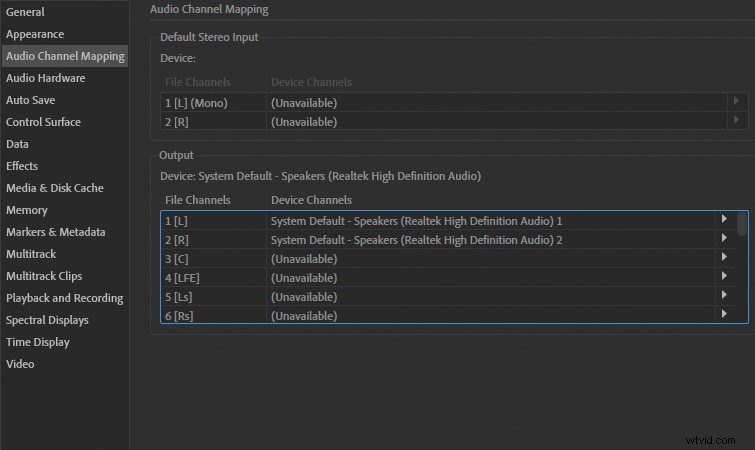 Open the Audio Channel Mapping preferences.
Under Output, set Channel 3 to one speaker and Channel 4 to another. If you only have two speakers, assign Channel 3 to Speaker 1 and Channel 4 to Speaker 2.
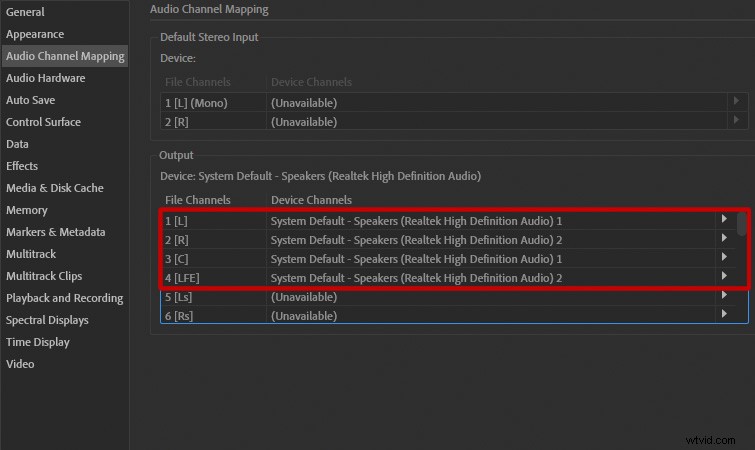 Assign channels to available speakers.
Some files label channels as W, X, Y, Z instead of 1–4. Map these as well by scrolling to the W, X, Y, Z entries under Output.
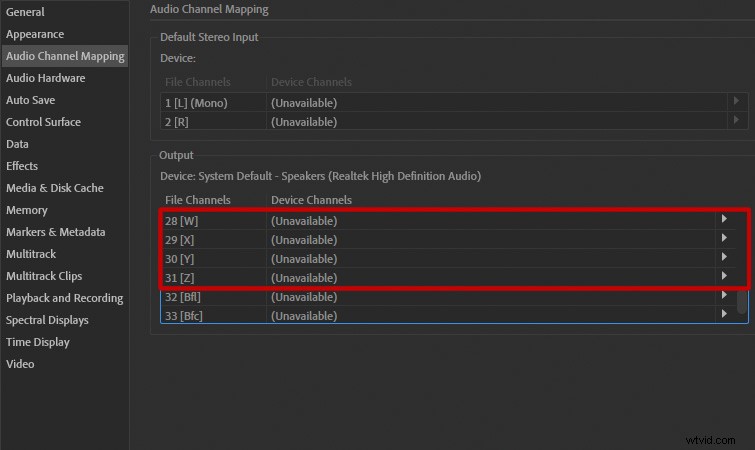 Map W, X, Y, Z channels to speakers.
Applying Effects to Ambisonic Files
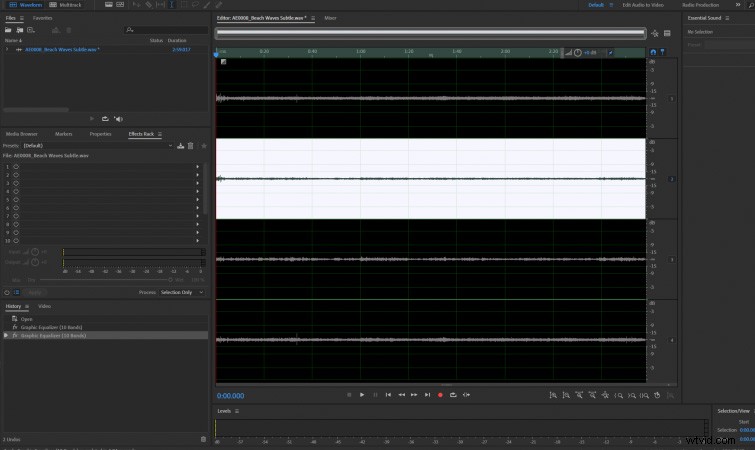
Audition treats ambisonic tracks like any multi‑channel audio. Selecting an effect will automatically apply it to all four channels unless you disable specific tracks.
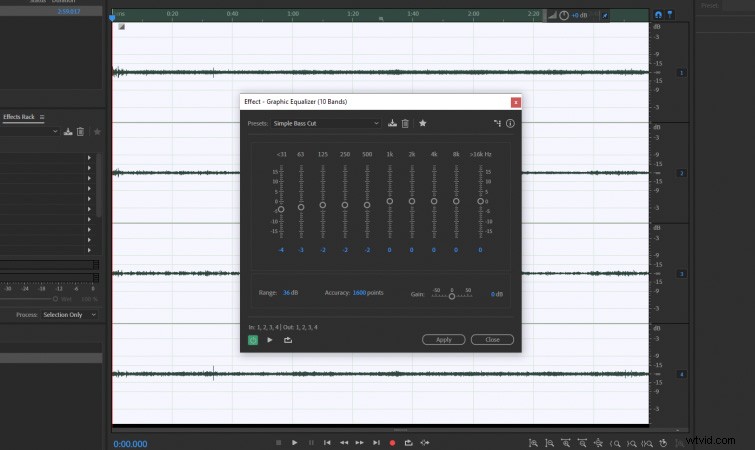 Effects apply to all channels by default.
Targeting Individual Ambisonic Channels
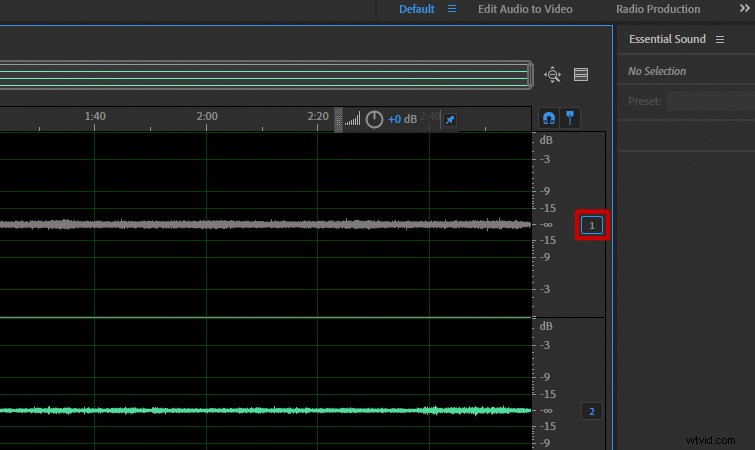
To isolate a single channel, toggle the channel’s checkbox next to its number on the right side of the channel list. Disabled channels are ignored by effects.
 Disable channels by clicking the checkbox.
For example, disabling all channels except Channel 2 ensures any applied effect only affects that channel.
 Enable only the desired channel.
Remember to re‑enable all channels before exporting to preserve the full ambisonic data.
Exporting the Mixed Ambisonic File
Export your final mix via File > Export > File. Choose Wave PCM as the format and confirm the sample type settings:
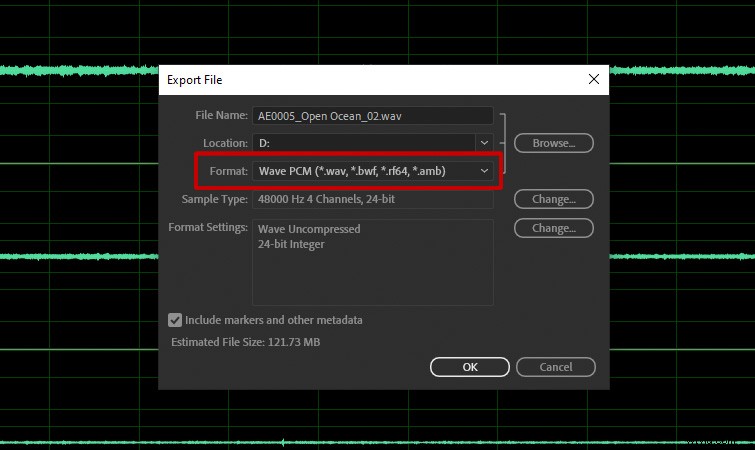 Select Wave PCM format.
Click Change next to Sample Type and set Channels to Same as Source to retain the four‑channel structure.
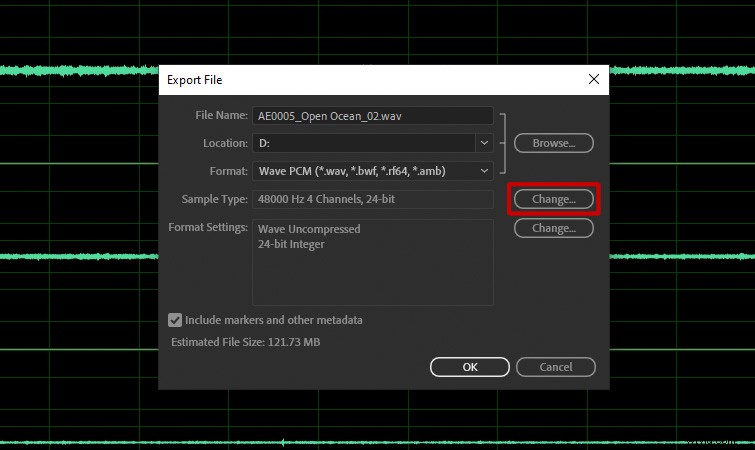 Adjust sample type settings.
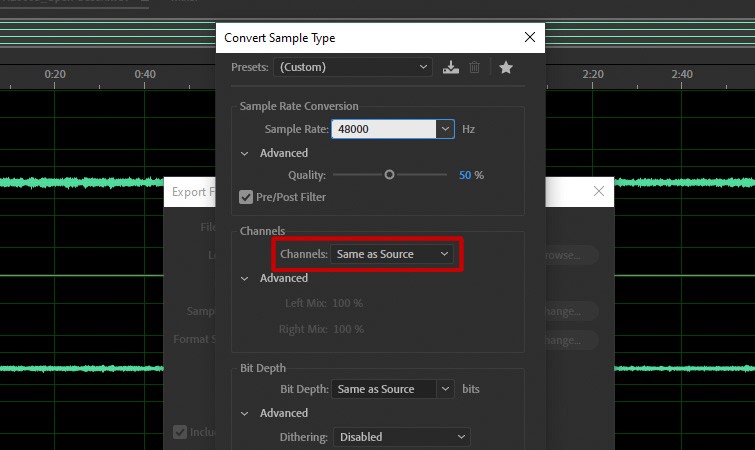 Ensure channel count matches the source.
Confirm with OK and export the file.
Converting Ambisonic Audio to Stereo or Mono
Ambisonic recordings offer flexibility: you can downmix to Mono, Stereo, or other configurations. A popular free solution is RØDE’s SoundField plugin, which integrates seamlessly with Audition.
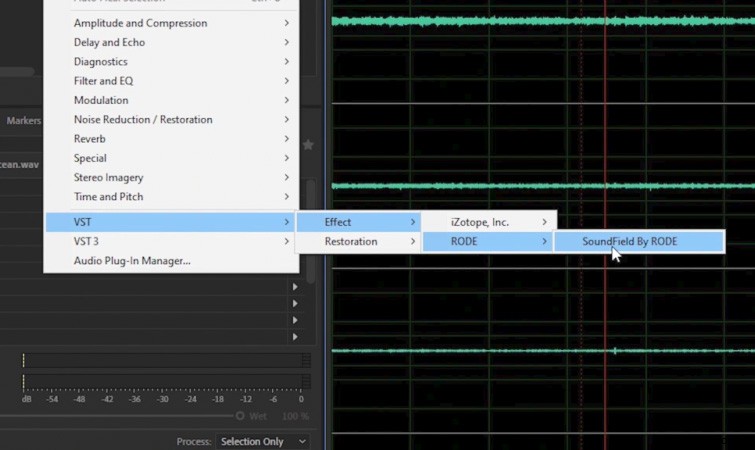 Use the SoundField plugin for versatile downmixing.
SoundField lets you emulate virtual microphones, adjust angles, and choose output formats, making it ideal for VR, AR, gaming, and film applications.
Finding Ambisonic Sound Effects
For immersive projects, high‑quality ambisonic sound effects are essential. PremiumBeat offers a catalog of over 16,000 SFX available in stereo, 5.1, and ambisonic formats, suitable for AR/VR, game development, immersive film, advertising, and live events.
Explore their library to enrich your audio mix with realistic spatial cues.
Additional reading: