Want to speed up a video quickly and reliably? FFmpeg—an open‑source, cross‑platform powerhouse for multimedia—lets you do just that from the command line. Whether you’re creating a time‑lapse, trimming footage, or simply speeding a clip for a presentation, this guide gives you step‑by‑step instructions, clear examples, and best‑practice tips.

In this article
- Where to Download FFmpeg
- Using the setpts Video Filter
- Raw Bitstream Method
- How to use Filmora to speed up video
- How to Make Various Speed Effects with Speed Ramping
Part 1. Get Started with FFmpeg
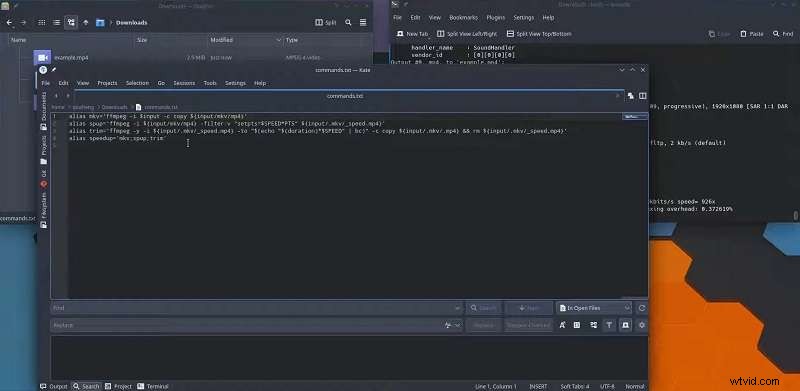
Unlike most video editors that rely on a graphical interface, FFmpeg is a command‑line tool. This means you’ll type commands that define exactly how the software should process your media. While the syntax can seem intimidating at first, mastering it gives you unmatched precision and control.
FFmpeg can decode, encode, transcode, filter, play, and, crucially, adjust playback speed for any media file.
Where to Download FFmpeg
Start by visiting the official FFmpeg website. From there you’ll find download links for Windows, macOS, and Linux. Choose the installer that matches your operating system and follow the on‑screen instructions to complete the installation.
Part 2. How to Speed Up Video with FFmpeg
Speeding a video with FFmpeg boils down to adjusting the Presentation Timestamp (PTS) of each frame. The PTS dictates when a frame appears during playback. By scaling these timestamps, you can double, triple, or even multiply the speed of a clip.
There are two primary methods: (1) using the setpts filter, or (2) re‑muxing a raw bitstream with new timestamps.
1. Using the setpts Video Filter
The setpts filter changes the PTS values of video frames. Scaling the timestamps directly adjusts speed without re‑encoding the video.
Example: To double the playback speed, use setpts=0.5*PTS:
ffmpeg -i input.mp4 -vf "setpts=0.5*PTS" output.mp4
- -i input.mp4 – specifies the source file.
- -vf "setpts=0.5*PTS" – scales PTS by 0.5, effectively doubling speed.
- output.mp4 – the resulting file.
Note that this changes only the video stream. To drop the audio (which would otherwise be out of sync), add -an:
ffmpeg -i input.mp4 -vf "setpts=0.5*PTS" -an output.mp4
For extreme speedups—say, 60×—use:
ffmpeg -i input.mp4 -filter:v "setpts=PTS/60" -an output.mp4
If you also want to standardise the frame rate (e.g., 24 fps) after speeding up, append the fps filter:
ffmpeg -i input.mp4 -filter:v "setpts=PTS/60,fps=24" -an output.mp4
2. Raw Bitstream Method
This lossless approach preserves the exact video data while adjusting timestamps. It’s ideal when you need the original quality untouched.
Step 1: Extract the video stream to a raw bitstream.
ffmpeg -i input.mp4 -map 0:v -c:v copy -bsf:v h264_mp4toannexb raw.h264
Here, raw.h264 contains the unaltered H.264 stream.
Step 2: Mux the raw stream back into a container with new timestamps.
ffmpeg -fflags +genpts -r 30 -i raw.h264 -c:v copy output.mp4
- -fflags +genpts – tells FFmpeg to generate fresh PTS values.
- -r 30 – sets playback speed; adjust to increase or decrease speed.
- -c:v copy – copies the video without re‑encoding.
Increasing -r speeds up the clip; decreasing it slows the video.
Part 3. A User‑Friendly Alternative: Wondershare Filmora
If the command line feels daunting, Filmora offers a visual interface that delivers the same speed‑adjustment functionality with a few clicks. Try the free version first, and upgrade if you need advanced features.
Filmora lets you accelerate videos up to 100× or decelerate them to 0.01× speed. It also supports Speed Ramping, enabling smooth transitions between different speeds.
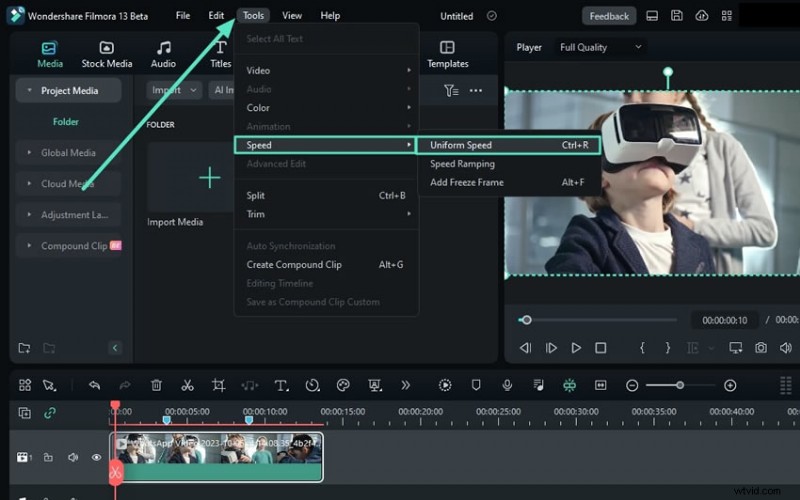
How to Use Filmora to Speed Up Video
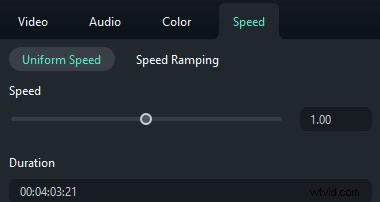
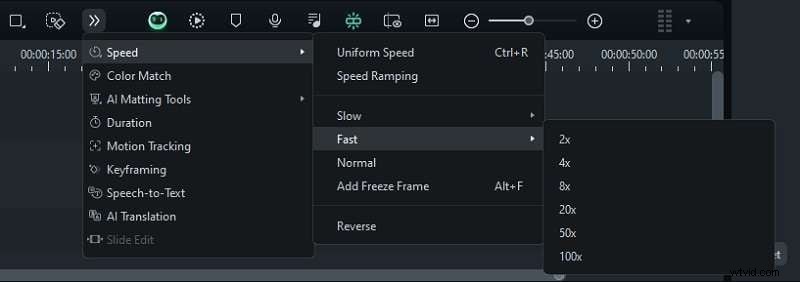
1️⃣ Adjust speed via the toolbar: Select the clip on the timeline, click the Speed icon, and choose “Uniform Speed.”
2️⃣ Set the desired rate: Move the slider right or type a value greater than 1 in the Duration field for precise control.
3️⃣ Choose a preset: Go to Speed > Fast and pick from 2×, 4×, 8×, 20×, 50×, or 100×.
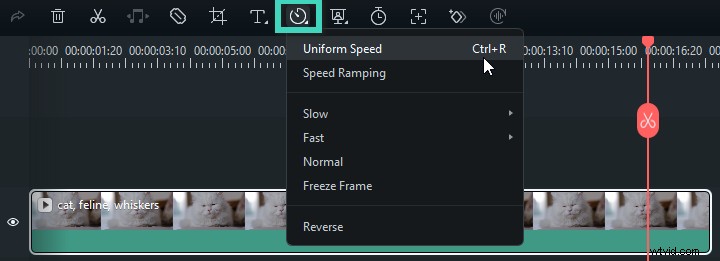
Creating Dynamic Speed Effects with Speed Ramping
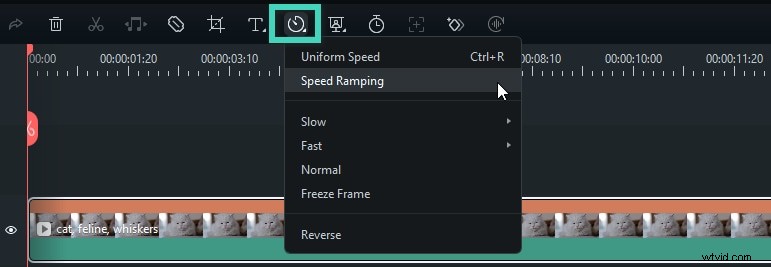
1️⃣ Access Speed Ramping: Click the Speed icon and select “Speed Ramping.”
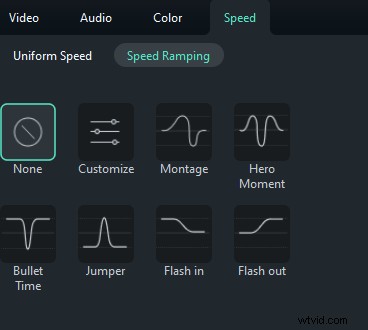
2️⃣ Choose a preset: Filmora offers a variety of ramp presets—consult the help guide or experiment to find the right one.
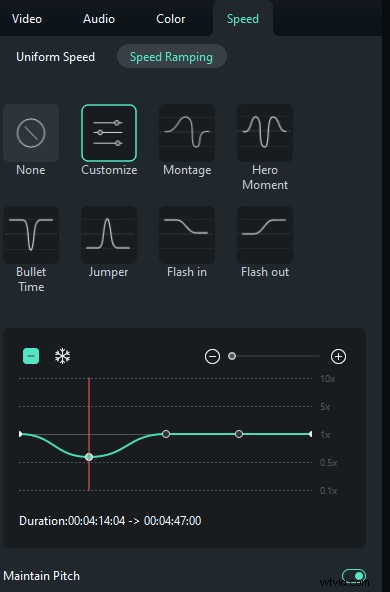
3️⃣ Fine‑tune speed points: Drag the markers up for faster or down for slower segments, and reposition them horizontally to target specific parts of the clip.
4️⃣ Manage points: Add or remove points with the plus/minus icons. To freeze a frame, place the playhead, click the snow icon, set the duration, and apply.
Conclusion
FFmpeg’s command‑line interface offers granular control for speed adjustments, but it does require learning the syntax. Refer to this guide whenever you need to create time‑lapse videos, shorten footage, or simply tweak playback speed.
If the terminal feels too complex, Wondershare Filmora’s intuitive visual tools make speed editing accessible to everyone.
FAQ
1. Can I adjust the audio speed along with the video on FFmpeg?
Use the
-anoption to drop audio, or apply theatempofilter for audio‑only speed changes. Combine multipleatempofilters for rates beyond 2×.2. Can I preview changes before finalizing the video on FFmpeg?
FFmpeg lacks real‑time preview; you must run the command and review the output file. For quick checks, consider using a small segment of the clip.
3. What should I do if FFmpeg commands are not working?
Double‑check your syntax and consult the official FFmpeg documentation. If problems persist, report the issue with the command, console output, and a concise description of the problem.