The slide transition is a common effect used in video editing to produce seamless, smooth movement between clips. It’s an excellent option for presentations, trip videos, and dynamic narratives. This transition adds a polished, professional touch to edits by guiding the viewer’s eye naturally from one scene to the next.
Both Adobe Premiere Pro and Wondershare Filmora offer ways to add this effect. The former offers advanced customizations, allowing you to fine-tune movement, pace, and direction to produce a professional finish.
For beginners or those seeking a quick solution, though, Filmora streamlines the process with built-in transitions that can be used with just a few clicks.
In this guide, we will walk you through the process of adding a slide transition in both Premiere Pro and Filmora. Regardless of your level of expertise, by following our step-by-step instructions, you’ll be able to add smooth transitions to your videos.
In this article
- AI Smart Cutout
- AI Audio Denoise
- AI Auto Reframe
A Step-by-Step Guide to Add the Slide Transition in Premiere Pro
In Adobe Premiere Pro, adding a slide transition helps provide flawless, seamless movement between clips, providing a dynamic effect in your videos. It gives you complete customizing, allowing you control over the speed, direction, and effect style.
Here’s how to add and customize slide transitions to achieve a polished and engaging final edit.
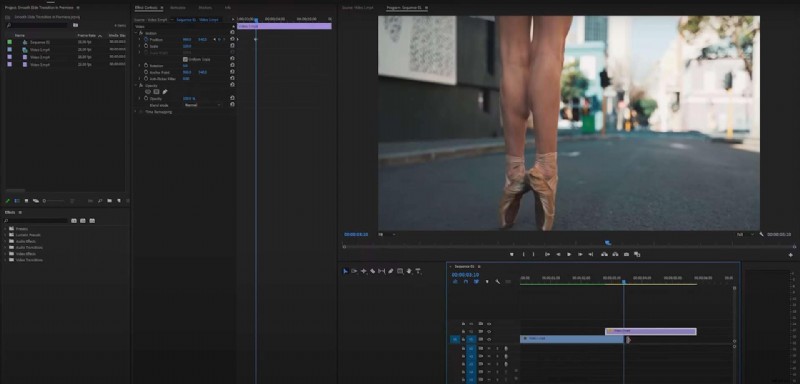
Step 1: Add videos to the timeline.
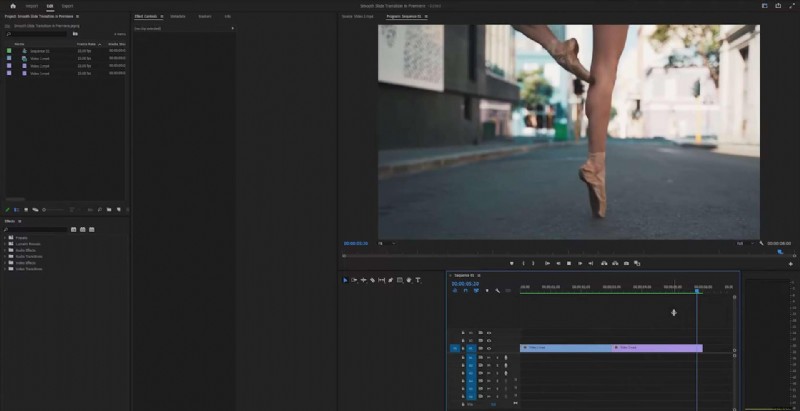
Step 2: Navigate to the middle by pressing Shift + Down Arrow Key.

Step 3: Go 5 frames to the left by holding Shift and pressing the Left Arrow Key once, and drag your second clip on top of the first one.
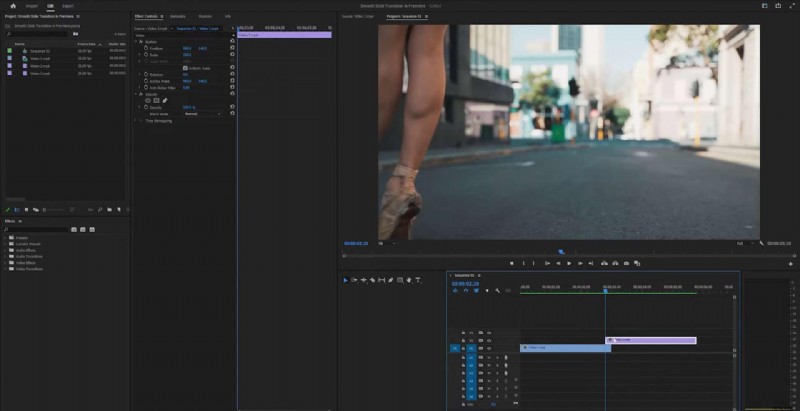
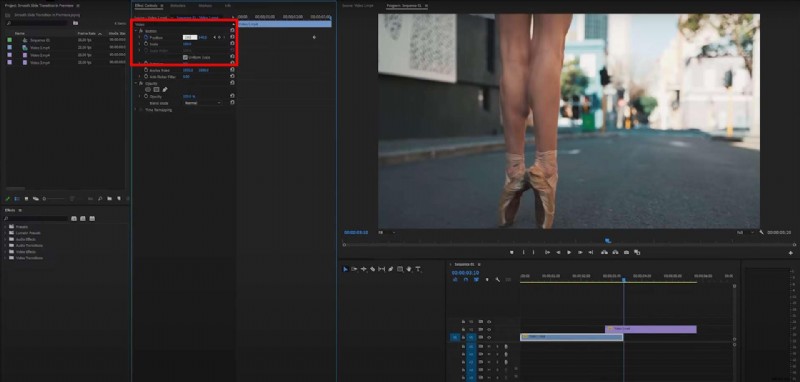
Step 4: Select your top video, navigate to the position settings, hit the keyframe, and set the position to .960 to the left, making your video go out of frame.

Step 5: Select your top video and go 15 frames to the right. You can do that by holding the Shift key and pressing the Right Arrow Key 3 times. Press Reset in the position menu.
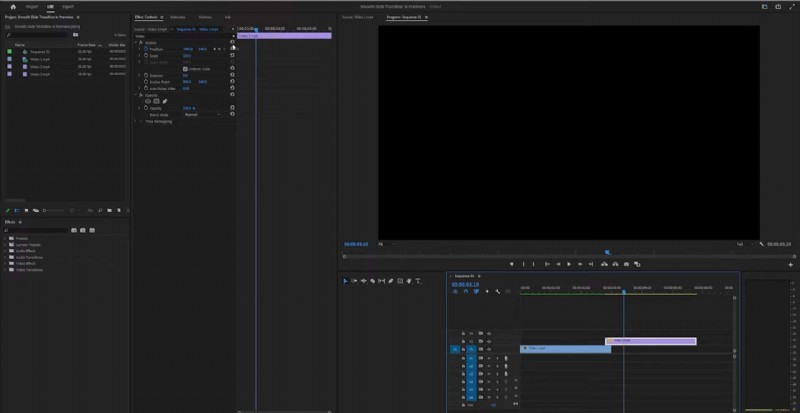
Step 6: Drag your bottom clip to the same 15-frame position you previously set.
Step 7: Select the second clip and get to the position where the two clips meet. Set the keyframe at the start of the clip and go 15 frames to the right. Set the position to be 1880 to the left.
Step 8: To make the transition even smoother, you can right-click on the starting keyframe and select Ease Out.

Step 9: Right-click on the ending keyframe and select Ease In. Repeat the same process for the other clip as well.
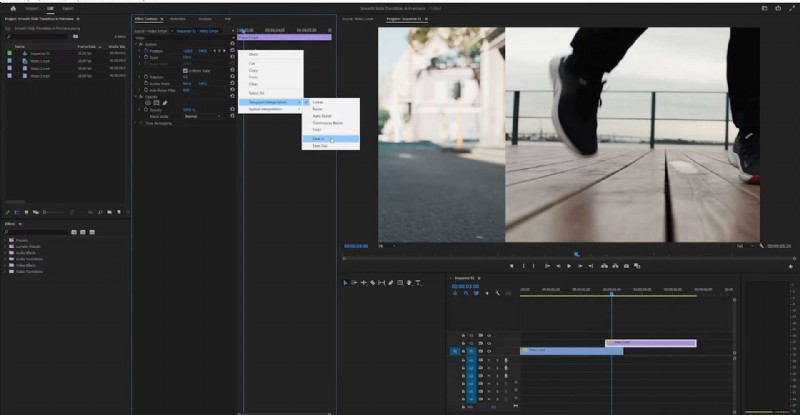
Step 10: Right-click on the project items and add an adjustment layer.
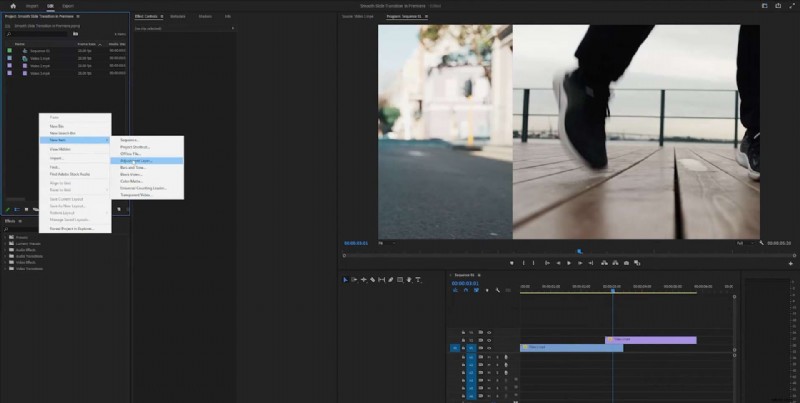
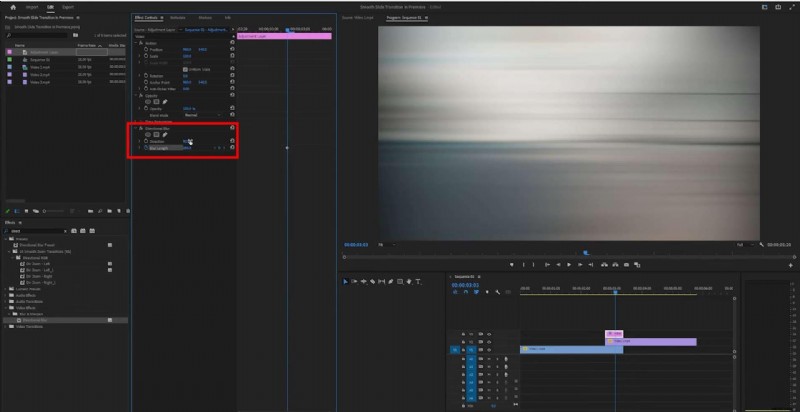
Step 11: Add it on top of your second clip, and cut it to the length of the transition, which is 15 frames in this example. Make sure the position is exactly where you’d like to make the transition. Select the adjustment layer and search for a directional blur in the menu on the left.
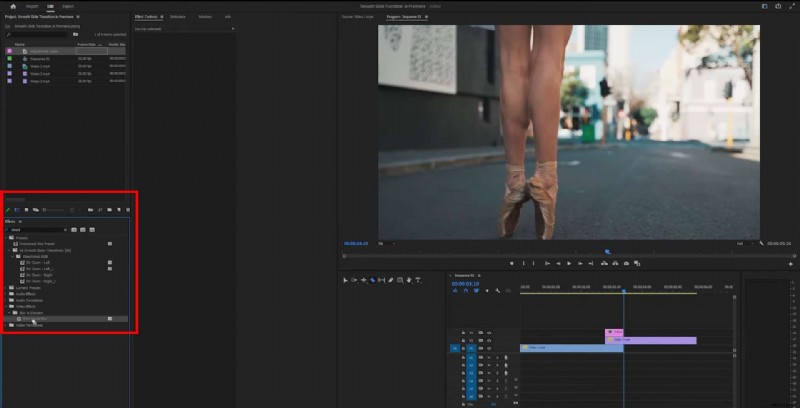
Step 12: To further customize your blur effect, you can adjust the length and direction. Simply click on the middle of your adjustment layer and navigate to the options on the left. In this example, we have adjusted the length to 250 and the direction to 90 degrees.
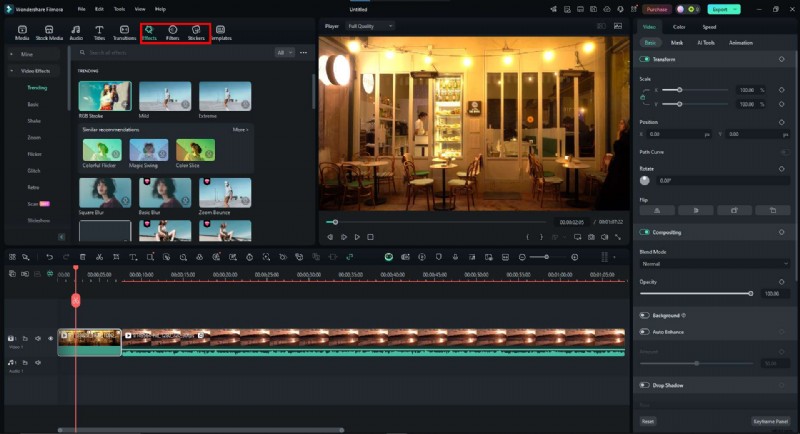
A Step-by-Step Guide to Add the Slide Transition Effect in Filmora
A simple and quick approach to producing seamless scene changes in your videos is adding a slide transition in Filmora. Filmora’s drag-and-drop interface lets you quickly apply and edit the effect in a few clicks. These step-by-step instructions will guide you through the process of adding this transition to your videos.
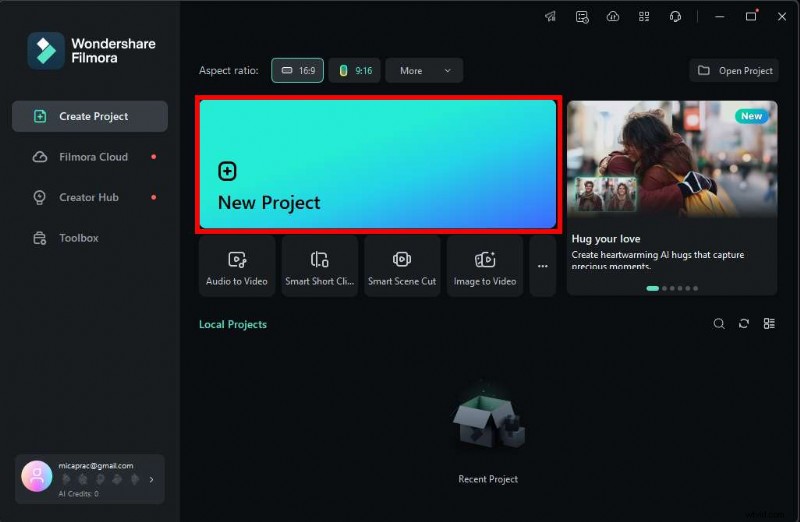
Step 1: Open up your Filmora and start a new project.
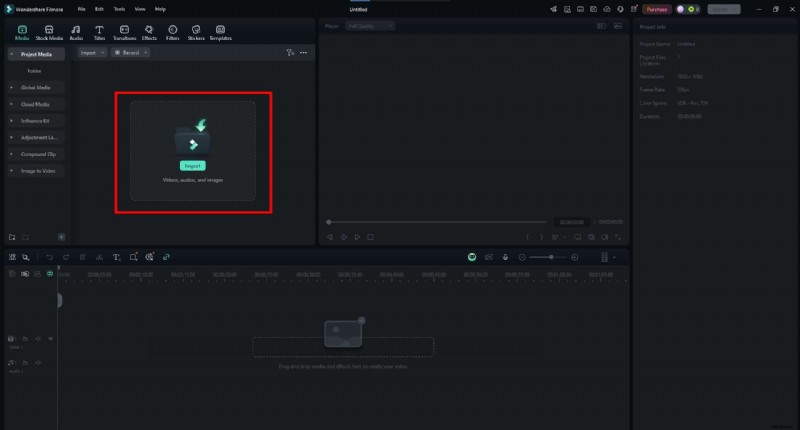
Step 2: Import the videos you’d like to edit.
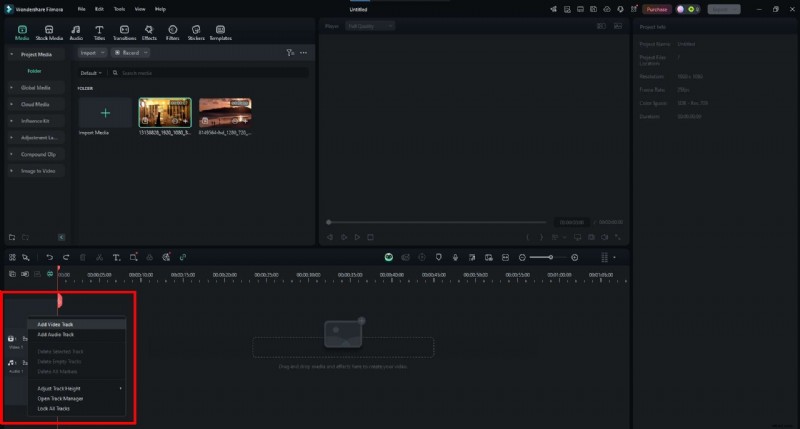
Step 3: Add an additional video track.
Step 4: Drag and drop your clips on top of one another. Make them overlap for the duration of the slide transition.

Step 5: Head over to the Transitions menu in the header and pick the one you’d like to use.
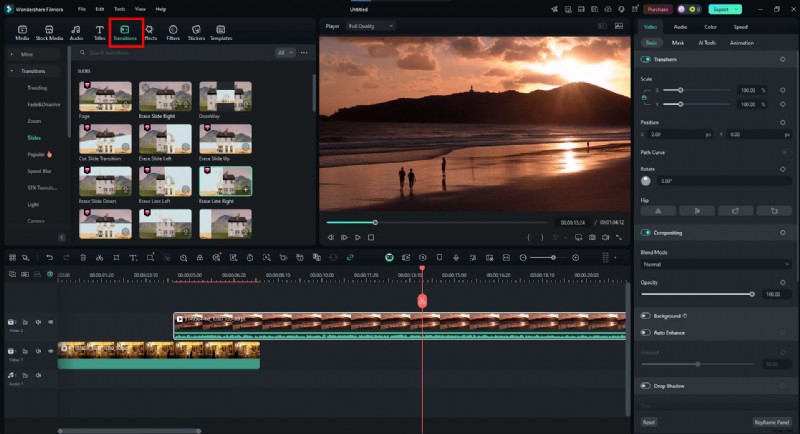
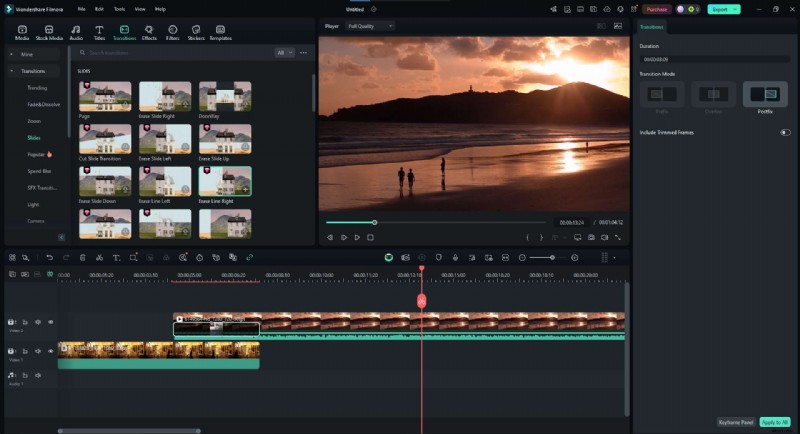
Step 6: Drag and drop it on your second video. You can adjust the length by clicking on the edge of the transition effect and dragging it.
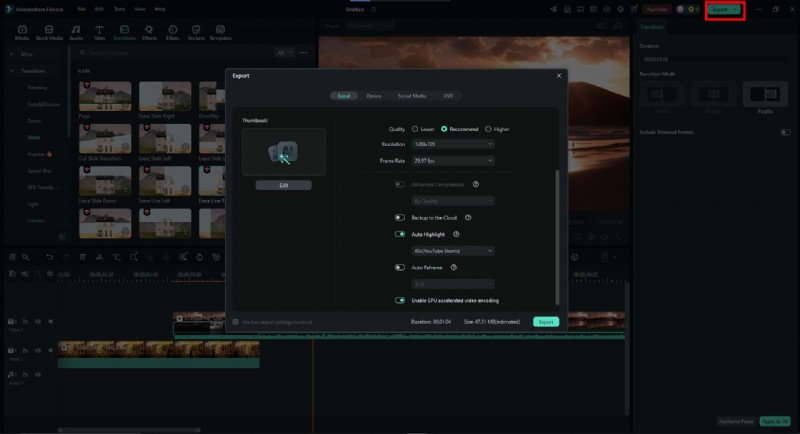
Step 7: If you’re satisfied with the results, export the video, and you’re all done!
Improve Your Video with Filmora’s Extensive Video Editing Tools Library
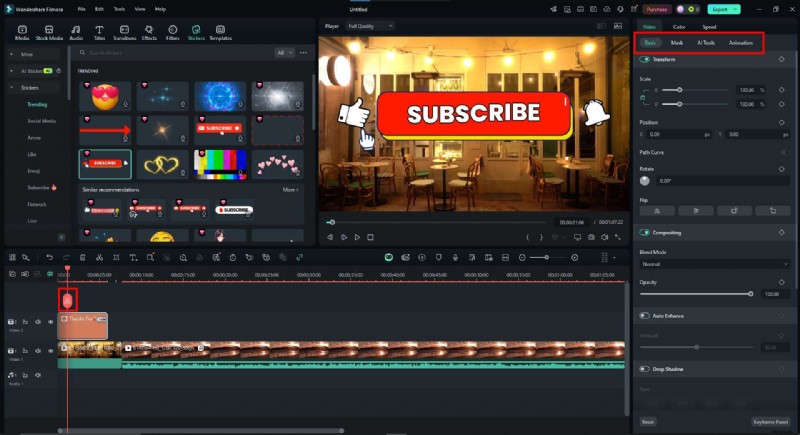
Filmora offers powerful tools designed to make your projects stand out. By adding custom effects, stickers, titles, or professional filters, you will make your videos more playful and engaging. Thanks to its user-friendly interface, you can easily do that in just a few clicks. Let’s go over the process.
Step 1: You will find options to add custom elements in the header.
Step 2: You can choose your favorite effect from a wide range of options. Simply download it, and it’s yours to use.

Step 3: Drag and drop the element where you want it. To further customize it, head over to the options menu on the right.
Try Some of Filmora’s AI Features While You’re At It
Filmora offers a wide range of AI-powered tools that work hand-in-hand with slide effects. By using AI Smart Cutout, AI Audio Denoise, or AI Auto Reframe, you can isolate subjects, remove background noise, or keep your focus centered.
These tools guarantee to improve your edits by working effortlessly with the sliding effect to provide a neat and aesthetically pleasing change between clips.
AI Smart Cutout
Filmora’s AI Smart Cutout doesn’t require a green screen. You can easily eliminate background or separate topics, and it works well with the slide transition by making elements stand out as they seamlessly move between scenes. It lets you isolate a person from one clip and have them slide into the next.
AI Audio Denoise
Background noise can cause a transition to lose its smoothness, reducing the polished feel between segments. As your video slides from one clip to the next, AI Audio Denoise intelligently finds and eliminates undesired noises, ensuring consistent audio. Combining this function with the slide transition will provide a more polished finish.
AI Auto Reframe
AI Auto Reframe ensures that key elements stay centered and correctly framed if your videos have different aspect ratios. Combined with the slide transition, this feature will keep your main subject centered while the transition happens. It’s used to prevent misplaced subjects as the clips collide.
Conclusion
Although Premier Pro provides strong tools for designing unique transitions, learning its features might take some time and work. Filmora offers an easy-to-use substitute if you’re new to video editing or just looking for a quicker approach to get polished, professional-looking slide transitions.
Its drag-and-drop interface and AI-powered tools let you create powerful effects in just a few clicks without any previous editing knowledge required.
Filmora is available on Windows, Mac, Android, and iOS, making it accessible across all your devices.