If you’re interested in learning to produce and edit video but feel overwhelmed by the learning curve of mega programs like Adobe Premier Pro, ACDSee Video Studio 3 might be just what you’re looking for.
The need for video seems to be growing by leaps and bounds, whether it’s video added to a portrait session, behind-the-scenes videos, tutorials, reviews, and the list goes on. Not everyone who needs to produce a video will need all the bells and whistles of a large, robust program, however, and many photographers don’t have the extra time or money to devote to learning new software. ACDSee could be the perfect solution for creators in this situation, and at a price point that makes getting into video more than affordable.
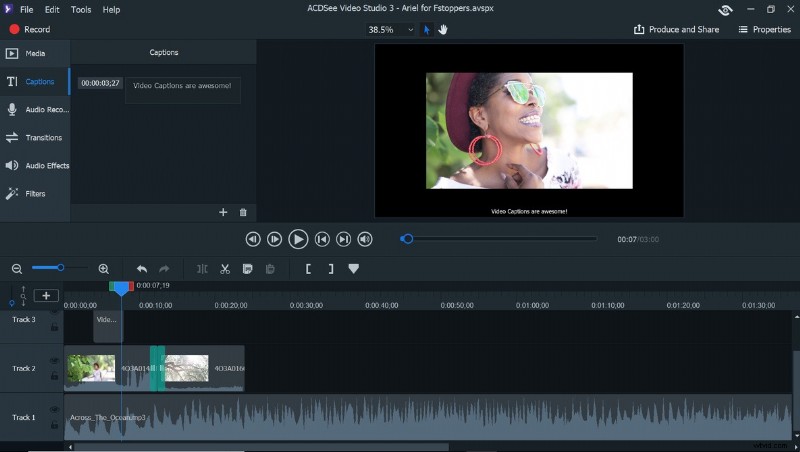
ACDSee Video Studio 3 has a clean, minimalistic interface with no confusing menus or icons; every extraneous option has been paired away to leave only the necessities: media, captions, audio recorder, transitions, audio effects, and filters. This makes it easy to navigate between options as they can all be seen in a display window next to the tool panel. A single click brings up each library in the display window, which can then be chosen by scrolling and selecting the media or effect. Having no extra menus to navigate or tool bars to search through cuts editing time down a surprising amount, which can be a huge plus for people creating content on a deadline.
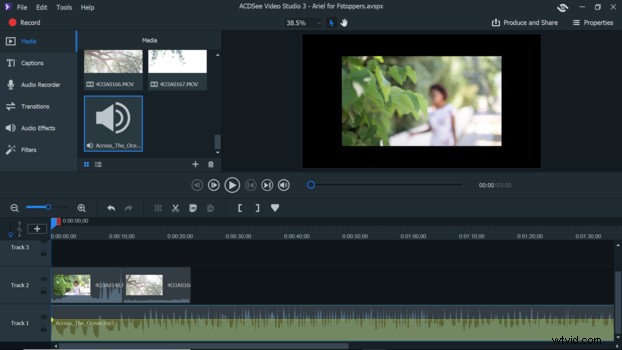
Uploading media is simple because Video Studio 3 supports all the most popular file formats; JPG, JPEG, GIF, BMP, and PNG for stills, WMA, MP3, AAC, WAV, AC3, OGG, and M4A for audio, and AVI, MP4, WMV, FLV, MOV, TS, MTS, M2TS, ASF, M4V, MPG, or MPEG for video. Clips, stills, or audio can then be arranged by dragging them from the Media window and dropping them into the timeline, which takes up the bottom third of the window and, like the rest of the program, is arranged for ease and simplicity.
Transitions, audio effects, and filters are just as easy to apply with a simple drag and drop. The app will highlight the areas to which a transition can be applied, and then the transition can be dragged back or forth to lengthen or shorten the effect. Tracks can even be locked to avoid accidental edits.

Rather than having a separate menu for dealing with audio, all can be done directly from the timeline with a right-click that brings up options for editing audio inside the clip, or separately from it.
For those creators looking to add screen capture to a video for a tutorial or behind the scenes, there is a record button on the top left that brings up a separate window — arranged with the same simplicity as the rest of the program — to dial in options like which audio device to use and what dimensions the recording should be, allowing a screen capture recording to begin in no time flat.

With a timeline that includes multiple layered tracks, any supported file can be added and then blended to create a visually dynamic video. When finished, the final product can be rendered in resolutions up to 4K and exported as MP4, MOV, M4V, WebM, or MP3.
This short video, which was created in less than 20 minutes, is the result of my first experience with the program. I wanted the cuts to match the timing of the music, which was easy since I could see the beats on the audio track just beneath the video clips on the timeline, and to use a few of the features that would make the video flow nicely, such as layering a couple clips, and using simple transitions where the cuts would have been more jarring. The speed and ease with which I was able to get this video out makes me particularly inclined to use it for things like behind the scenes of a shoot that I want to release on the fly.
While Video Studio 3 lacks the advanced features of other editing programs, such as the ability to do complex color grading or use slow motion, what the user gains in their place is a streamlined workflow that requires almost no learning curve and produces clean results quickly with no sacrifice in image quality, as video can be recorded and rendered in 4K. One of the particularly handy features of Video Studio 3 is the ability to produce and share a finished product directly to YouTube — which gets content to viewers fast — so anyone with a channel need only sign into their account and boom, the video uploads directly from the program complete with keywording options.
As a personal note, I’ve found that working with programs that are restrictive in their capabilities forces me to be more creative and technically sound because I can’t rely on the program to make up for my shortcomings as a photographer or videographer. I must get things right and be creative while I work so that the content I bring into the program is top notch. Not having features like warp stabilize to rely on means that I can’t get lazy with my technique. I can’t “fix it in post” so I’ve got to get it right the first time. When I work this way, I find that not only do I produce better results, but when I do need to use a more robust program, I have less editing to do and the final result is of much higher quality.
Considering how affordable Video Studio 3 is, how intuitive and simple it is to use, and how quickly content can be produced and released, it makes a great introduction for anyone to begin making videos and honing their storytelling skills.
Will it replace programs like Adobe Premiere? No, but then it’s not meant to. Video Studio 3 fills exactly that niche of ease of use that is perfect for those just getting started and those looking for a simple program that helps them produce great content quickly.
Combining ease of use, simple features, high-quality rendering, speed, and affordability, ACDSee makes learning and editing video not only more accessible, but easier and more profitable.