
Colorists and video production folks are already familiar with LUTs (Lookup Table) and likely already use them for color grading videos. This is the next level for working with LUTs.
What is 3D LUT Creator?
3D LUT Creator is a very powerful and advanced piece of software that allows creation of LUTs and it has easy integration with Photoshop for still work as well. One single click to load your newly created 3D LUT into Photoshop with a layer for masking if need be.
The Interface
This is definitely a program for advanced users, it’s very powerful and contains many different tools to do different things with your color grading. It’s worth noting that the program is lightning fast on PC and runs a bit laggy on Mac, usable but definitely slower. It seems it was possibly designed on PC and ported over.
Where to Start
The Program has a working image and reference image which can be displayed side by side, top/bottom, or toggle back and forth. Keyboard shortcuts are displayed in the menu.
There are several ways to bring your source imagery (photo, or still from clip) into 3D LUT Creator.
Fortunately my favorite ways to interact with other programs also work. For instance, I love dragging a photo from Finder straight into PS; this works in 3D LUT Creator as well. There’s also an Image from PS button, which does exactly what it states, loads in the active document from PS in. Also, pasting from clipboard works, this is especially cool if say, you are watching a video on YouTube, or looking at a picture somewhere that you like the grading from, you can use your screenshot to clipboard shortcut (Mac) and go to 3D LUT Creator and press Command+V and paste right in. You can also swap work and reference images. There is of course, the menus but who uses menus in programs these days, once you learn the shortcuts.
Working With Your Color
Now that your image/content is loaded into the program, you can begin to work with your color. Some are similar tools to Photoshop, or other programs and some are completely unique to 3D LUT Creator.
The primary coloring tabs are:
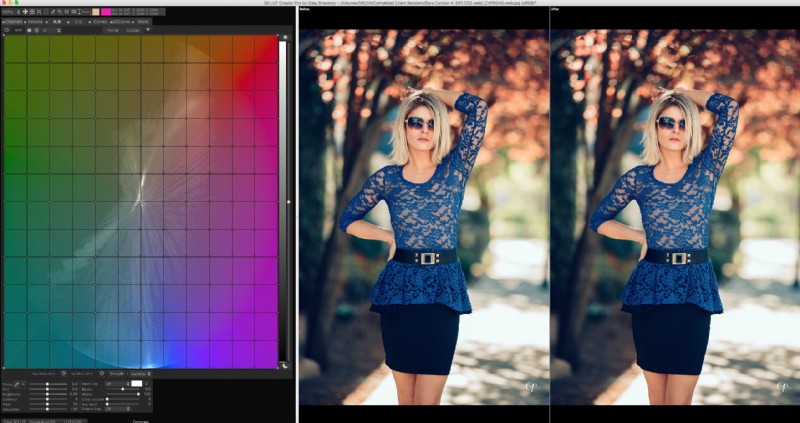
Channels - For working with Channels, sort of like Channel Mixer in Photoshop.
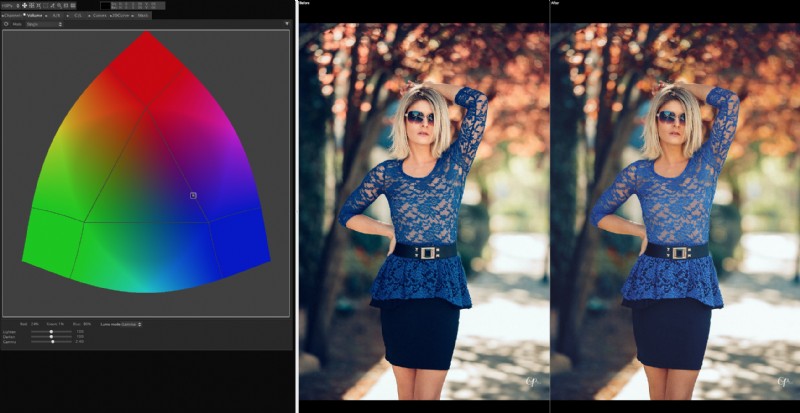
Volume - Allows you to control brightness depending on the color. Here’s an example of Volume with the control point moved toward blue, and as shown in the before/after on the right, brightens the blue, and generally darkens other colors. This is one of those tools that you can just play around with and see what it does pretty clearly.
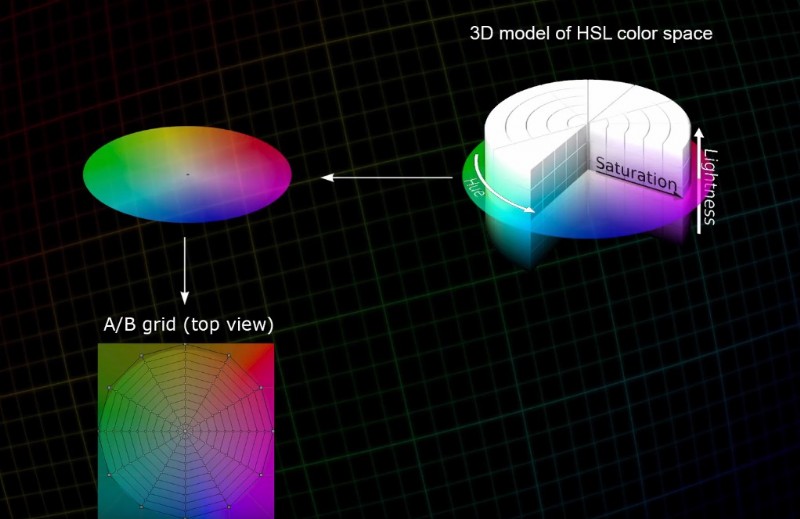
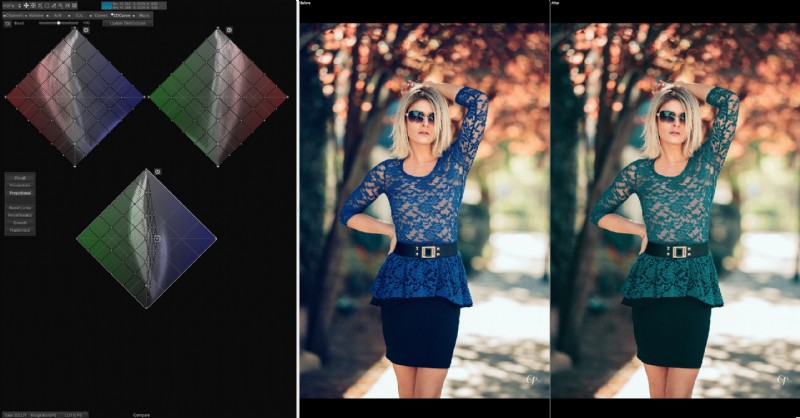
The A/B Grid - This is one of the most useful tools within the program, as it allows you to change hue and saturation of an object or color in your scene without affecting other colors. The grid comes in circular or square and for this example, we will be using the circular grid. The wheel of color here shows control points all around, closer to the center is less saturated and the outer edges are more saturated. So if you wanted to saturate blues only, you could grab the blue point and drag it farther out.
With the A/B Grid it’s very easy to condense and limit colors within your scene as well, as you can take colors and drag the point to each other. Example, say you had a sky that had a deep rich blue on one side, and more purple on the other side, you could easily take the purple points on the grid and drag the to the blue point, and even out the color. Then you can drag both those points together, and move them around the grid to achieve the specific hue you wish.
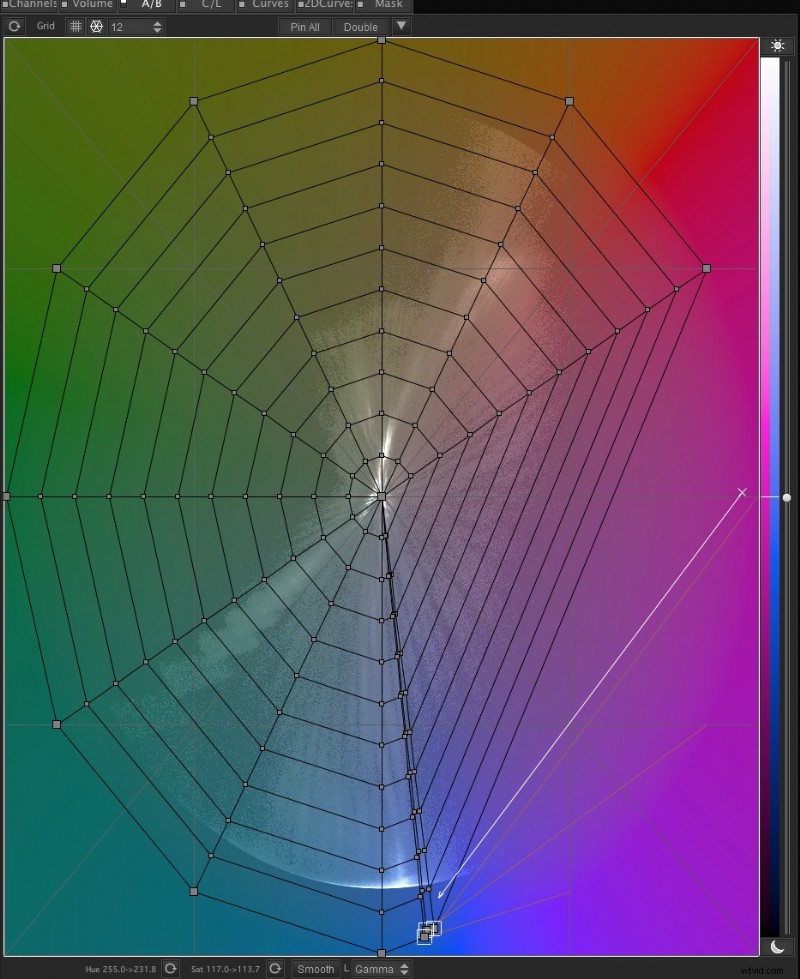
Here’s a visual explanation of the A/B Grid, to help you understand how it works… taken from the 3D LUT Creator very helpful video found here:
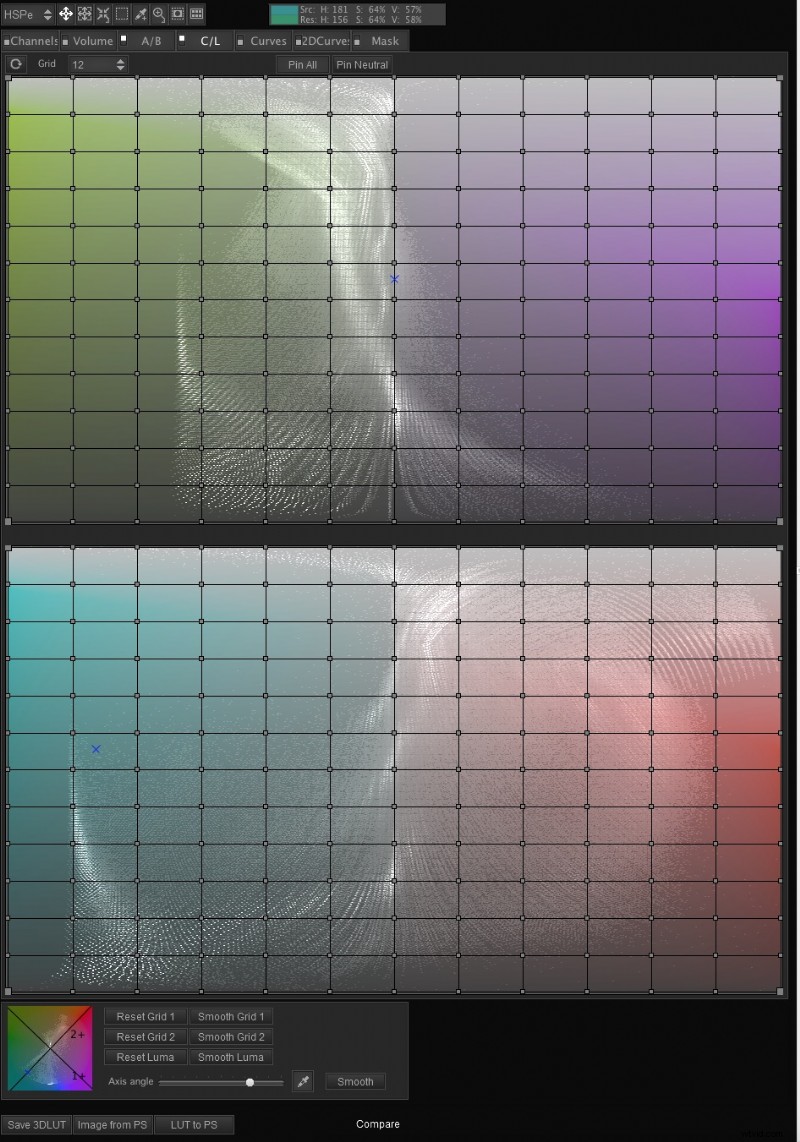
C/L Grid - This allows specific control over contrast within a specific color range, based on the grid. You can rotate the axis angle for specific hues to work with. This is a very unique and powerful tool.
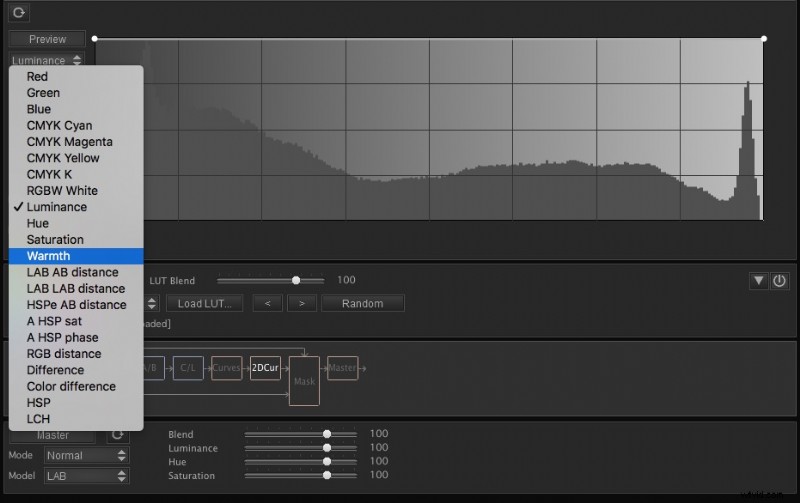
Curves - This is similar to Photoshop but far more powerful, as there are many different ways to interact with curves, such as controlling the saturation based on luminance or controlling the saturation based on existing saturation, or controlling the luminance based on current saturation. This is an incredibly powerful new way of working with curves. You can also do very precise color adjustments based on the numbers by using color swatches and many different color modes, I generally use HSV mode (think of it as hue, sat, luminance) I’m thinking the V means Volume, which essentially is the same thing, based on the Volume tab described earlier.
The program itself has many different color models: LXY, MXY, MABe, MXYe, SXY, YUV, CMYK and RGBW, which they explain here:
2D Curves - Grid system for working with color and luminance, shown here:
And of course, Masking - This is where the program gets really interesting you can obviously create masks based on many different settings, such as warmth, hue, and much more, shown here:
There are many powerful ways of masking what your new LUT is affecting in your scene. Within the mask tab as well, you can "stack" LUT files, by loading an external LUT and then working with the program over the top of it then saving a new LUT, that's a combination. Sort of a pseudo-layered LUT effect, the possibilities are truly endless.
How To Use This Program
The general workflow I see would be to take your video, and screencap a scene that you would like to color grade, then paste that image into 3D LUT Creator, do your color grade and then save the file as a LUT. Which you can then import via Premiere, After Effects, or whatever you may be working with.
You could create a specific LUT for each project you are working with, or you could create a general look that you like such as a certain tint to blue skies, or a certain tint to blacks, etc. Save the LUT to import over your footage in the future, quickly and easily.
It can also, as mentioned be used with Photoshop for working with still images as well. For which you can do a sort of “roundtrip” by “Image from PS” and “LUT to PS” buttons.
Who Is This Program For?
Primarily video professionals and editors. Photographers may use it as well for still images.
What I Liked
The flexibility and control of all things color is unmatched with this powerful program. I have only barely scratched the surface of it's incredible power in this review.
What Could Be Improved
Mac performance would certainly be the number one thing that could definitely use improvement. I am a workflow and efficiency nut, so every little performance tweak is a huge deal to me.
Conclusion
The program is quite complex, and I think that is perfectly acceptable considering it’s not a beginner program. It is designed for advanced colorists and folks who wish to achieve total control over your color.
I use this for all my complex color work. Using Premiere and After Effects, I can make my drone footage super dramatic and graded, with ease. And working with my portraits, I am able to achieve specific toning that would be much more difficult to try and achieve in Photoshop.
There are three levels of pricing, at $99, $199, and $249
To learn more or purchase, visit the official website.