Working with keyframes in Adobe Premiere Pro is quite easy once you learn a few of the basics. And thankfully, learning the basics takes no time at all.
Knowing how to add and manipulate keyframes will add a new collection of tools to your video editing toolbox. It’s an important skillset to have, and will help you stay competitive in a rapidly changing industry.
Overview
In this Premiere Pro editing tutorial, I’m going to show you how keyframes can bring life to your project and why you would want to use them.
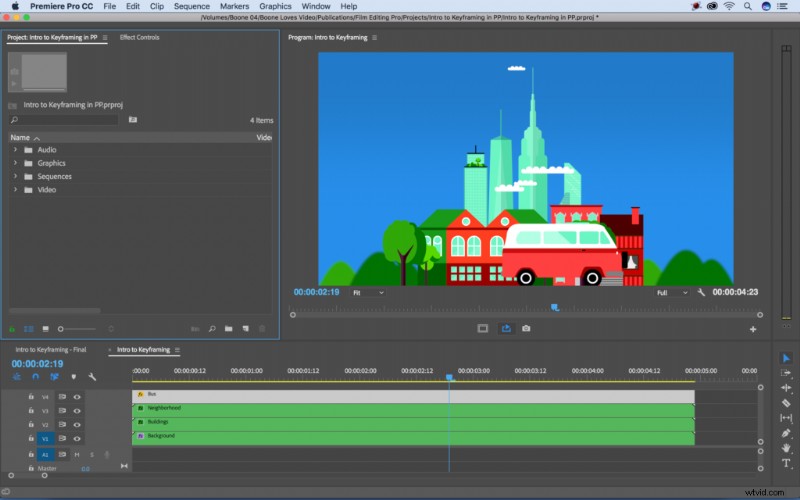
In this particular project I’ll be working with four still images inside of Premiere Pro—a bus, a neighborhood, a city, and a background scene. I want to create the illusion that the bus is driving down the street while the neighborhood and city pass by in the background. Let’s see how we can achieve this in Premiere Pro with some simple keyframing.

First of All, What is a Keyframe?
Keyframes allow you to bring an attribute to life over a period of time. Think of when you zoom in on an object, or transition with a fade up from black. These are all things you can accomplish with keyframes. Essentially, you are creating an animation when you adjust these attributes. And to create an animation, you generally need two or more keyframes—one to start the animation, and one to end it.

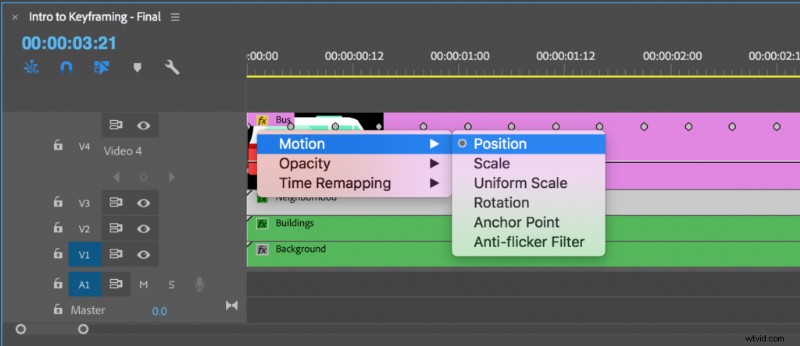
Let’s take my bus image as an example. To bring the bus to life and give it the illusion of movement, I need to animate the Position property. First, I need to decide the length of time my bus will be moving and for how long. Then I can simply add two Position keyframes, one at the beginning of this time and one at the end. There are two places in Adobe Premiere Pro where I can add keyframes—the Effect Controls panel and the Timeline. Let’s take a closer look at each.
Working with Keyframes
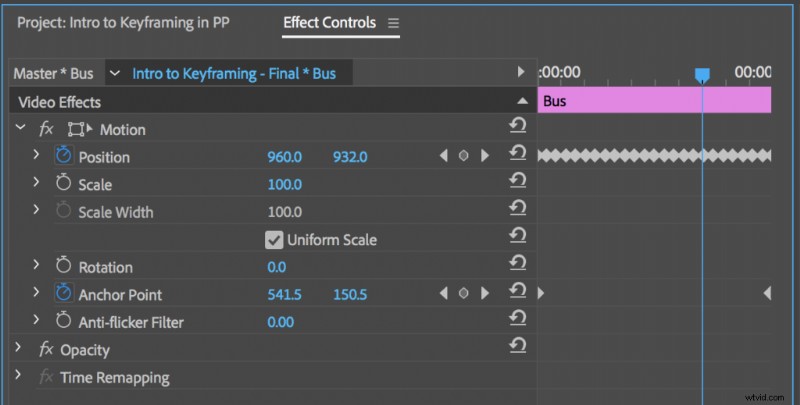
Effect Controls Panel
To access this panel, go to Window > Effect Controls. Here you can view various attributes of your asset, including Position, Rotation, and Opacity information. You can also see properties of any specific Effects you’ve added to your layer. Just to the right of the properties section is an area where you can view and manipulate keyframes via a timeline layout.

Some attributes are next to a Stopwatch icon. This is the Toggle Animation button, and activating it allows you to add keyframes to that particular attribute. Once you have keyframes applied, you can navigate between them with the arrow buttons. Add and remove keyframes by pressing the button between the navigation arrows.
The Timeline
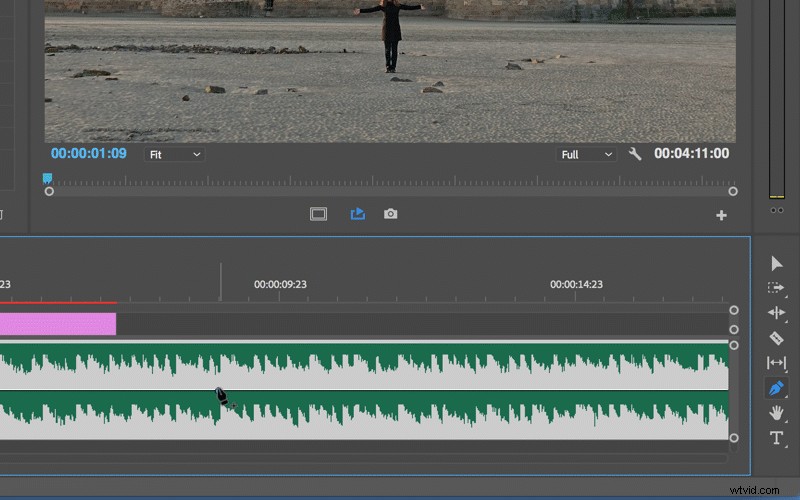
Another way to add, view, and manipulate keyframes is via the Timeline panel. Double click in the video header to expand a video track. Once expanded you’ll notice three buttons to aid you with keyframing—Go to Previous Keyframe, Add-Remove Keyframe, and Go to Next Keyframe. You’ll also notice a white horizontal line spanning the length of your clip. This is how you view keyframes in the Timeline panel. To change the attribute you’re viewing, Ctrl+click on the clip’s FX badge.
Make the Bus Drive
Now that we know how to work with keyframes in Adobe Premiere Pro, let’s bring this bus scene to life with as few keyframes as possible. My sequence is five seconds in length, and I need movement throughout all of those five seconds. I want the bus to drive the entire time, with the neighborhood and city slowly moving by in the background.
To make this work I need to layer my clips appropriately. I’ll put the bus layer on the top, the neighborhood as the second layer, the city just under that, and finally the background at the bottom. I’m layering them in this order to help create the illusion of depth. Now let’s animate these layers.
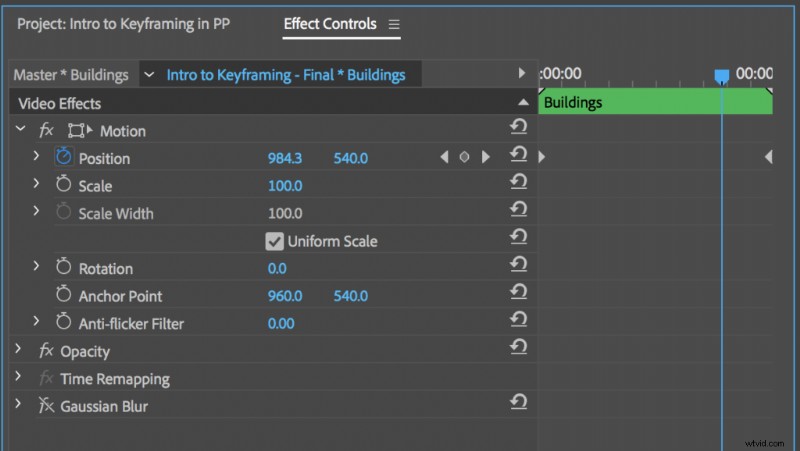
First, I’ll animate the city in the background. I can bring the city layer to life with two simple Position keyframes—one at the first frame and one at the last. I’ll have the city layer positioned just to the right of center for the first keyframe, and just to the left for the last. Once the keyframes are in place, my city layer has a nice slow movement from right to left.
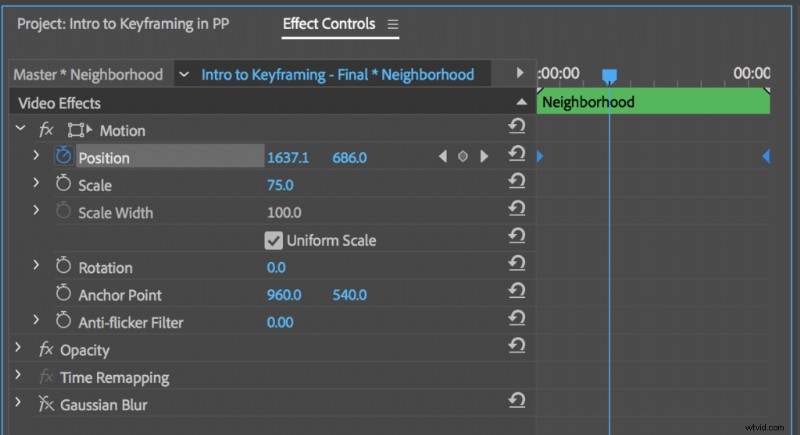
I want the neighborhood layer to appear much closer, as if the bus is passing right by it. To achieve this I’ll again add two basic Position keyframes—one at the first frame and one at the last. Only this time I’ll have the layer move all the way through the screen. The neighborhood will start off screen and end off screen.
For the last step I need to give my bus some movement. I want it to look like it’s motoring along, bobbing down the highway. To do this I’ll add a Position keyframe every five frames, moving the bus slightly up and down with each keyframe. I can speed up the animation process by copying and pasting the keyframes in the Effect Controls panel. Finally, I’ll add two Position keyframes to the bus’s Anchor Point, making it slowly moving forward as it bobs.
Voilà! Our animation is complete. Now our bus slightly bobs up and down, with the neighborhood and city passing by in the background. The movement of each layer works together to create the illusion that there’s a foreground, middleground, and background.

Now that you know how to work with keyframes, let’s take a look at a few additional ways to use them.
When to Use Keyframes
Once you learn how to create and manipulate keyframes in Premiere Pro, there are a number of different ways to use them. Create dynamic motion graphics, including main titles and lower third elements.

Simulate camera movements such as pans, zooms, and handheld shake and bring still images to life with Position and Scale keyframes.

And sweeten your audio with Volume and Pan attributes.
And these are just a few examples of the possibilities.
Be sure to check out our Premiere Pro quickstart course to really learn how to edit in Adobe Premiere Pro!