Doh! Your boom is in the shot. Here’s how to make it (and other unwanted objects) go away in Adobe Premiere and DaVinci Resolve.
Despite everyone’s best intentions, the boom pole occasionally slips into even the most well-prepared camera crew’s footage. The reason is simple: The boom operator strives to keep the mic as close to the actor as possible — just out of shot — and the camera operator sometimes needs to adjust the frame on the fly.
This results in a boom mic creeping into the top of your footage. And, if the shot is to be used in the final film, it’ll have to be removed somehow.
If you’re shooting in a taller aspect ratio than you plan to master your project in, the black bars on the top and bottom of your footage will hopefully cover up the mic. If not, you’ll need to remove the mic digitally. Let’s look at the quick and easy steps for using Adobe Premiere and DaVinci Resolve to get rid of unwanted objects.
How to Remove a Boom Mic in Premiere Pro
Removing any object has two distinct stages. First, you’ll need to trace and track your object through the shot. Next, you’ll need to fill the hole it leaves.

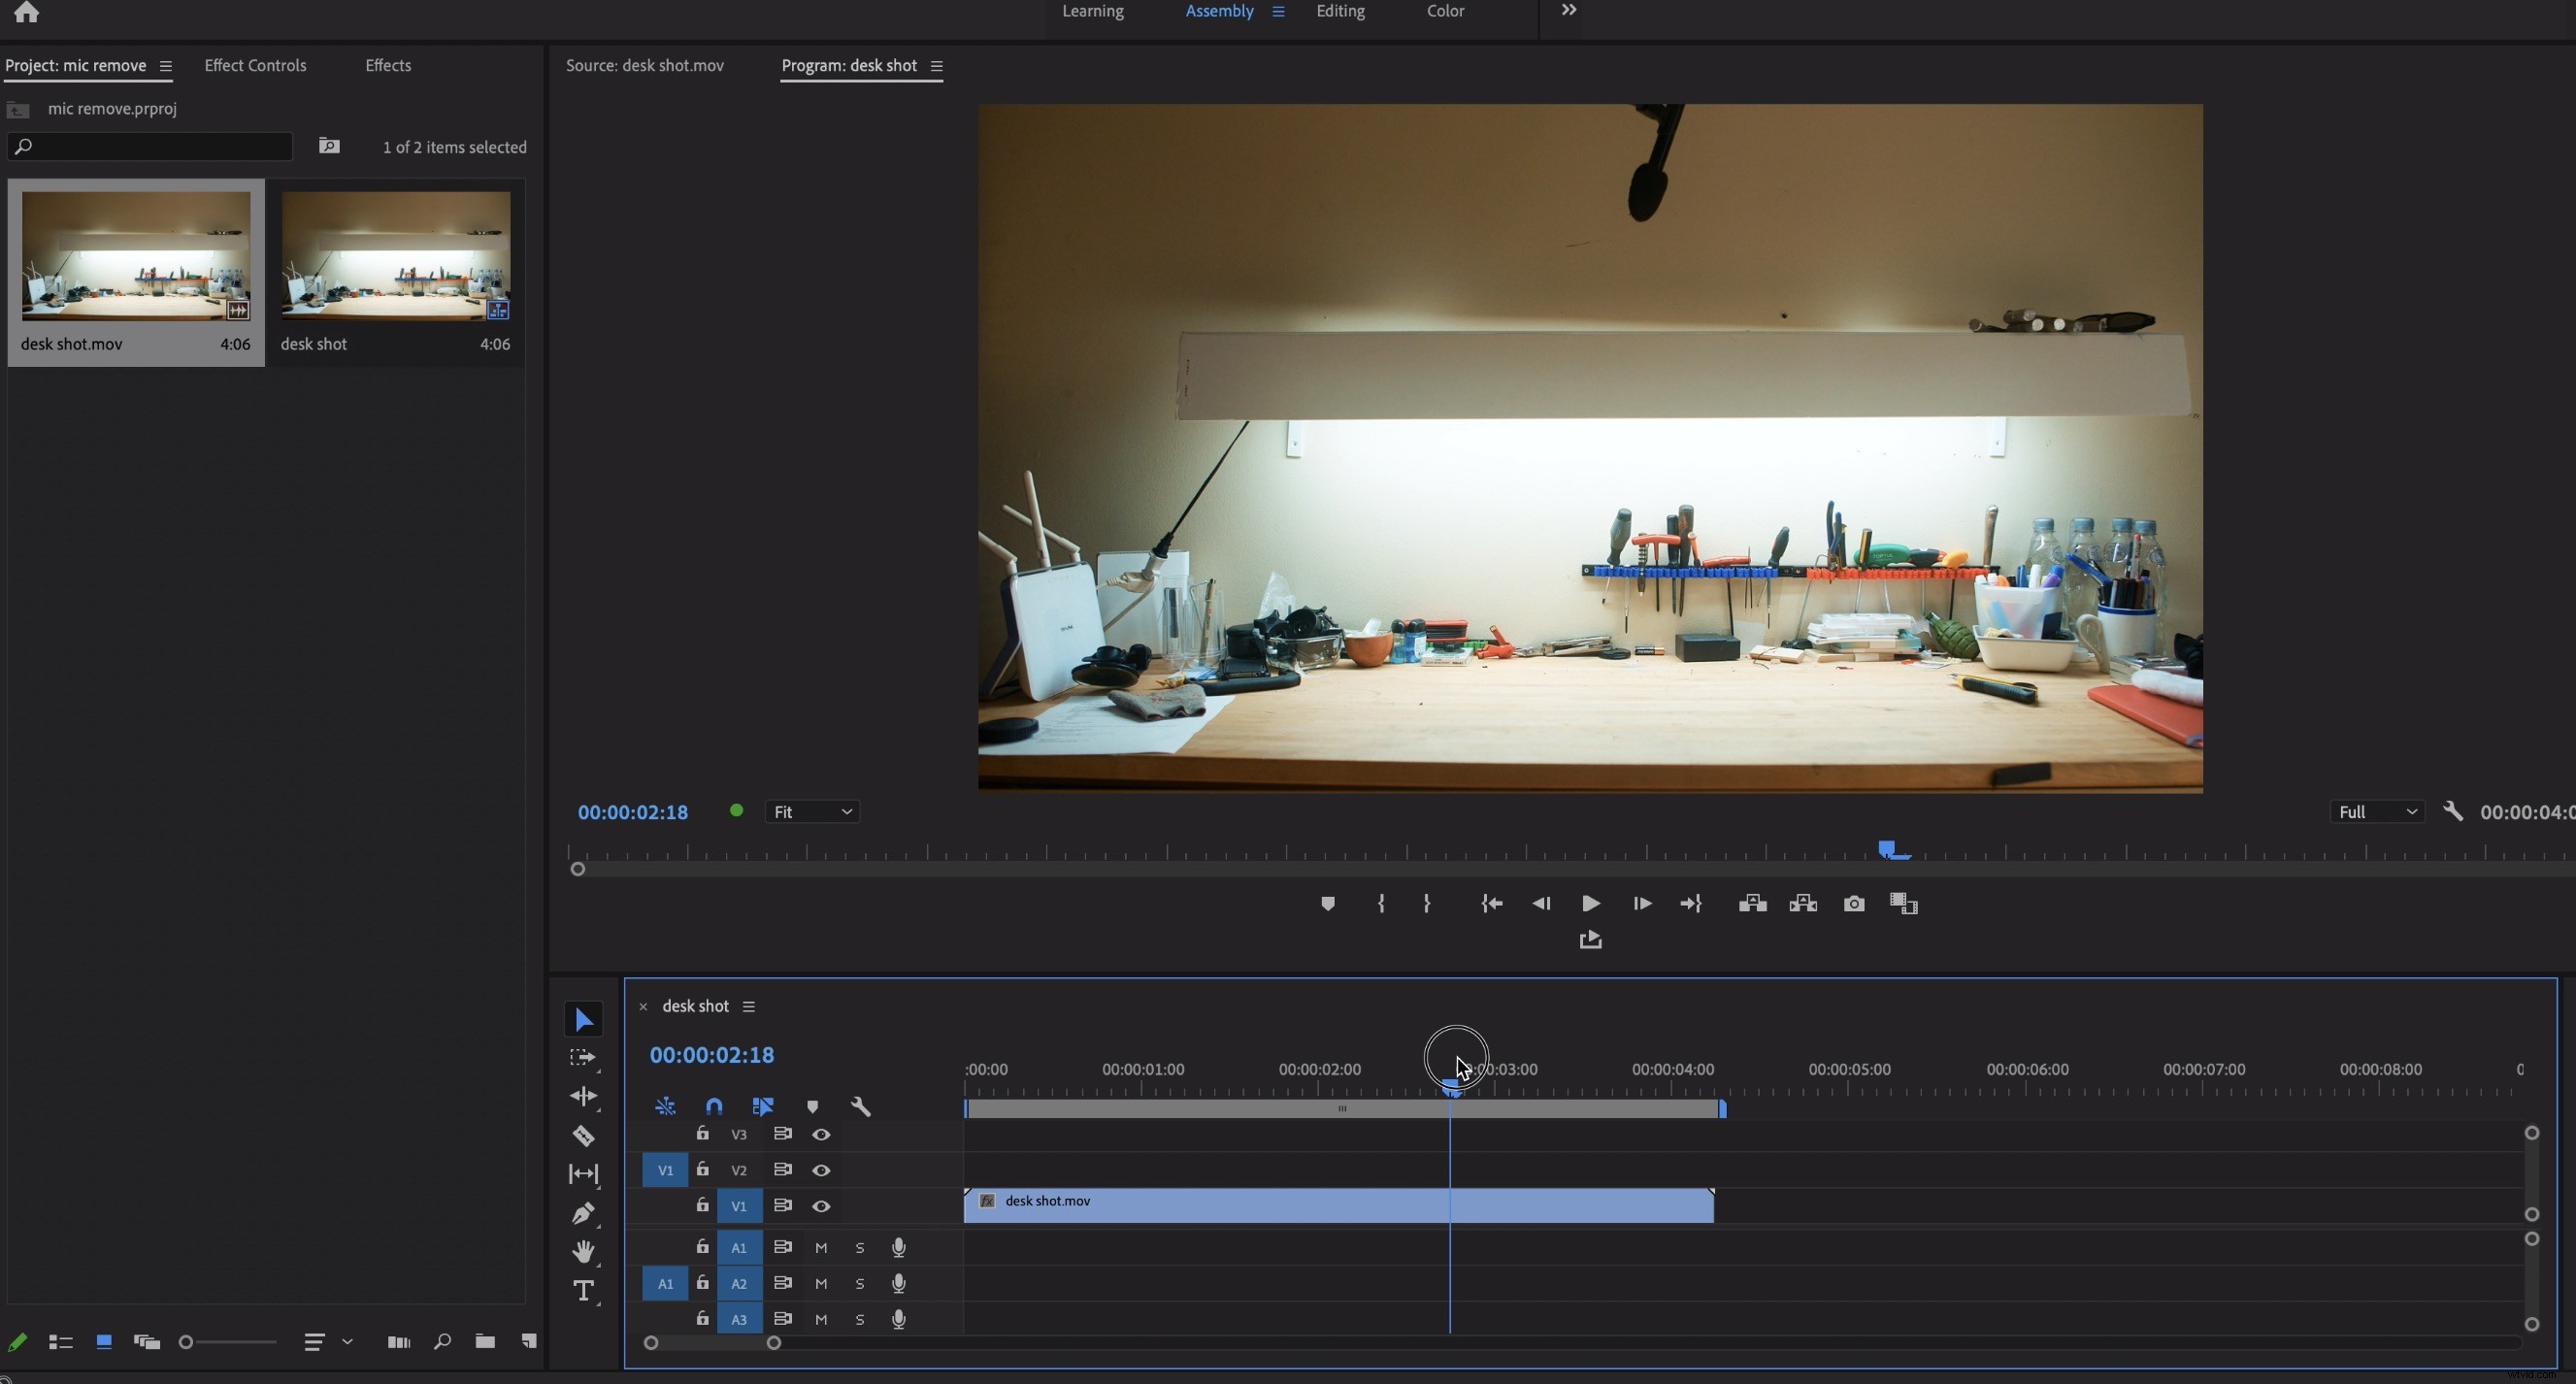
Find a frame where the mic is most in the shot. In the Effect Controls tab, select the pen tool and draw a path around the mic.
Use the play forward and back buttons right below the mask name to track the path through the shot until the object disappears. You’ll need to add feathering to the mask so that the edges are less obvious.
Now, move the layer you’re working with V2, one layer up. Turn off the mask and find a frame of the shot where the mic isn’t visible.
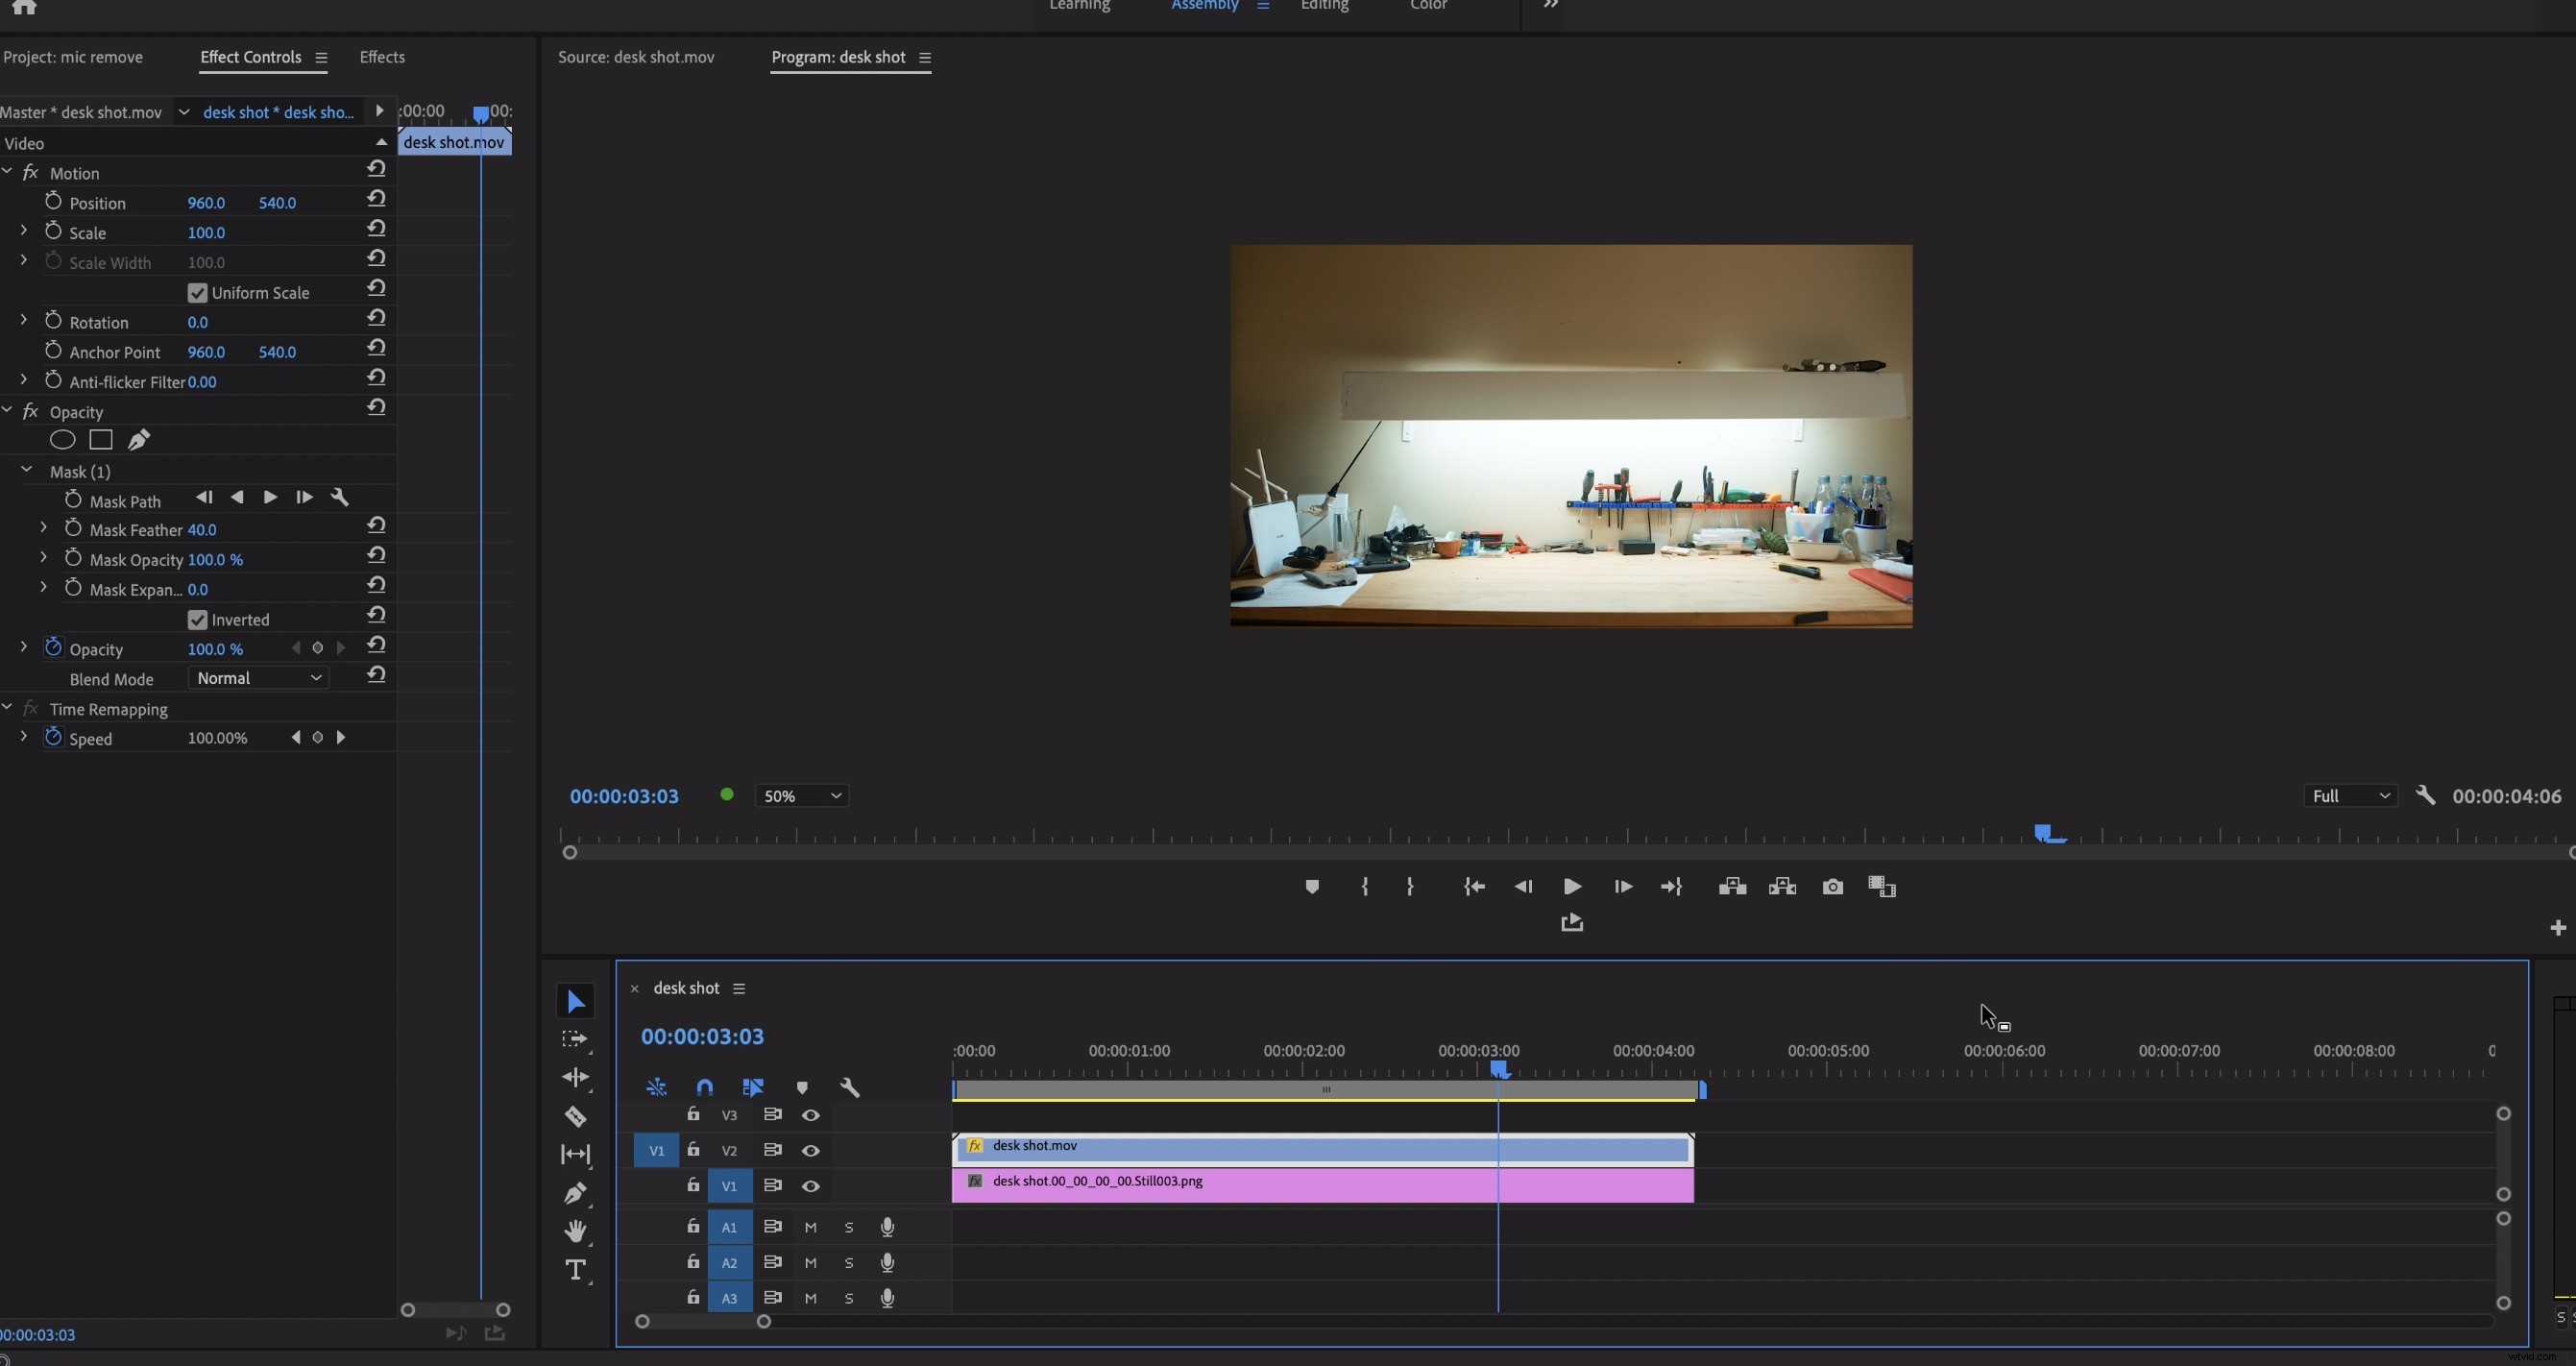
Hit Shift+E to export a frame of that clean shot (after making sure that Import into Project is selected). Remember, it’s best to use PNG rather than JPEG to keep colors consistent.
Drop your still frame onto the layer below your masked layer, and turn the mask back on. The still frame acts as a clean plate, and the mic should now be invisible.
How to Remove a Boom Mic in DaVinci Resolve
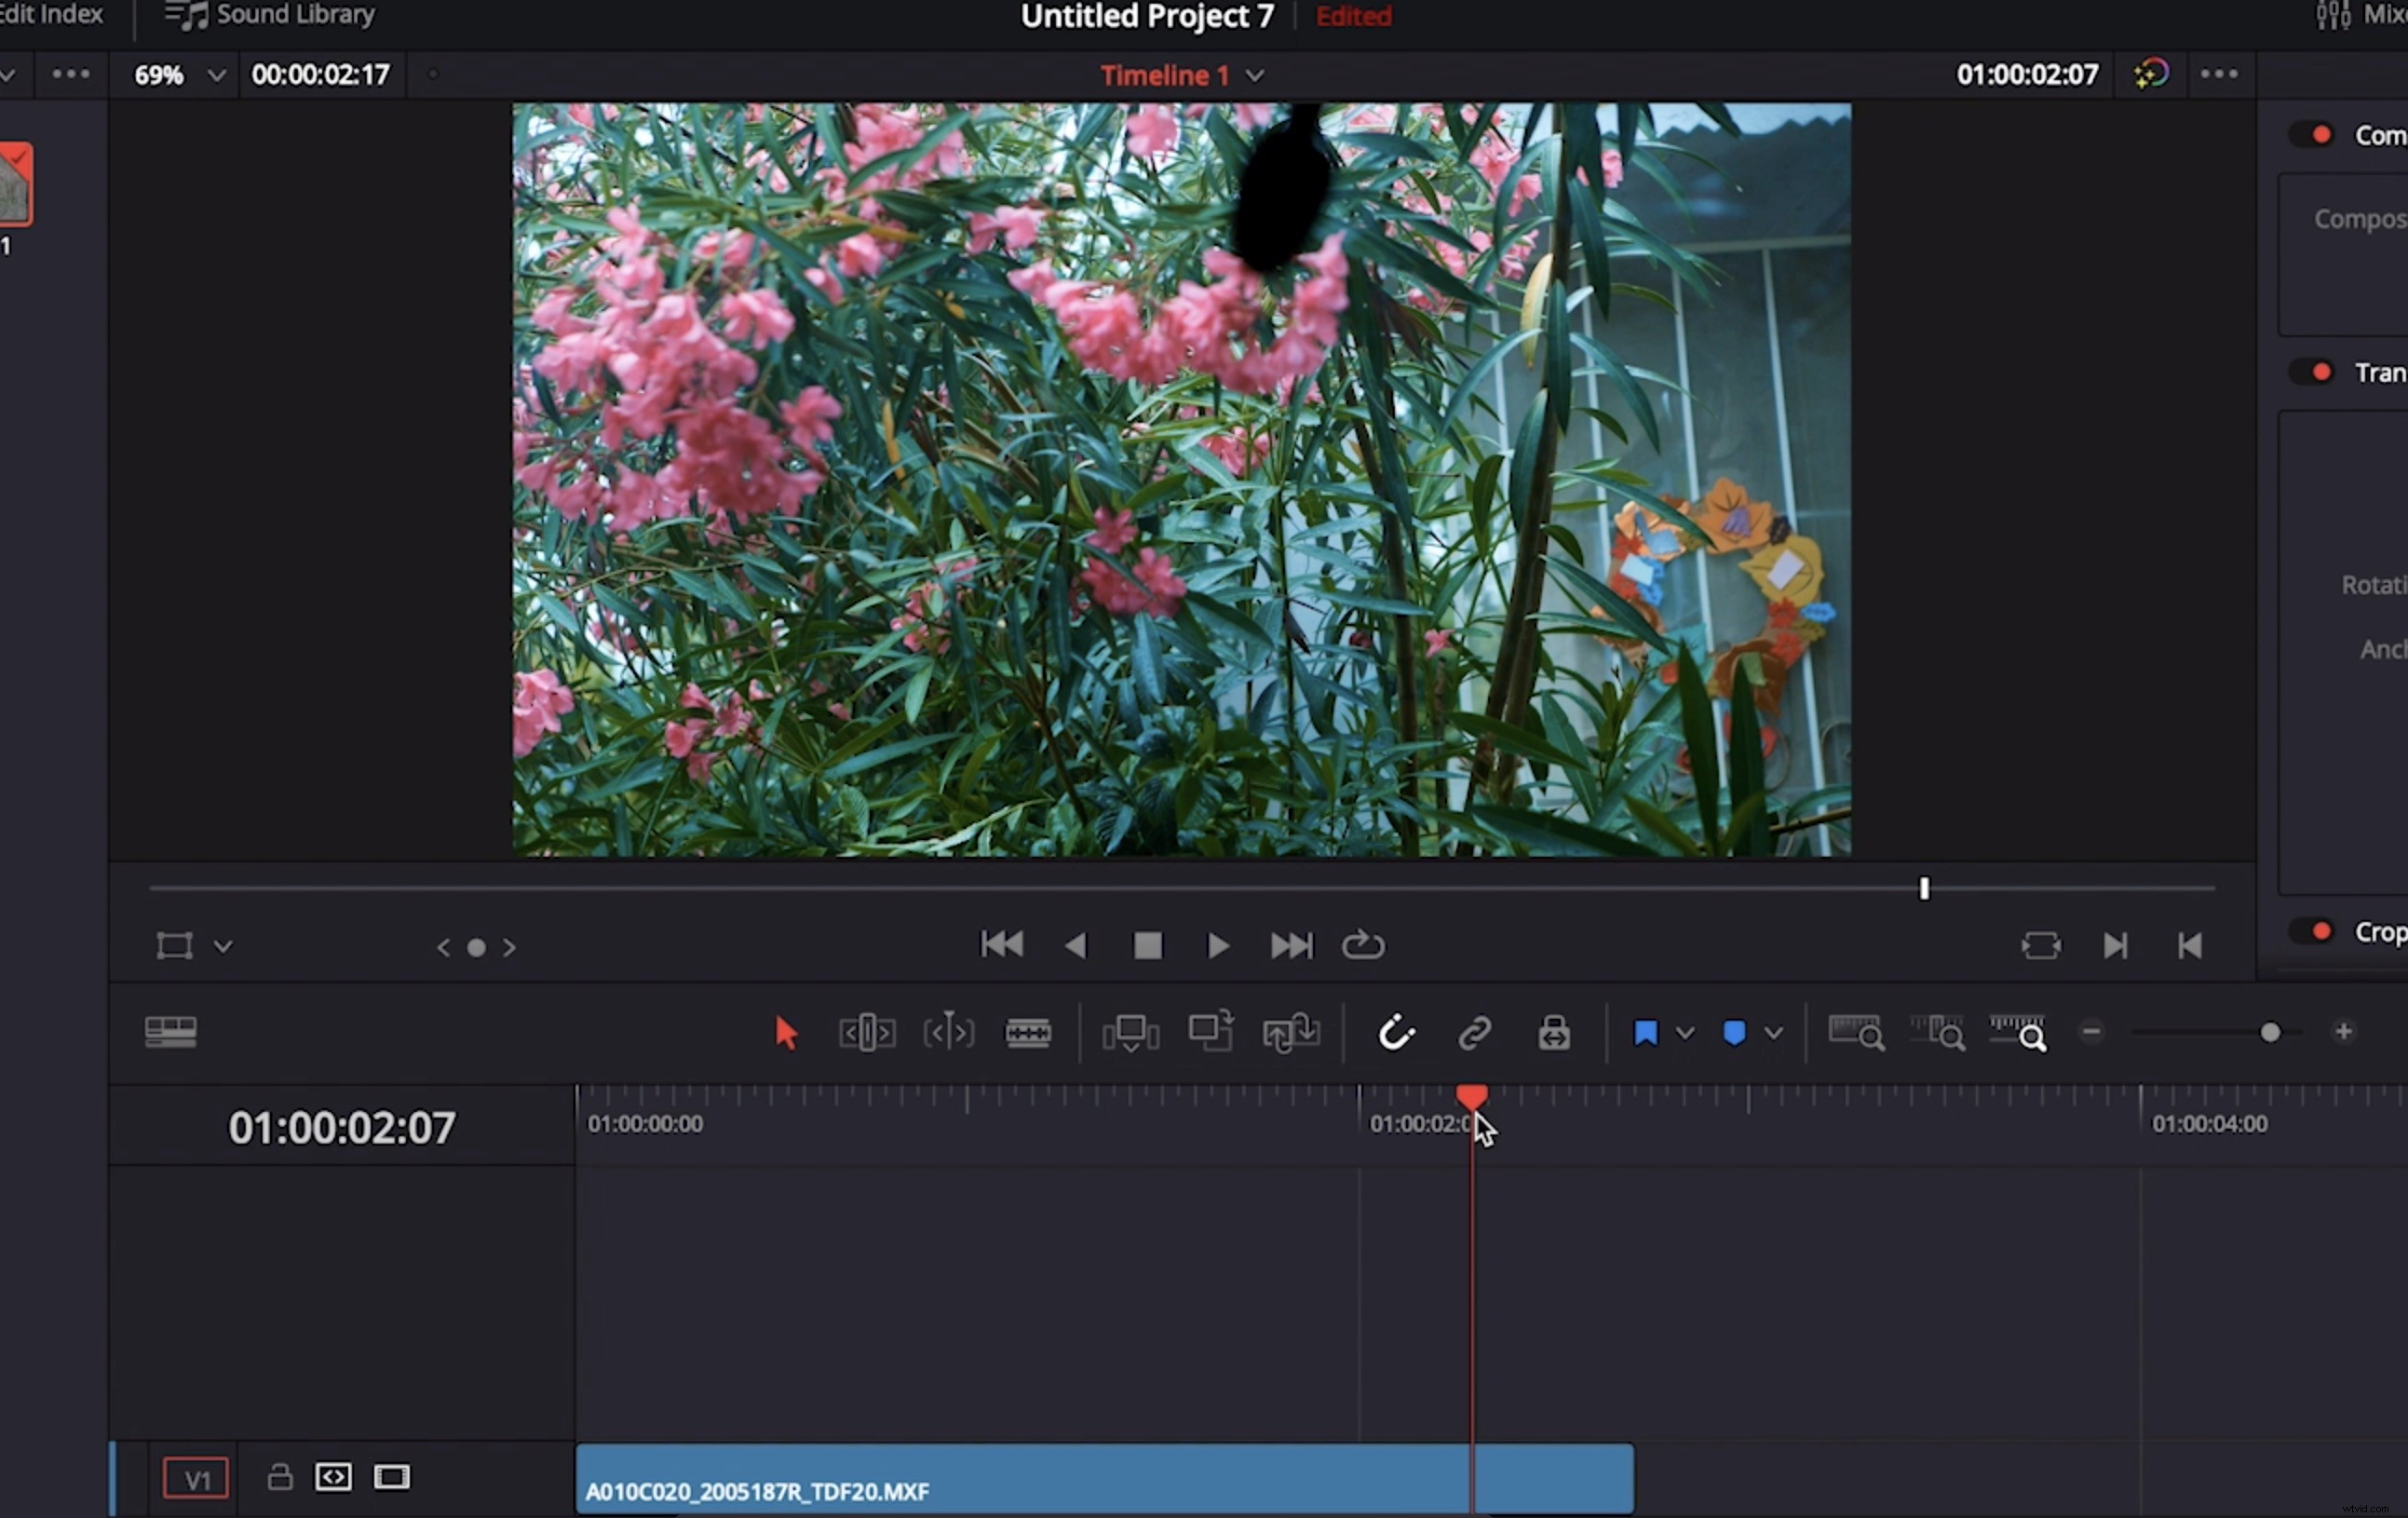
We’ll use the same basic method in Resolve, but instead of using a still as the clean plate, we’ll use a different part of the same footage. This helps if there’s a complex or moving background.
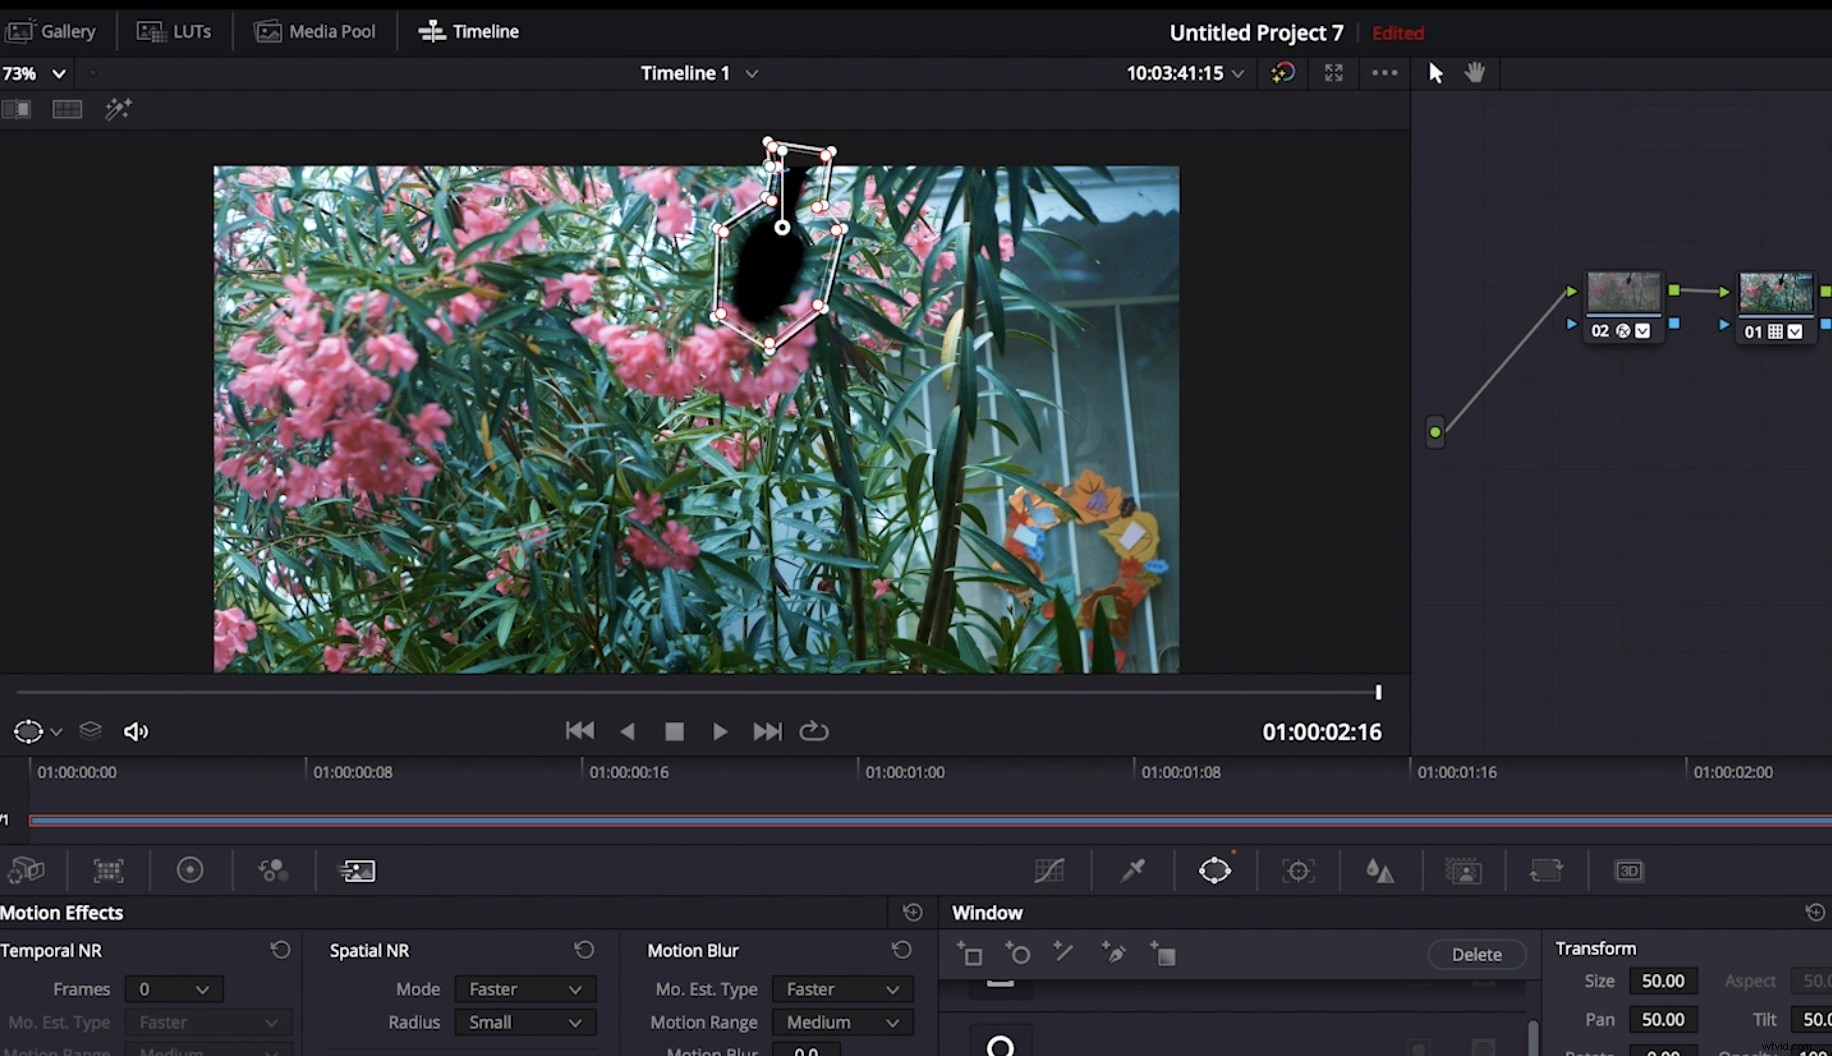
Set up your project in the same way as Premiere, with two identical copies of the same clip on top of one another in the timeline. Select the top clip, and use the path option in the window tool to trace the boom at its most exposed location.
Click across to the tracker and track the object forward and backwards until it disappears. Paths can sometimes linger after the object has gone, and it helps to move over to the Frame tab in the tracker to manually set a final keyframe, with the mask off the frame.
You’ll need to add an Alpha Output in your node graph and connect the Mask Alpha to it in order to transfer the mask path. The final step is reversing the Alpha Key Output in the Key tab.
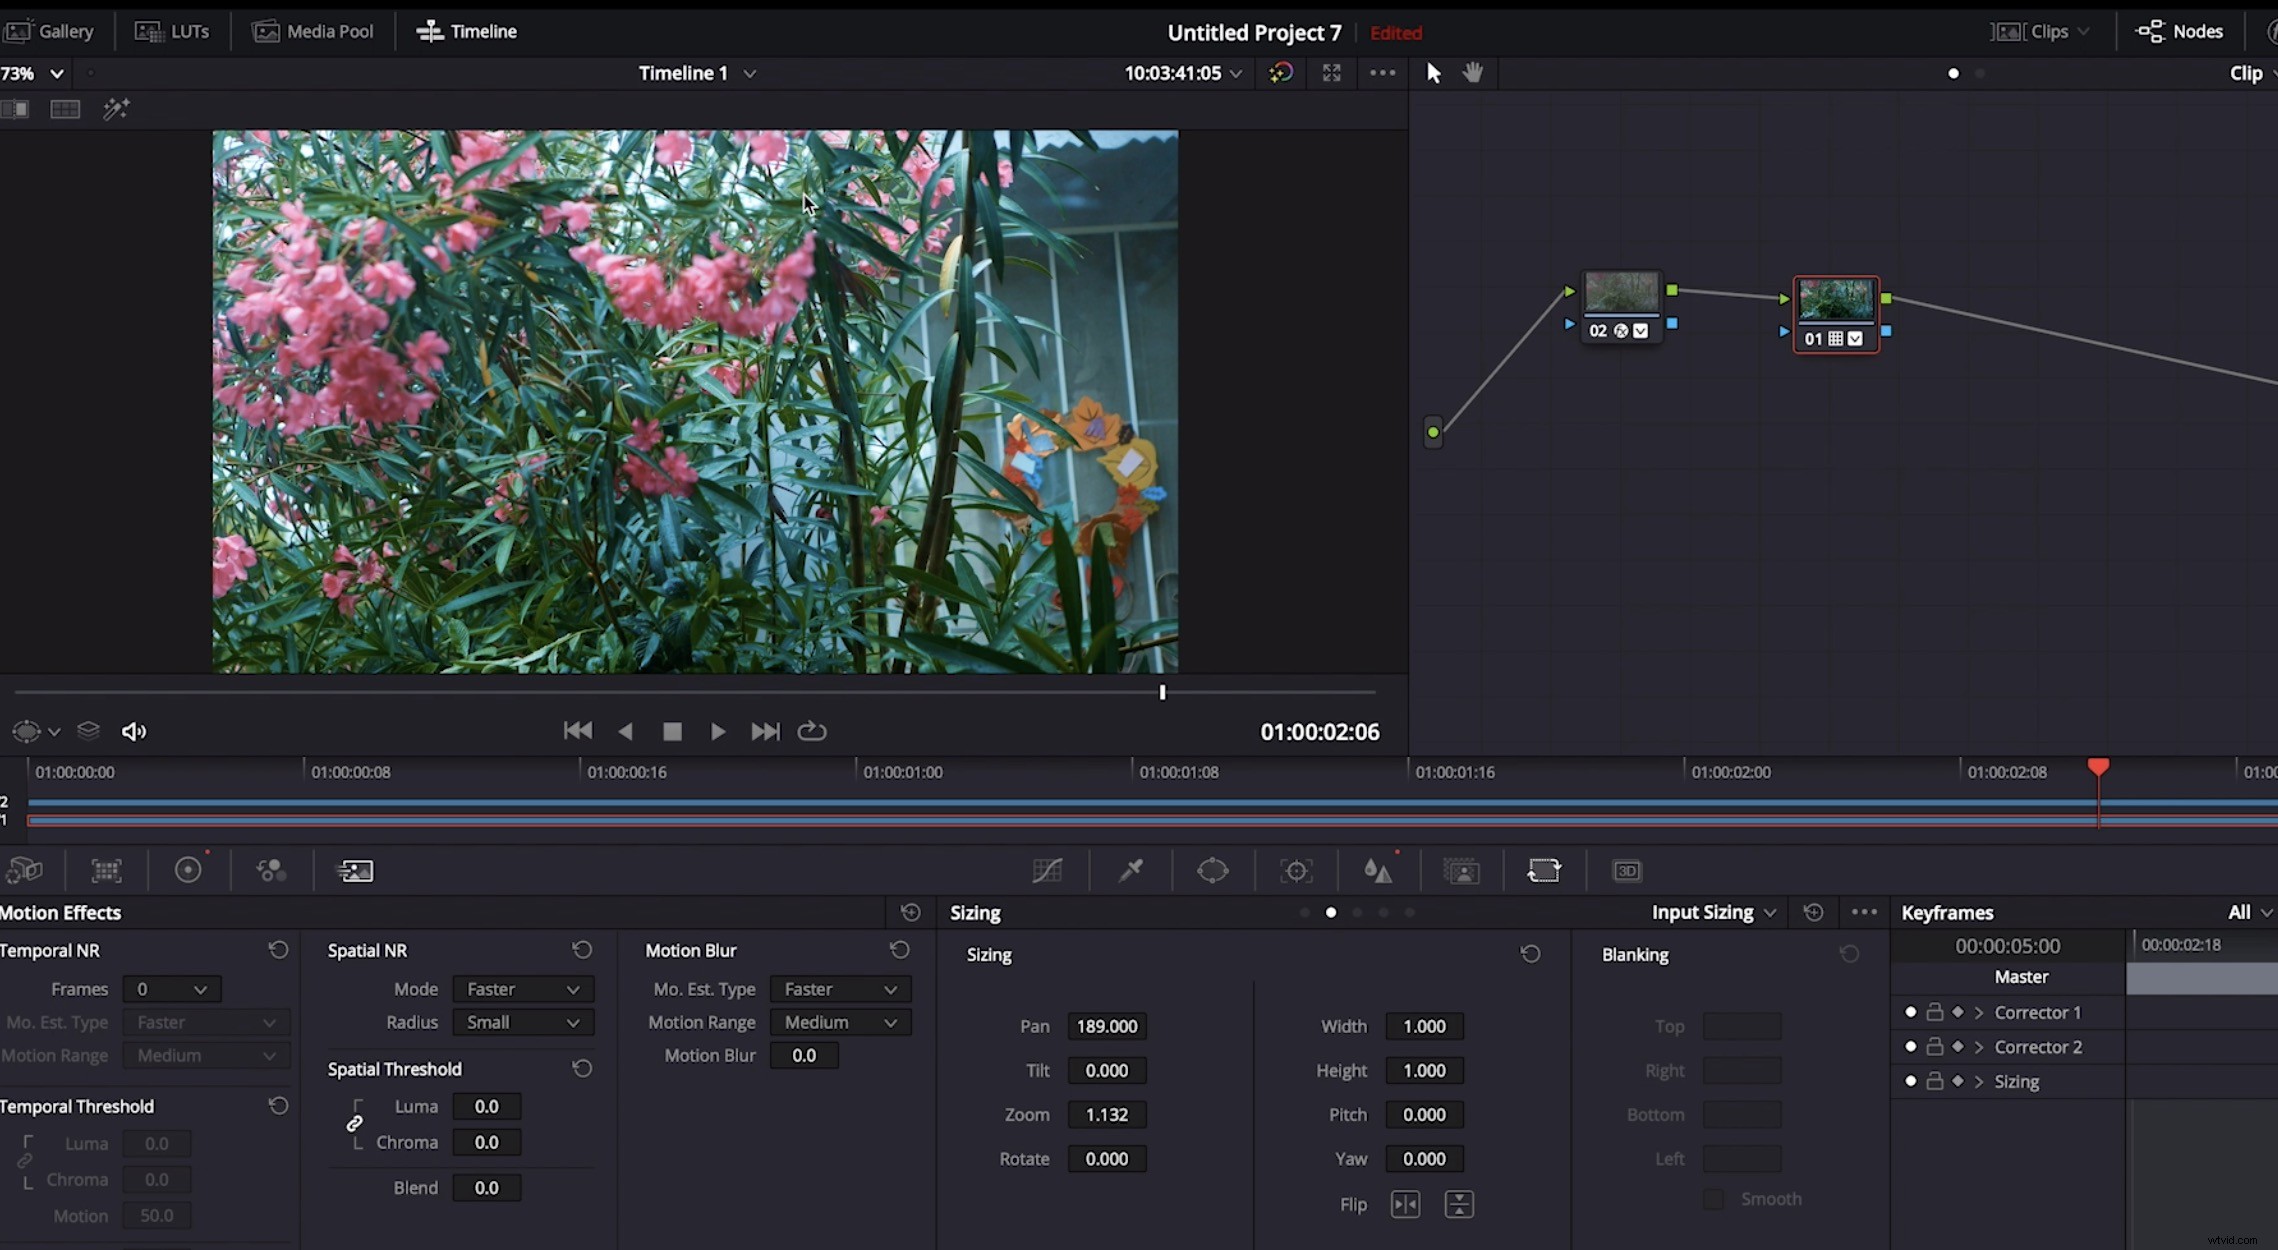
With the bottom layer now selected, go to the Sizing tab and adjust the pan and tilt until the hole left by the mask is filled by a similar part of the same shot. You may need to hunt around (and even resize the lower clip) until you get a good match.
The end result is a clean shot without any boom mic. What was once unusable is now as good as any other shot in your project.
Dig into these articles for more info, tips, and tricks related to your favorite NLEs:
- How to Replace the Sky in Premiere Pro and DaVinci Resolve
- Hardware Accelerated Encoding Coming to Premiere and After Effects
- 5 Tips for Project Managing a Video Edit Remotely
- Fix It in Post — Four Ways to Save Your Film in Post-Production
Cover image via WAYHOME studio.