The image below is a stitched panorama comprised of 7 separate frames, stitched together in Photoshop CS6, using the Photomerge feature. The full sized finished image weighs in at 85 megapixels. In this article I will share some tips for creating your own stitched panoramas.

Sunset Cliff, San Diego, CA - 1/160, f/5.0, ISO 125, 70mm (Canon 5DmkIII, EF24-70mm f/2.8L USM)
Shooting your Photos
The first step in creating a stitched panorama with Photomerge is to shoot suitable images. Keep these points in mind:
- Overlap the images – according to Adobe, the images should overlap by at least 40%, but no more than 70%. Outside of this range, Photomerge may not be able to align the files correctly.
- Keep your settings constant – you need to keep focal length, focus point, and exposure constant throughout the series of images so that you can combine them later. The easiest way that I’ve found to do this is to take one shot on P, look at the camera settings, and then dial those settings in on manual mode. I also focus on a suitable object about 1/3 of the way into the scene, and then change the camera to manual focus so that the focus will be constant.
- Shoot vertical – this is a little counter-intuitive since we’re making panoramas. It’s usually best to shoot vertical (portrait orientation). Since you’ll merge multiple frames together later to get as wide as you need, shooting vertical will give you a taller overall panorama. Also, you’ll need some of this vertical space for cropping. More on cropping later.
Preparing your Files
The next step in the process is to prepare your files for Photomerge. This is actually optional. If you shoot JPEG and you’re happy with your images straight out of the camera you can go directly to Photomerge in Photoshop. If you shoot RAW, process your RAW images in whatever program you use, and export full size TIFF or PSD files to a temporary location on your computer so you can open them from Photomerge.
Merging your Panorama with Photomerge
The next step is to open your images in Photomerge from within Photoshop, and stitch together your Panorama.
(Lightroom Users: if you jumped to Photomerge straight from Lr, skip to step 4 below)
1. From the file menu, chose Automate > Photomerge
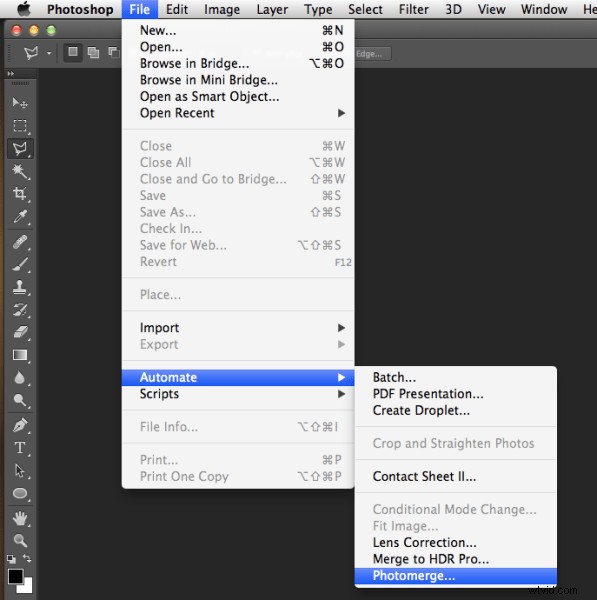
Launching Photomerge within Photoshop CS6
2. Click “Browse” and navigate to the files you exported to a temporary folder in your drive.
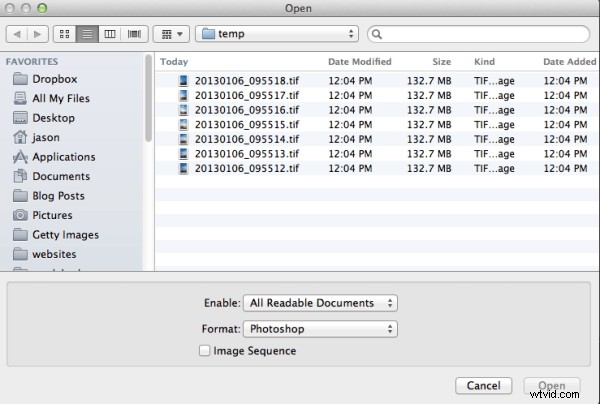
Browse to the location where your files are located
3. Select all of the files and click “Open.”
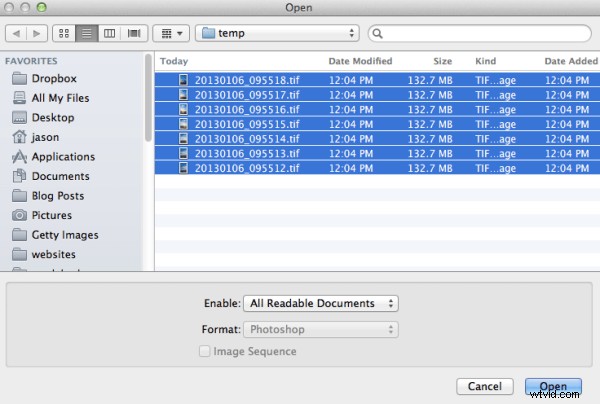
Select all files
There are several options under “Layout” on the left side of the Photomerge dialogue box, but I’ve had good success with Auto. For a detailed explanation of each of the options, check out the Adobe Help article here.
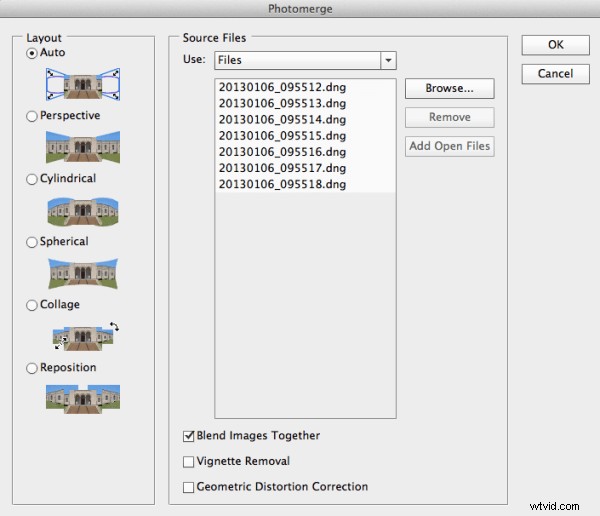
Photomerge dialogue
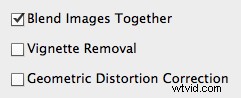
If you noticed any vignetting or distortion in your source images, select the options to correct that during the Photomerge process. Personally I don’t use these two options, as I’ve noticed they slow down the Photomerge process exponentially. Instead I prepare my images in Lightroom and apply Lens Correction in Lr before sending my images to Photomerge. However these features are there if you need them.
Photomerge options
4. Click OK and wait for Photomerge to complete.
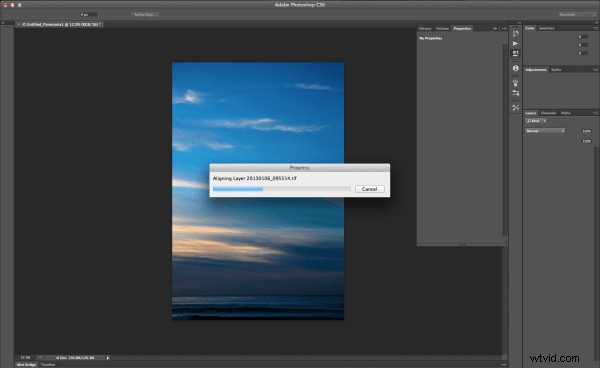
Photomerge working
5. When Photomerge finishes its magic, you will have a single panorama with each image in a separate layer. Zoom to 100% and check the seams between the images. If everything looks OK, flatten by navigating to the Layers menu and selecting “Flatten Image.”
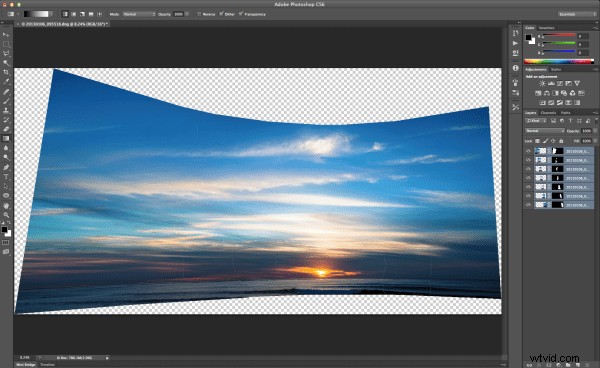
Panorama in separate layers
6. Crop a rectangular composition from the center of your stitched panorama. This is where shooting in portrait mode really helps. There is a more vertical height to the photo and therefore more space available for cropping.
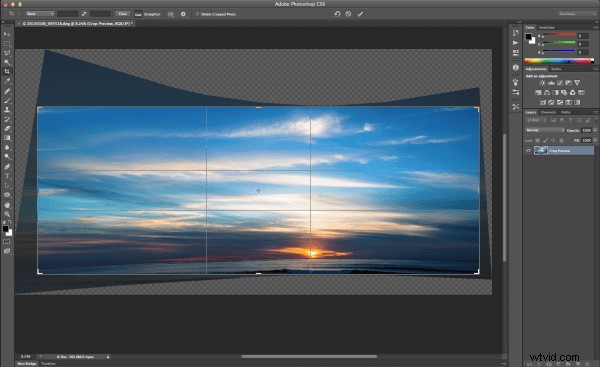
Cropping your Panorama
Conclusion
The Photomerge feature in Photoshop makes stitching Panoramas easy. For me, the hardest part is remembering to take advantage of this feature by shooting images when I’m out an about that I can later stitch together into a panorama. Next time you’re out shooting and the you can’t figure out how to fit the scene into your lens, try shooting multiple frames and stitching together a panorama when you get back to your computer.

7-frame stitched panorama of Matsumoto Castle. Matsumoto City, Nagano Prefecture, Japan - 1/500, f/7.1, ISO 100, 70mm (Canon 5DmkII, EF70-200mm f/2.8L IS USM)
I appreciate feedback, please comment below or feel free to connect with me through Facebook or Google+. I’ll do my best to answer questions and reply to comments.