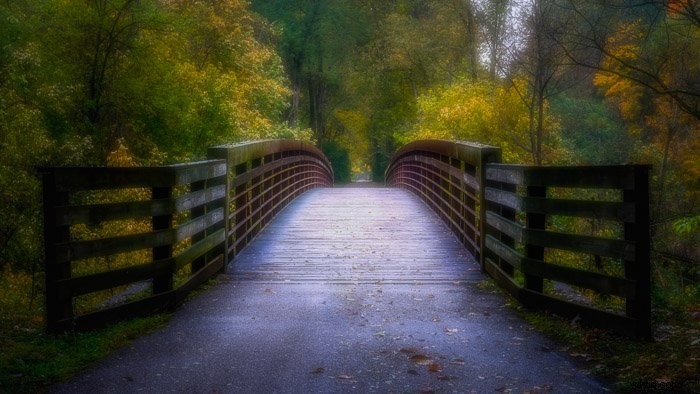
The Orton Effect is a popular, artistic post-processing technique developed in the 1980s. The process is popular in landscape photography and creates a soft, watercolor effect.
In this article, we’ll show you how to create the dreamy effect in Photoshop and Lightroom.
What Is the Orton Effect?
The Orton Effect is a post-processing technique used to add a romantic or mysteriousness look to landscape photography.
It’s named after Michael Orton, a Canadian landscape photographer, who introduced a surreal vibe to his photos.
To apply the Orton Effect, he shot two or three photographs of the same scene. One was focused correctly, and the second he threw out-of-focus using a shallow depth of field. Both were often overexposed.
In the darkroom, Orton merged the images together. They produced a single image that was both sharp and blurry. The images tend to have an abstract and surreal feel with a glow in the highlights.
Today, landscape photographers are more restrained in their use of the effect. They use it to add a soft glow to dramatic landscape photos, but usually do not apply it heavily.
It’s a straightforward process to achieve this look in Photoshop and Lightroom. It’s up to you how far you want to take the effect.

How to Create the Orton Effect in Photoshop
There are many ways to achieve the Orton Effect in Photoshop. Some involve using a blend mode and the ‘Apply Image’ tool.
I find the best way is actually the simplest. Plus, you’ll have a lot of control over how much of the effect to apply to your photo.
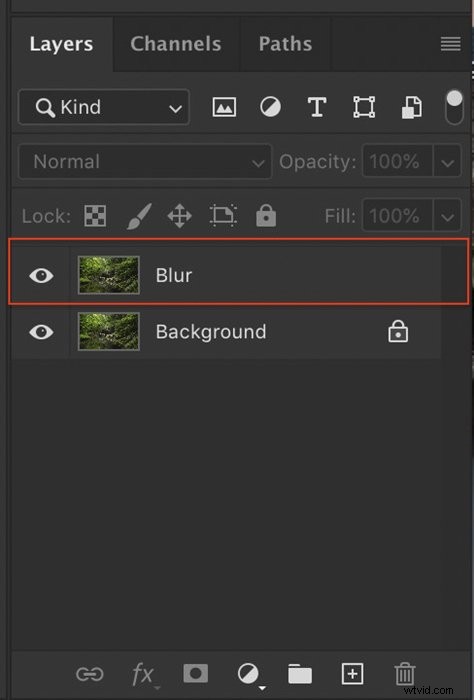
Step 1: Create Layer
After applying basic edits to your photo, open the image in Adobe Photoshop and create a duplicate layer.
You can do this by right-clicking on the background layer and selecting ‘Duplicate Layer‘ (Ctrl or ⌘J).
I label this layer ‘Blur’.
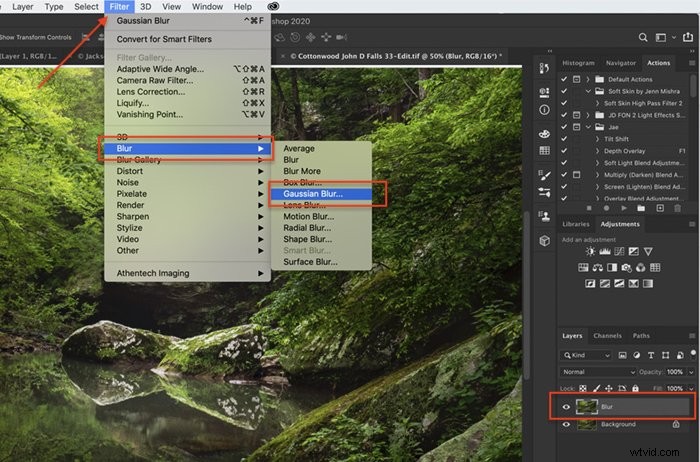
Step 2: Create Blur
Select the ‘Blur’ layer.
We’re going to add a blur to this layer to add glow to the scene. Go to Filter>Blur>Gaussian Blur.
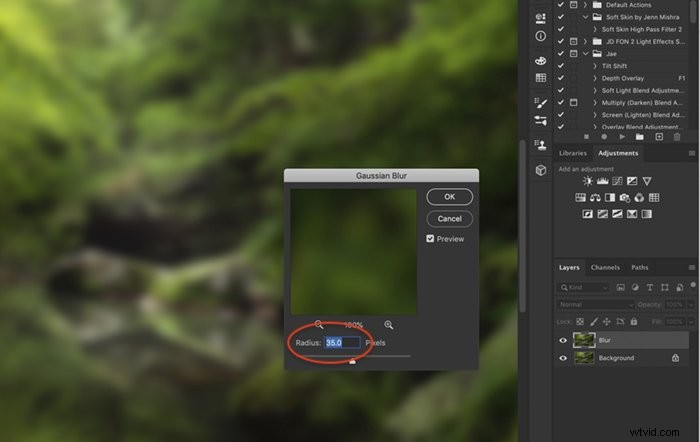
In the pop-up dialog box, select a radius value that blurs the scene.
At this stage, blur the scene a lot. Choose a radius of between 25 and 50. You will control how much of the blur you see later in the process.
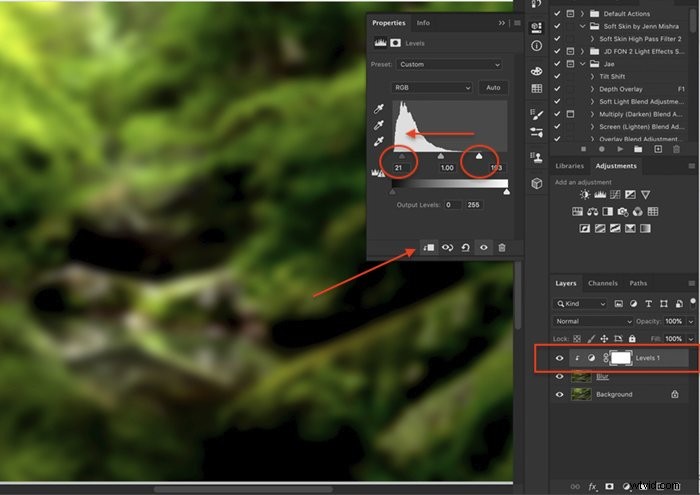
Step 3: Add Contrast & Lighten Layer
Add contrast and lighten the photo by adding a ‘Levels’ adjustment layer. Go to Image>Adjustments>Levels or click on the ‘Levels’ icon in the ‘Adjustments’ panel.
This step will take some experimentation to get the look you want. There’s no hard and fast rule. Try starting with the Photoshop preset ‘Contrast 3’ and then pull the highlights carrot and the shadows carrot left.
Click the ‘Clipping Mask’ icon on the bottom left of the window. This applies the adjustments to only the ‘Blur’ layer.
Step 4: Adjust Strength of the Effect
Select the ‘Blur’ layer and take the opacity down to 0%. This removes the Orton Effect entirely from your photo.
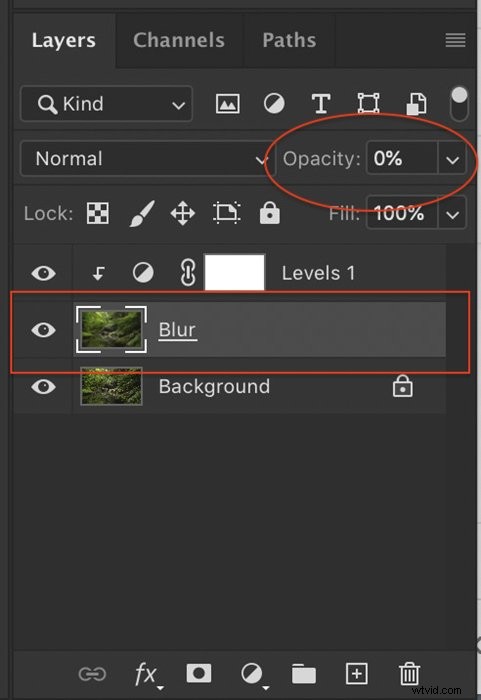
From zero, slowly add the Orton Effect to your image. Many photographers like to be restrained and only add a little bit of the effect. Somewhere around 5 to 10%. Others, like Orton himself, like to go much more abstract and surreal.
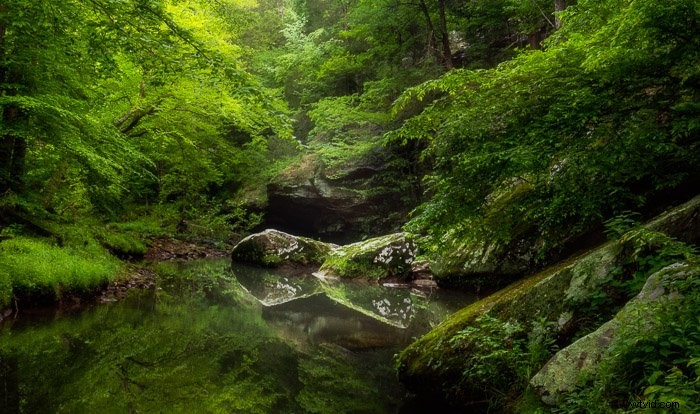
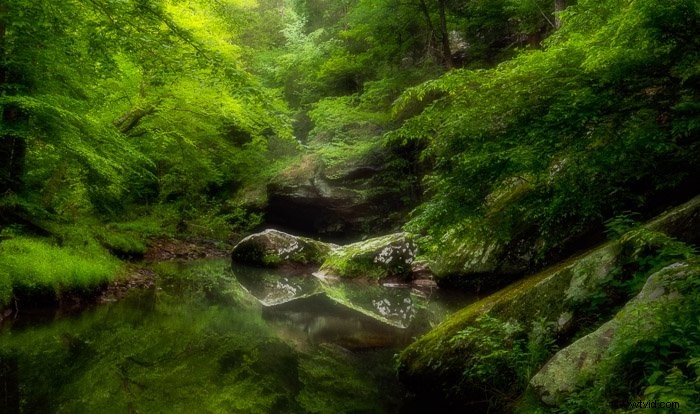
Compare 15% opacity (before) with 35% (after).
The effect should be seen in the highlights more than the shadows.
Add a layer mask to the ‘Blur’ layer and paint out the effect with a black brush in the shadowed area.
How to Create the Orton Effect in Lightroom
You can achieve a similar look in Lightroom by using a combination of the ‘Clarity’ and ‘Texture’ sliders and lightening the image.

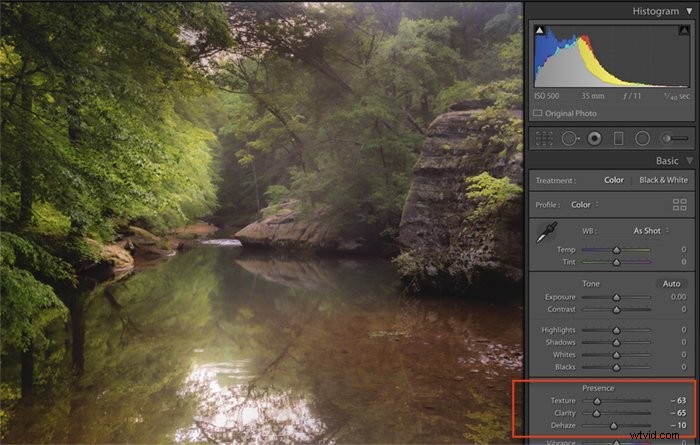
Step 1: Lower Presence in Develop Module
After applying basic edits to your image, go to the ‘Basic’ panel in the ‘Develop Module’. Look for a set of tools in the ‘Presence’ section called Texture, Clarity, Dehaze. These will have the most effect on creating the Orton Effect in Lightroom.
Often for landscapes, we raise the numbers by dragging the sliders to the right. For the Orton Effect, we’re going to do the opposite.
Lowering the ‘Texture’ decreases the texture in the image while retaining detail and clarity adjusts contrast in the mid-tones. How much you lower these sliders is up to you. Somewhere between -40 and -80 is a good range.
I sometimes add a little haze to the image by lowering the ‘Dehaze’ slider.
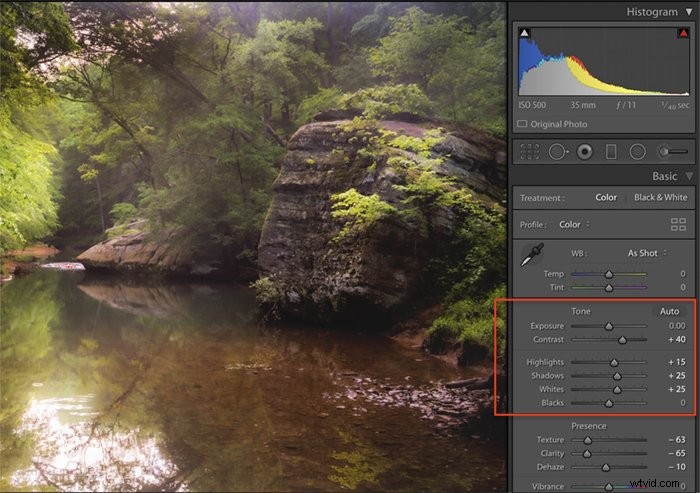
Step 2: Add Contrast & Light
Clarity reduced mid-tone contrast, but it makes the image a bit lifeless. Add back some overall contrast and lighten the image. Orton overexposed his images, and you’ll want your highlights to glow.
There’s no fixed recipe. I tend to lighten highlights, shadows, and whites in the ‘Tone’ section of the ‘Basic’ panel.
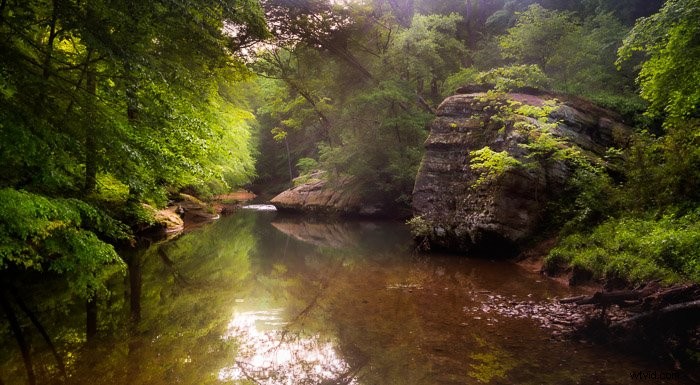
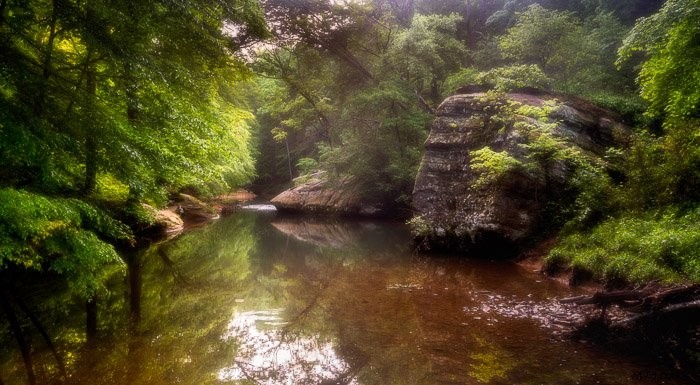
Compare the results. The first image was created in Lightroom. The second image was created using the above process in Photoshop. The results are similar, but not exactly the same.
Conclusion
Landscape images processed with the Orton Effect have a soft, ethereal look. The look is easy to achieve in both Lightroom and Photoshop.
Over-processed Orton Effect photos, like over-processed HDR images, are sometimes disparaged on social media. But Orton himself was going for an abstract look. It’s up to you how much of the effect to apply.
Applying a little blur and overexposure can create a dreamy landscape. Try it and see for yourself!
Eager to learn more about landscape photography? Why not check out our course Simply Stunning Landscapes next!