Introduction
This tutorial has been transcribed from the SLR Lounge Adobe Lightroom 4 DVD Guide, a 14 hour DVD featuring over 130 tutorials for mastering Lightroom.
If you own your own studio, or are heading in that direction, it is nice to have your Lightroom customized to your own studio. This portrays an established brand, especially if you happen to be showing a client a catalog on the spot. In previous articles we have shown you how to customize the Identity Plate. In this article we will show you how to customize your panel end marks by uploading your own logo, or simply choosing one of the preset end marks Lightroom has provided.
Using Preset Panel End Marks
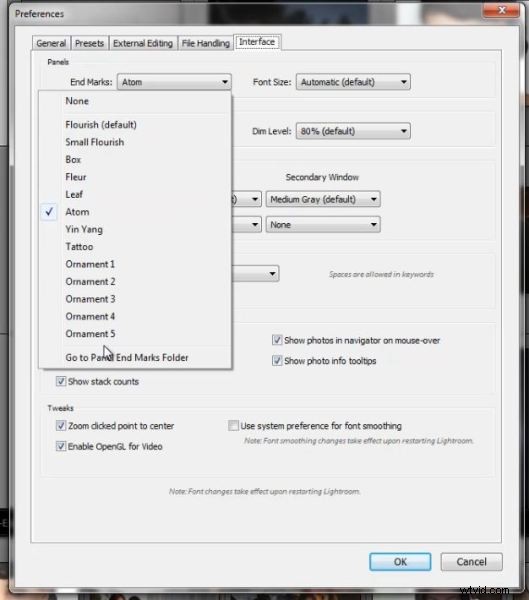
To get started we will go into our Preferences Dialog Box by going to our Menu Bar, selecting the Edit drop down menu, and selecting Preferences (or hit CTRL + , ). Once in our Preferences Dialog Box, select the Interface Tab. Panel End Marks is the first option within this tab. By selecting the End Marks drop down menu you can see that Lightroom has created a variety of preset end marks which you can select based on your personal preference.
Creating Your Panel End Mark Graphic
We created our Panel End mark graphic in Illiustrator. While Illustrator is somewhat beyond the scope of this article, I will let you know that we decided to bring down our transparency on the graphic so that it did not stand out to much. Another tip when creating your Panel End Mark graphic, is that you do so using transparent backgrounds saving the file as a PNG. This will insure that when you up load the graphic there will be no white showing against the grey interface of Lightroom in parts of the image where there is a blank background. You can also move your graphic up, down, right or left by adding transparent pixels to your file within Illustrator or which ever software you use to create your graphic.
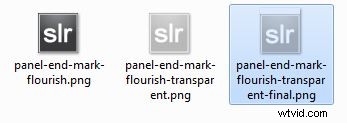
This is our final SLR Lounge end mark saved as a PNG file to preserve all of the transparent pixels which we will be using for this tutorial.

Loading Your Custom End Mark
Once you have completed your End Mark design, you must load it into the Panel End Marks Folder for it to be visible in the End Marks pull down list. To do so we will once again select the End Mark drop down menu within our Interface Tab in the Preferences Dialog Box. The bottom option of this menu is “Go to Panel End Marks Folder”. This will bring you into your finder, or explorer where the Panel End Mark’s folder is located. You must upload your graphic into this folder for Lightroom to be able to recognize it.
Now you will see the Panel End Marks Folder opened in your Finder or Windows Explorer window as shown below.

From here you locate the file that you would like to use for your custom Panel End Mark and drag it or copy and paste it into the Panel End Marks folder. We have loaded three different versions of the SLR Lounge End Mark into our folder as seen below.
Once you have done this, you can close your finder or explorer window, as well as close you Preferences Dialog Box. Now we will re-open our Preferences Dialog Box, select the Interface Tab and the Panel End Marks drop down menu. You should now see your new custom Panel End Mark available as an option as shown below.
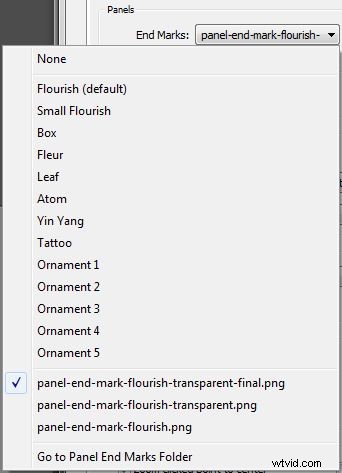
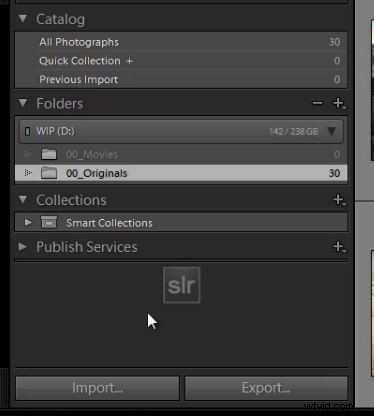
We have selected our panel-end-mark-flourish-transparent-final.png file as our selected End Mark and now you can see it displayed in its final form below.
The SLR Lounge Lightroom 4 DVD Guide
If you enjoyed this tutorial, then we know you will love the SLR Lounge LR4 DVD featuring 130 tutorials and nearly 14 hours of training covering Lightroom 4 from A – Z, nearly half of which is devoted strictly to image processing techniques. Click here to learn more and purchase via digital download.