When it comes to food photography, photo editing is at least half of the battle. Sure, there’s an art to styling and shooting food so that it looks yummy right out of the camera. But more often than not, it pays to spend a little time sprucing up that photo in post-production. There are lots of popular photo editing tools out there, but lately, I’ve been preferring Luminar by Macphun, soon to be Skylum.
Simple and straightforward to use, you can enhance any food photo in Luminar right out of the box. Here’s how to get started. I should be clear that this is my personal food photography editing workflow. Feel free to make adjustments and edits to your own taste (pun intended) and preferences.
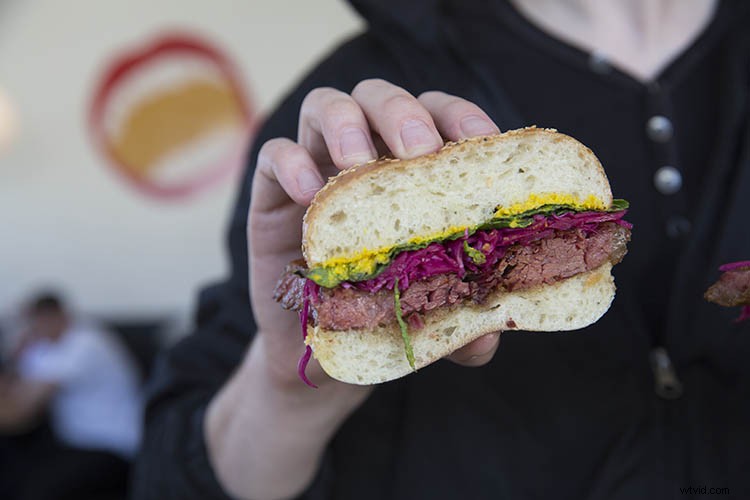
The final image, edited in Luminar.
Get Started
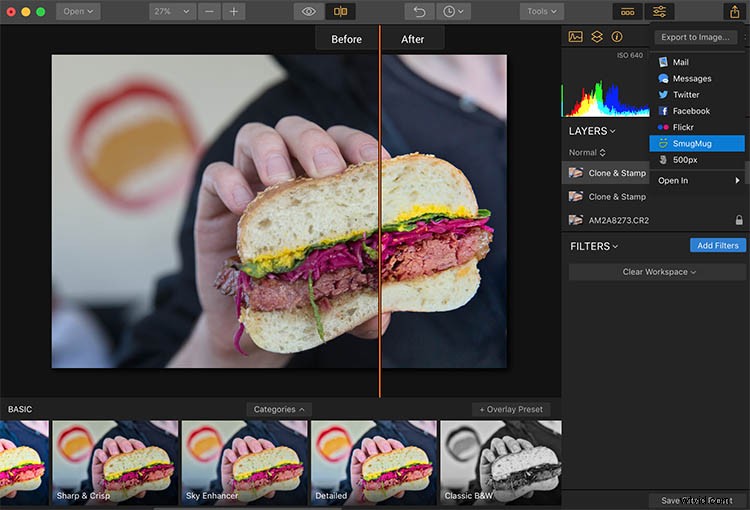
First, open a photo in Luminar. You can open an image three ways; by clicking the blue Open Image button on the welcome screen, by going to File > Open, or by dragging and dropping an image on the welcome screen.After your image is open, take a look around at the software’s interface.
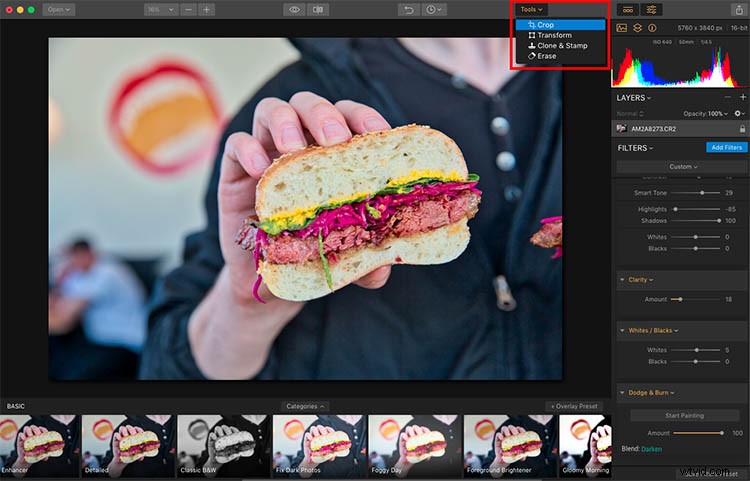
The top bar contains a variety of useful tools such as crop, transform, and undo, plus unique features like clone and stamp, erase, and a handy history menu which lets you scroll back through every edit you’ve made to an image. There’s also a button to give a quick preview of changes made to your image, and even a compare slider showing the image before and after editing.
1. Apply a Luminar Preset
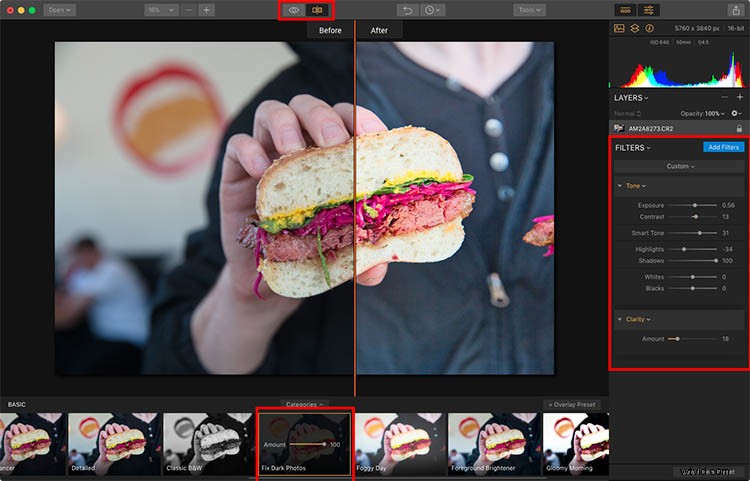
On the bottom row of Luminar, you’ll find a menu of presets, which are essentially filters, with predetermined settings. (Note: if the presets are not showing click the icon third from the right in the top toolbar.) There are dozens of presets to choose from and they’re sorted by category. In the default version of the software, there’s not a specific category for food photos, but the Basic presets will do just fine (and as you go, you can create your own custom presets).
Selecting a preset automatically applies the edits intended by the designer of the preset. In the sandwich image below, the Fix Dark Photos preset has been applied. Directly over the preset is a slider that allows you to adjust the intensity of that preset. On the right side, a panel opens up showing what aspects of the photo have been edited. You can go in and fine-tune the adjustments to taste using the sliders.
2. Open up the Filters Catalog
Applying a preset will get your photo off to a great start, but you’ll often need to make a few micro adjustments to your image.
To do this, click on the Add Filters button in the right-hand corner. This will open up the Filters Catalog, offering you tons more editing tools. Hovering your mouse over a filter will result in a pop-up window that explains the filter’s effect and shows an example thumbnail image (as seen below).
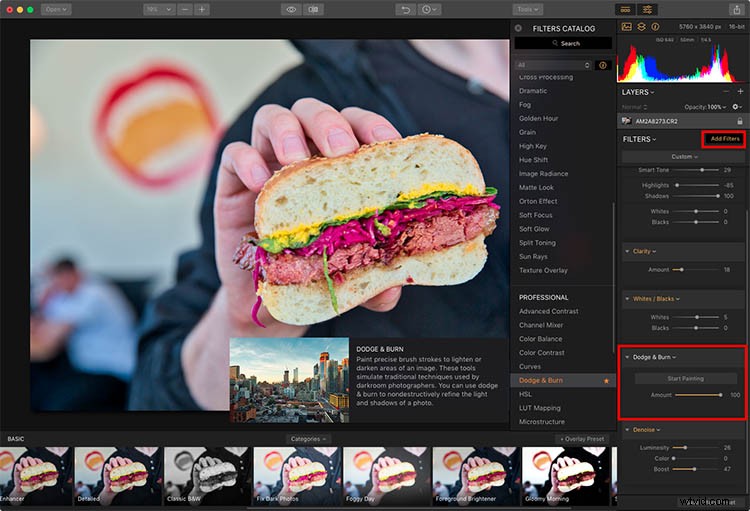
Here I’m adding the Dodge & Burn Filter.
Finding and Sorting Filters
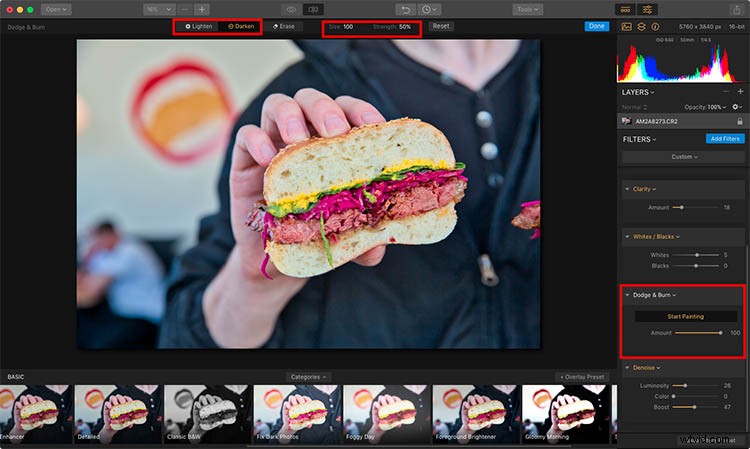
There several tools in the catalog that will help you find the filters you need. First is the search bar where you can type in a filter name. Below that is a drop-down menu that lets you see filters according to their usage, such as Issue Fixers, Essential, and Creative. Finally, you can star or favorite your most-used filters to make them easier to find. For food photos, I stick to pretty basic filters that add minor adjustments.
Below, I’ve applied a Dodge and Burn filter to darken (burn) some of the sandwich bread. I also added a Denoise filter to reduce some of the grain in the black background.
3. Crop the Image
After applying a preset and fine-tuning with filters, I’m feeling pretty good about the color and lighting of my image. All that remains is cropping the image. To do this, click on the Tools menu in the top bar and select Crop. This will reveal a cropping interface with guidelines, a collection of crop preset,s and the ability to rotate the image if you like.
In this case, I cropped in just a bit to put more emphasis on the sandwich and remove the bit of food on the right.
The Crop tool in Luminar.
4. Clone and Stamp
Almost there! Now that I’ve cropped the image to my liking, there are a few messy spots that I want to erase. Time to clone and stamp! This feature is also in the Tools drop-down menu where you found Crop.
In this workspace, Clone & Stamp works very similarly to other image editors such as Photoshop and Lightroom. Simply hold down the Option key and click on an area you want to copy pixels from. Then click (paint) over the object you want to remove or replace. In the photo below, a few messy spots on the bread have been clone stamped, as well as part of the black shirt background.
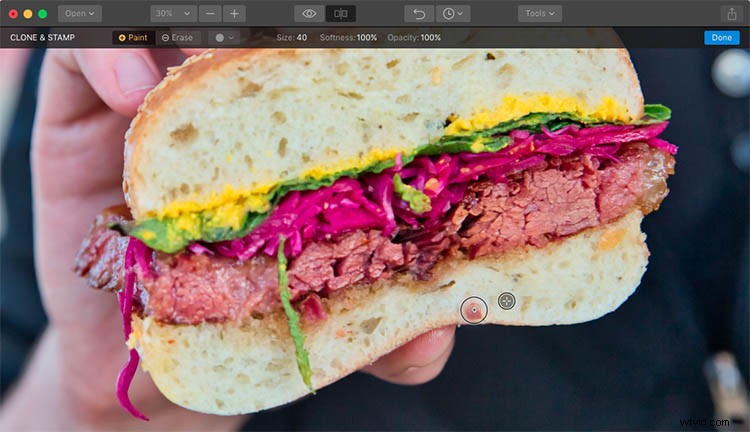
Clone tool for fixing a few messy bits.
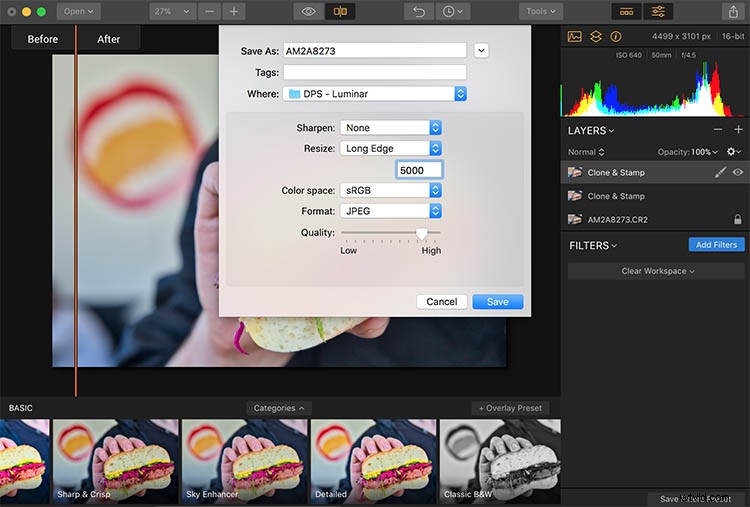
5. Save, Export, Share, or Open Image in another platform
When you’re done editing your food photos in Luminar, you have several options for saving and sharing images.
One option is to go to File –> Save As. Just note that this will save your image in a Luminar 2018 native format (.lmnr) so that you can continue to fully edit and adjust the same image later. If you choose you can save all the layers and the history for this image in the .lmnr file.
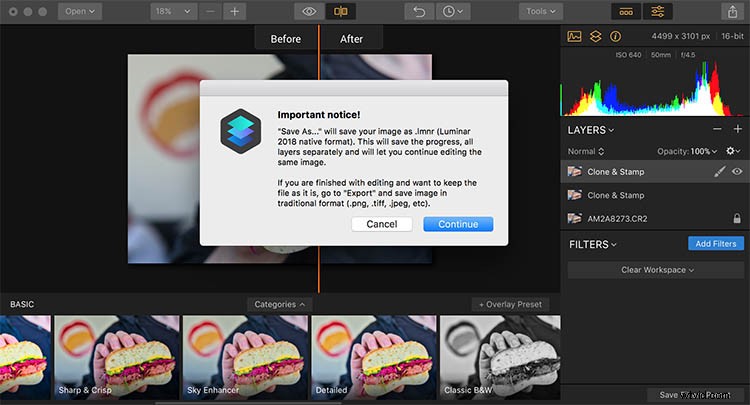
Saving as a .lmnr file.
If you want to save in another file format such as a JPG, you’ll have to Export. This brings up a dialogue box where you can specify file size, format, quality, and the location of the saved image.
Your final option for saving images is to share them directly to online platforms such as Facebook or 500px. It’s necessary to sign into your individual accounts to connect them to Luminar, but once you do so, sharing them directly to other websites is a snap.
You can also open the image in another image editing platform such as one of Macphun’s many other programs (i.e. Aurora HDR).
In Conclusion
Whether you’re trying to fix or spruce up a food photo, Luminar by Macphun, soon to be Skylum, is a great photo editing platform. Not only does it have a wide range of adjustable presets, but it also has basic and advanced tools that both amateur and pro photographers will appreciate.
Download a free trial of Luminar and give it a go! Post your food photo results in the comments below.
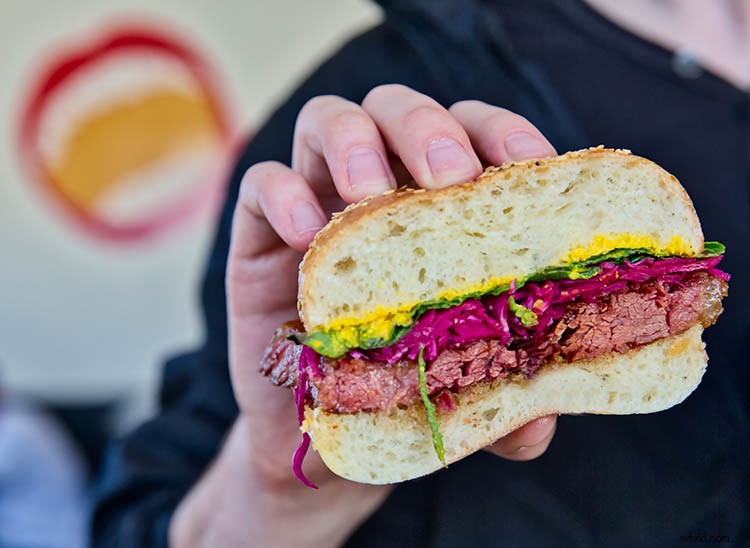
Final, edited photo.
Disclaimer: Macphun, soon to be Skylum, is a dPS advertising partner.