A Guest Post by Rob Dweck.
By the time I got serious about photography, digital cameras had advanced enough that buying a film camera wasn’t even a consideration. Having seen the photography of Art Wolfe, Galen Rowell and other landscape masters, I wanted to create photographs with the same visual impact and vivid color that I saw in their work. So off I went to various national parks with my Digital Rebel, only to come home and find that most of my photos were sorely lacking in impact of any kind.
Much of that was due to my newbie lack of basic photographic skills, which was remedied in time. But there was more to the equation. The photographs that first inspired me to pick up a camera were all done on film. As I looked at the technical information on many of the photographs, I noticed that most of them were shot using Fujifilm Velvia. That’s when it dawned on me why so many diehard film shooters fought the onslaught of digital tooth and nail.
Creating the Velvia look, and most any other film look, is possible in Photoshop using various combinations of adjustment layers and endless experimentation, but there is an easier way. Alien Skin Exposure makes it simple to replicate the look of a wide variety of popular film stocks with a few mouse clicks. Any time I want my landscapes to have a little extra pop, Exposure is my go to plug-in.
As with any plug-in, Exposure can be used to make subtle adjustments to the original image or to completely transform it. In the case of this photo from Bryce Canyon, I didn’t want to do anything too drastic; just boost the saturation in the reds and oranges, deepen some of the shadows and slightly bring up the glow on the backlit hoodoos.
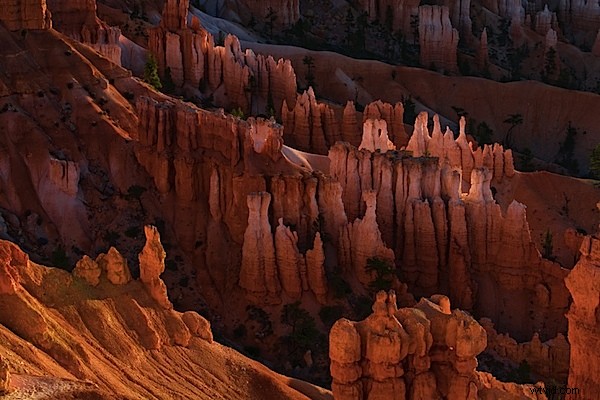
Image after preliminary adjustments in Lightroom and before plug-ins applied
As with most plug-ins, Exposure is opened from the filters menu, where you’ll find separate modules for black & white and color films.
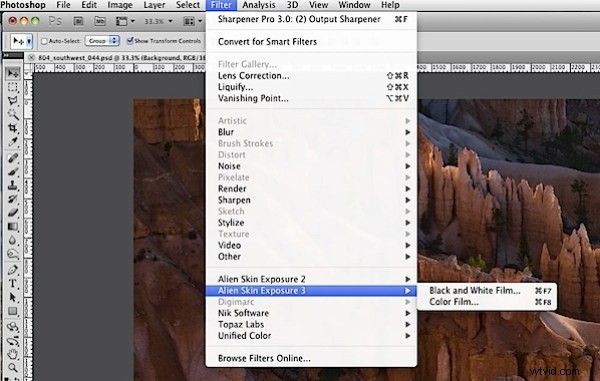
Select Exposure from the filter menu
The settings tab is where you’ll find the factory presets organized by category. I almost always head straight for color films- slide (grain off). The slide films are the ones that I find most pleasing and I’m just not a big fan of grain, unless it’s part of dinner.
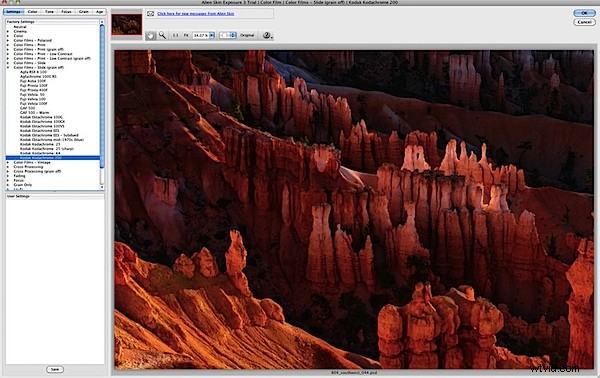
The left column contains presets organized by category
Normally I’ll work my way down the list of films beginning with Fuji Provia, unless I’m looking for extremely subtle effects in which case I’ll try Fuji Astia. After comparing the various presets, I’ll settle on the one that comes closest to the look I want to achieve.
In the case of this photo, Kodachrome 200 gave me the look I wanted. In some cases it will be good enough that I can simply click OK and be done. More often it’s close enough that I can click OK and then reduce the opacity of the exposure layer to blend it with the original.
Adjust the opacity of the Exposure layer to blend with the original layer
In most cases, simply selecting a preset and clicking OK is not enough and a little a few tweaks are necessary to get the look I want. I spend most of my time in the color and tone tabs making small adjustments. I was happy with the color, but wanted to slightly darken the shadows and give the highlights a little extra boost.
The tone tab presents the familiar curves graph as well as sliders for making adjustments. A small boost on both shadows and highlights did the trick.
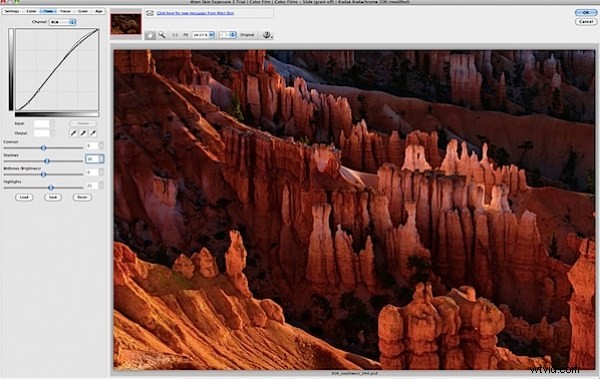
A few small adjustments in the tone tab can bring a little more pop to your image
The last step in my workflow is usually adding a vignette to darken the edges and draw the viewers eye away from the edge of the frame. This can be done in Exposure, but I use other plug-ins for that so I have more flexibility when it comes to blending. Here it was mostly the bottom of the frame that needed the darkening from the vignette.
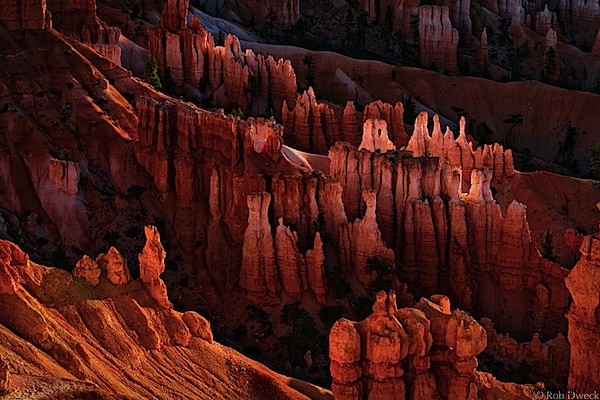
Final image after Exposure processing and vignette
It’s easy to be wowed by some of the brilliant colors and it’s easy to go overboard, something I’ve been guilty of on occasion. Some people really like the highly saturated colors, others find it unnatural or fake looking and prefer to show the scene “as it was.” There’s no right or wrong way. It’s all a matter of preference and your own aesthetic sensibilities are your best guide.
Rob Dweck is a San Francisco Bay Area based photographer who specializes in landscape and nature photography. His work can be viewed at robdweck.com.