Yes Aurora HDR was developed for creating HDR photographs. But did you ever think of using it for non-HDR tasks?
You’re in luck because in the next few minutes I’m going to open your eyes to some new ideas. Specifically ideas for using Aurora HDR in your photography workflow without using the term HDR.
What is Aurora HDR?
If you haven’t heard of Aurora HDR, it’s MacPhun’s answer to all the other HDR software out there. Developed in partnership with Trey Ratcliff, Aurora HDR has unique tools which rival even non-HDR software. I look at it as a mix between Photoshop and MacPhun’s Intensify.
But this isn’t about HDR. It’s about anything other than HDR. Before we dig in, know that the software can open a single image just like any other app or plugin. Let’s take a look inside:
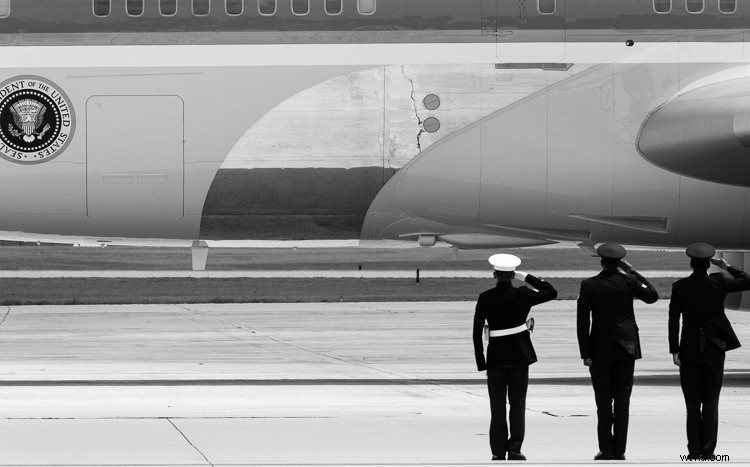
Air Force Airmen saluting Air Force One as it takes off.
1. Local Adjustments
Aurora HDR 2017 includes some local adjustment features which you are used to seeing in non-HDR software, like Lightroom or ON1. It includes things like gradient filters, radial filters, and the new Zone System Luminosity Masking. These are all powerful tools to make unique changes to specific areas of a photograph. The beauty is that any edits made to those local areas do not impact any other region of the image.
One local adjustment feature often overlooked is the Top & Bottom Adjustment module. It’s like the gradient tool but has a few sliders specific to this module. It includes things like exposure, warmth, vibrancy, and contrast. Each of which appears twice; once for the top of the frame and once for the bottom of the frame.
Before
After the Top and Bottom Adjustment.
What makes this even cooler is the quick slider method of changing the gradient smoothing (blend), X or Y axis location of the tool (shift), and the rotation which makes it vertical or horizontal.
Because the standard gradient tool in Aurora HDR 2017 requires you to make adjustments to the mask, having this module makes quick adjustments to a larger local area really quick.

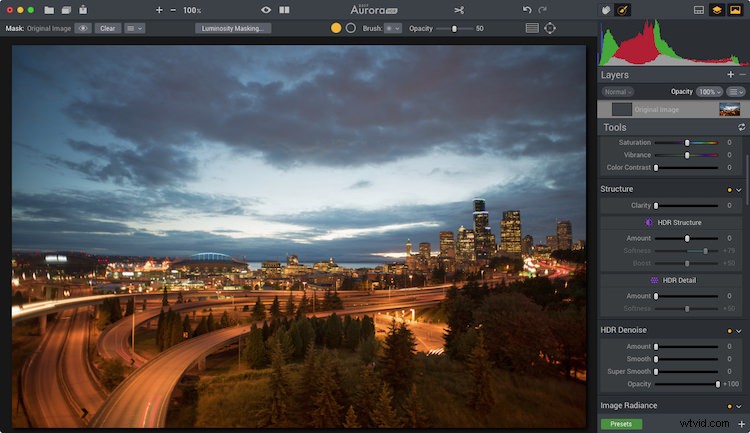
Local adjustments in Aurora HDR 2017
2. Luminosity Masking
Aurora HDR Pro (pre-2017 version) had Luminosity Masking, but it has been improved in the new version.
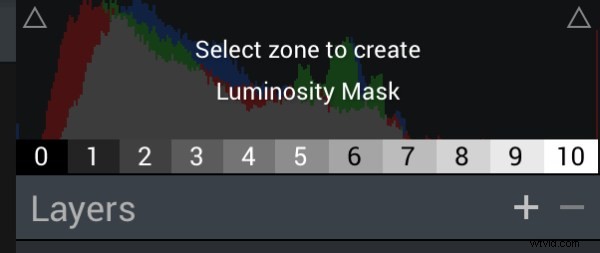
Luminosity Masking is popular in portrait processing, but it’s also useful for other kinds of photography. What MacPhun did in the new version is to take a page out of Ansel Adam‘s book, by adding the Zone System into the Luminosity masking tool. Now you can create a mask based on specific zones of light. And they made it so simple.
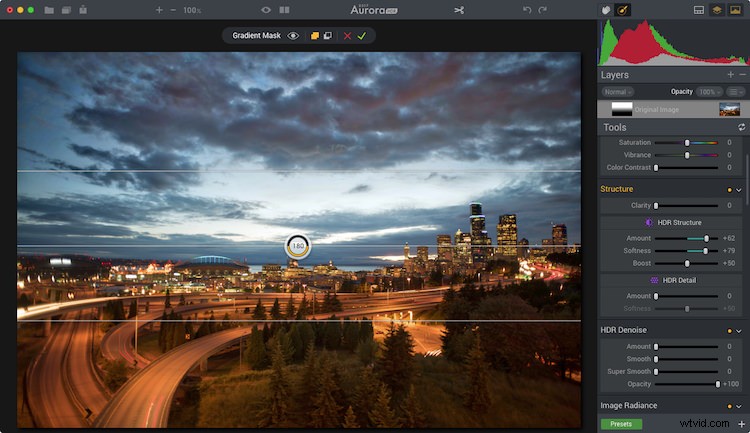
Aurora HDR 2017’s Zone System Luminosity Masking.
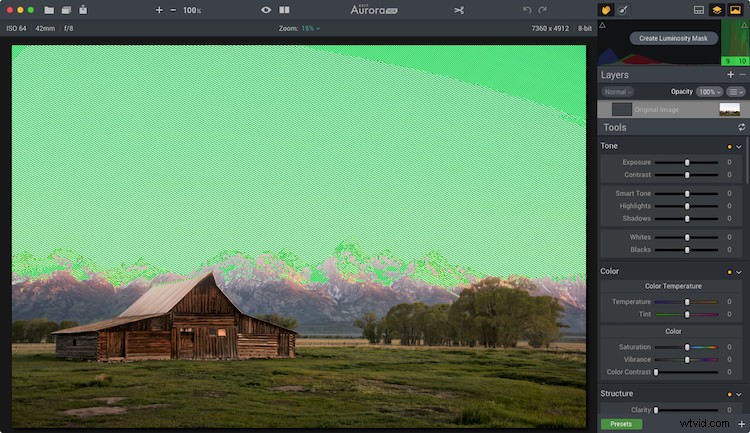
With the Luminosity Mask applied (masking the sky).
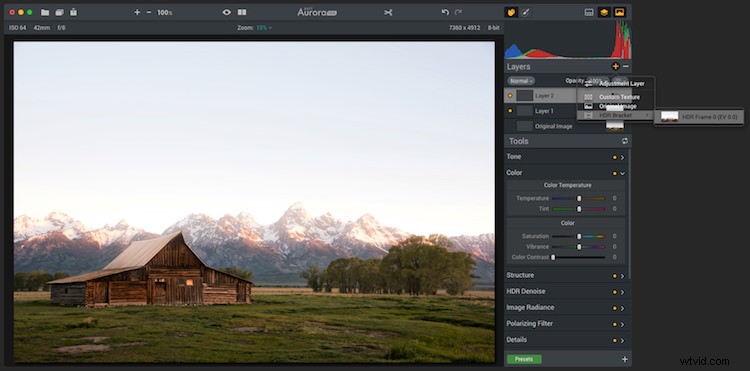
3. Advanced Masking
The layers and masking tools in the software are advanced. When you add a layer, you can do it from a single bracket, a blank slate, and other choices. The options enable you to load any amount many brackets you want, and not process them as HDR, but instead do regular masking and editing.
Masking can be implemented using a Wacom Tablet and as a radial or gradient brush, or using the new zone system tool.
This shows both color toning being combined with a brush mask.
4. Color Toning
Aurora has heavy duty color toning (split toning) features built into the software. Like Lightroom, users can choose a color to tone the highlights and shadows individually. But Aurora goes beyond that by adding highlight protection of the color. That way you can be more strategic on how much of the highlights are affected by the toning. You also have saturation control of the color for both highlights and shadows.
Like Lightroom, Aurora provides the ability to adjust the balance of the color tone. To add more or less color in either the highlights or shadows. Of course, there is also an amount slider which enables you to reduce the impact of the color on the complete photo.
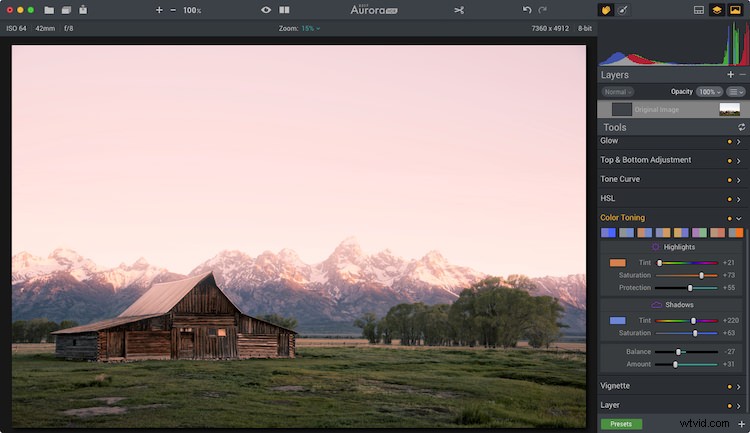
Color toning applied.
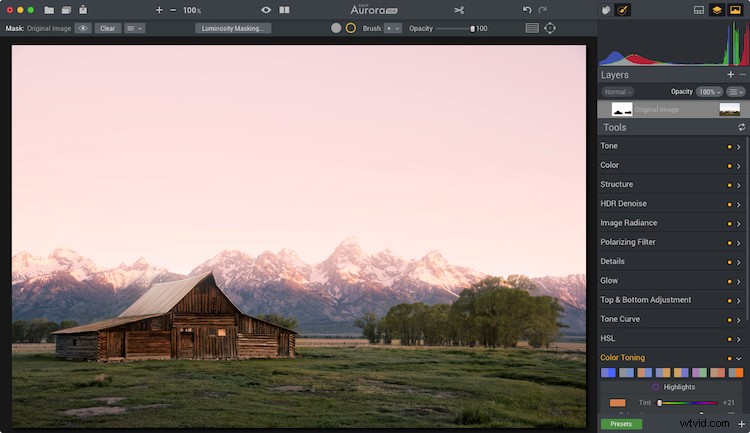
Mask applied to keep the color toning off the roof of the barn and other areas.
There are also a variety of preset color toning swatches included, or you can make your own by making an Aurora HDR 2017 preset. When combining color toning with the masking tools you have some incredible color options.
5. Batch Processing
Batch Processing might sound silly to some but think about it for a moment. Imagine you like one of the editing tools in the software, like the color grading tool, and you want to add that to a large volume of photos. With the batch processing tool, you can do that. You would launch the Batch Processor and then choose the preset and settings you want to be used. So if you want color grading, make a preset with it. Simple!
The way MacPhun does it is you can drop a folder of images and pick what preset you want to use on the photos. It will then run through it quickly without you having to do anything.
So Much More
Aurora HDR 2017 is made for HDR photography. I think that’s obvious by its name. But I think it’s important for photographers to understand when a tool can be beneficial, even when it is least expected.
This software has made its way into my regular rotation of post-processing tools. The reason is that when using a tool with a different user experience and features my creativity expands. Doors are opened which were once closed, and I walk away with fun edits of photographs I once didn’t know if I would touch.
Not the end!
If you have made it to the end and wanted one more takeaway, here goes.
My last piece of advice for you is this – go for it and try something new. Even if it’s not this software or the next. If you don’t try, you won’t learn and grow. But really, as a wise green man once said, “Do or do not, there is no try.”