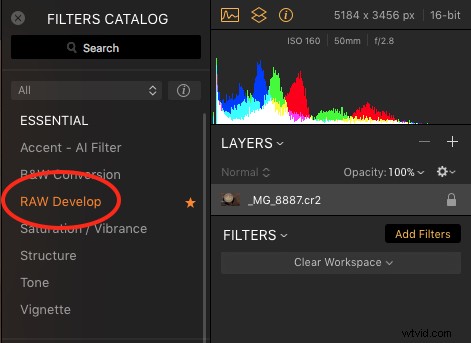
One of the most powerful new filters in Luminar 2018 is the RAW Develop Filter. RAW files, straight out of the camera, appear flat and boring, but with capable RAW conversion software like Luminar 2018, you can transform the RAW data into a detailed and vibrant photograph.
Luminar 2018’s RAW handling has seen significant improvements over previous versions. It performs faster and the tools in the RAW Develop Filter reveal additional details in the highlights and shadows, display more accurate color, and reduce noise.
LUMINAR 2018’S RAW DEVELOP FILTER
The RAW Develop filter is organized into three categories:
- Adjust – Essential Color and Tone Adjustments.
- Lens – Remove Image flaws caused by the lens.
- Transform – Correct perspective issues caused by the camera’s physical position.
These three tool sets form a powerful triad for correcting many of the problems encountered with unprocessed RAW image files.
QUICK TIP: JPG Shooters get access to the same tools in the Develop Filter.
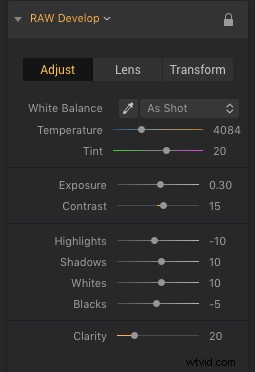
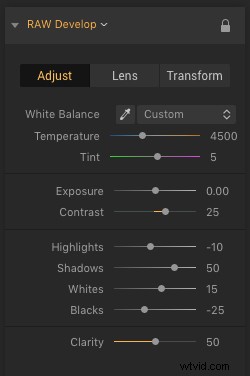
ADJUST
The Adjust tab inside the RAW Develop filter contains fundamental color and tone adjustments. Settings include:
- White Balance – Choose from white balance presets that are similar to the settings in your camera.
- Temperature – Warm up (yellow) or cool down (blue) the color temperature of the photo.
- Tint – Correct color casts by adding magenta or green.
- Exposure – Adjust the overall luminance of the photograph.
- Contrast – Adjust the overall contrast of the photo.
- Highlights – Adjust the brightness of the brightest areas of the photo.
- Shadows – Adjust the brightness of the darkest areas of the photo.
- Whites – Adjust the white point of the histogram and white tones in the photo.
- Black – Adjust the black point of the histogram and black tones in the photo.
- Clarity – Adjust mid-tone contrast.
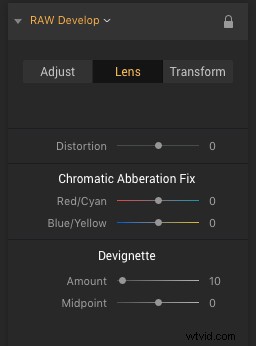
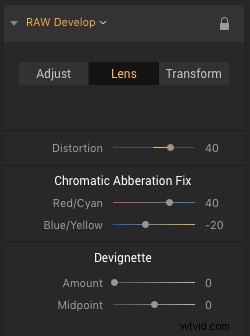
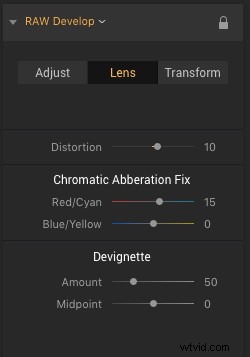
LENS
The Lens tab in the RAW Develop filter allows you to fix flaws caused by the lens. Settings include:
- Distortion – Correct barrel or pincushion distortion.
- Chromatic Aberration Fix – Correct for color fringing along high contrast areas.
- Devignette – Remove darkened edges caused by lens vignetting.
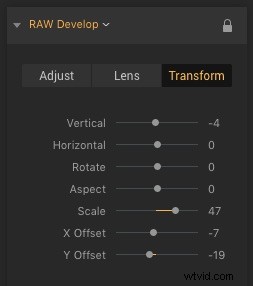
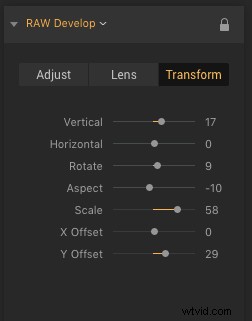
TRANSFORM
The Transform tab in the RAW Develop filter allows you to compensate for perspective problems caused by the position of the lens at the time of capture. Settings include:
- Vertical – Tilt the image forward or backward on the X-axis (helpful with key-stoning).
- Horizontal – Tilt the image right or left on the Y-axis (helpful when shooting at an angle from the subject).
- Rotate – Useful for straightening a photo.
- Aspect – Expand the height or width while contracting the opposite direction.
- Scale – Use to hide the edge gaps after transforming a photo.
- X Offset – Shifts the image left or right.
- Y Offset – Shifts the image up or down.
HOW TO PROCESS RAW IMAGES IN LUMINAR 2018
Open your photograph in Luminar, navigate to the Add Filter button and click on RAW Develop in the ESSENTIAL category. The interface is intuitively designed, suggesting the order in which to make your adjustments:
- Step 1 – Adjust
- Step 2 – Lens
- Step 3 – Transform
EXAMPLE 1

RAW/Unprocessed (© Angela Andrieux)
Straight out of the camera, the photo above was somewhat flat and slightly underexposed.

After Luminar 2018 RAW Develop: Adjust + Lens (© Angela Andrieux)
In the Adjust tab of the RAW Develop filter, small adjustments to the Exposure, Contrast, Highlights, Shadows, Whites, Blacks, and Clarity make subtle, but noticeable, improvements to the photograph.
In the Lens tab of the RAW Develop filter, a small adjustment was made to remove the lens vignette from the corners.
EXAMPLE 2
RAW/Unprocessed (© Angela Andrieux)
The photo above, in its unprocessed state, has blown out highlights, an unpleasant pink color cast, barrel distortion, and a slightly awkward perspective.
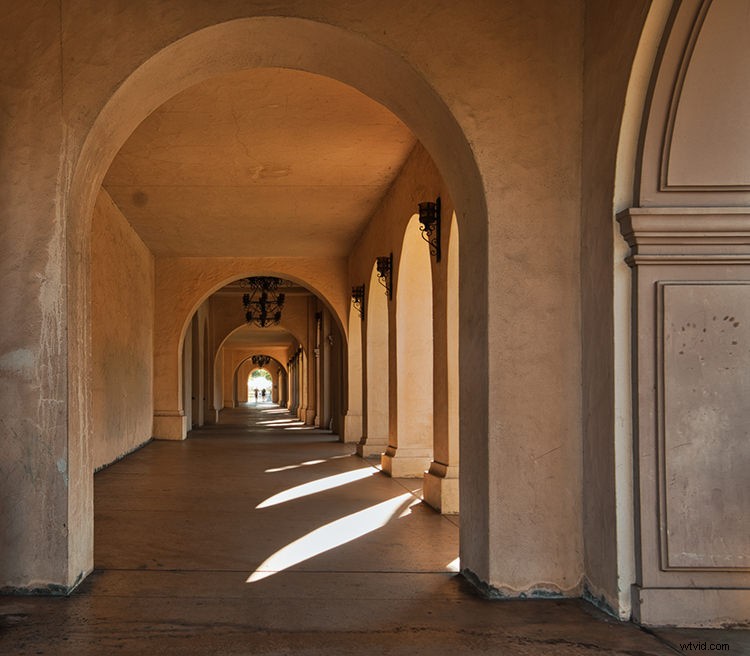
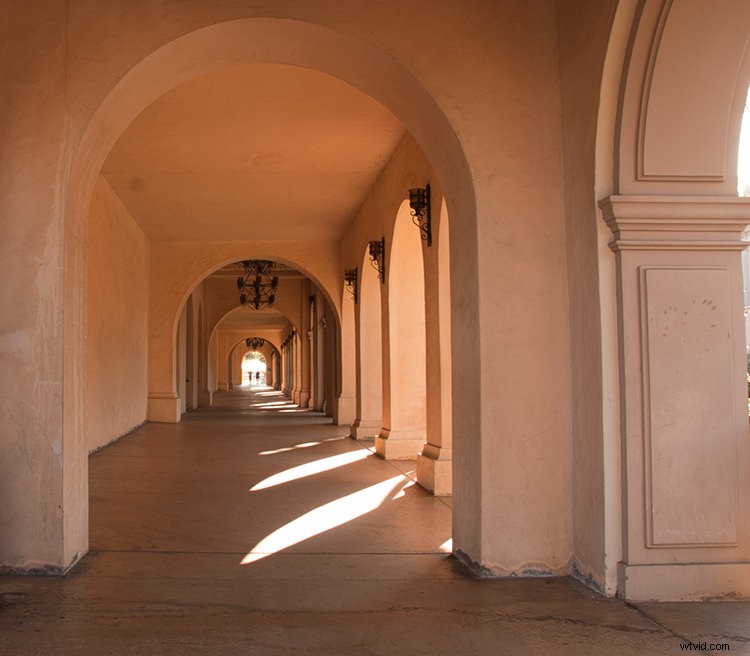
After Luminar 2018 RAW Develop: Adjust + Lens + Transform (© Angela Andrieux)
With the help of the Adjust panel in the RAW Develop Filter, the color cast was removed, the highlights were toned down with some detail recovered, and architectural details were enhanced.
The Lens panel in the RAW Develop filter fixed a slight lens distortion and removed chromatic aberrations.
This photograph had significant chromatic aberrations in the high contrast areas. Notice the patches of sunlight in the “Before” image below – each sunlit spot has a greenish fringe around the top and a magenta fringe at the bottom. The Chromatic Aberration Fix sliders did a great job of minimizing the unwanted color fringe.
QUICK TIP: Zoom in to 200-300% to check for chromatic aberrations in high contrast areas.
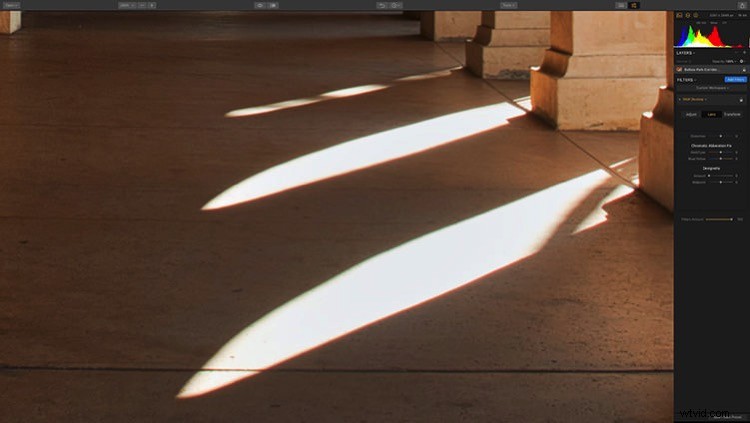
Before Luminar 2018 RAW Develop Lens Correction (zoomed to 200%) (© Angela Andrieux)
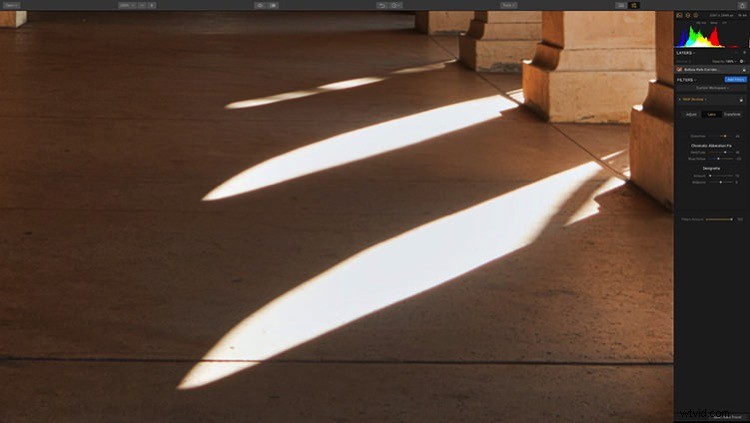
After Luminar 2018 RAW Develop Lens Correction (zoomed to 200%) (© Angela Andrieux)
The Transform panel in the RAW Develop filter corrected for a slight upward tilt of the camera when the photo was captured and straightened the vertical lines.
EXAMPLE 3

RAW/Unprocessed (© Angela Andrieux)
The unprocessed RAW photo above has a color cast, is underexposed, lacks detail and contrast, and has both lens distortion and perspective issues caused by a wide-angle lens. The tools in Luminar 2018’s RAW Develop filter corrected each of these issues.
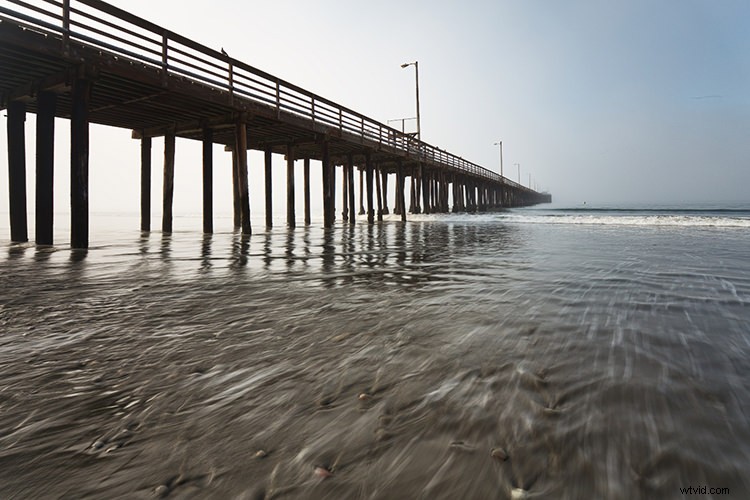
After Luminar 2018 RAW Develop: Adjust + Lens + Transform (© Angela Andrieux)
The Adjust tab of the RAW Develop filter corrected the color cast and white balance issues, increased the exposure, added contrast and brought out detail in the shadows under the pier and movement in the water.
The Lens tab of the RAW Develop filter made easy work of correcting the substantial lens vignetting, removing some barrel distortion, and cleaning up the chromatic aberrations around the pier pilings (high contrast areas).
The Transform tab of the RAW Develop filter straightened the horizon and the legs of the pier, correcting for both the position of the camera and the distorting effect of a wide-angle lens.
Conclusion
Each example above shows the power of the RAW Develop Filter in Luminar 2018. A RAW image file contains an abundance of data, but it takes a skilled photographer and a high-quality RAW conversion tool like Luminar 2018, to turn those files into beautiful photographs.
LUMINAR 2018 HOLIDAY SPECIAL OFFER
Ready to transform your RAW files into amazing photos? Visit Luminar 2018 until December 31 to take advantage of the holiday offer!
Get Luminar with an awesome pack of bonuses, plus get an extra $10 OFF with the coupon code: DIGITALPHOTOGRAPHYSCHOOL.
Disclaimer: Macphun, soon to by Skylum, is a paid partner of dPS.