
When you capture footage with a smartphone, DSLR, or webcam, the lighting conditions can shift the color palette, leading to a video that looks washed out or overly warm. Color correction is therefore a critical step in video editing, and applying filters online is one of the fastest ways to achieve a balanced, professional look without installing heavyweight software.
Filters not only correct color imbalances but also help you set a specific mood—whether you want a vibrant sunset vibe or a muted, cinematic tone. In this guide, we’ll walk you through five reputable online tools that let you apply filters instantly and export your finished video in the format you need.
In this article
- Way 1. Use Clideo Filter Editor
- Way 2. Veed.io Video Filters
- Way 3. Clipchamp Video Filter Editor
- Way 4. FlexClip Video Filter Editor
- Way 5. Kapwing Filter Video Editor
Way 1. Clideo Filter Editor
Clideo’s Filter Editor is a lightweight, browser‑based solution that delivers a wide range of presets with instant previews. Its intuitive interface makes it suitable for beginners and professionals alike.
Security is a priority—your files are encrypted during upload, and the platform supports multiple formats. Follow these steps to add a filter:
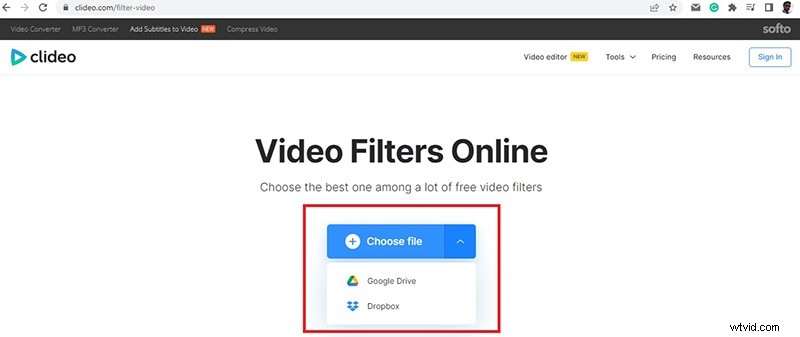
Step 1: Open your browser and visit clideo.com/filter-video.
Step 2: Click Choose File to upload your video from your hard drive, Google Drive, or Dropbox.
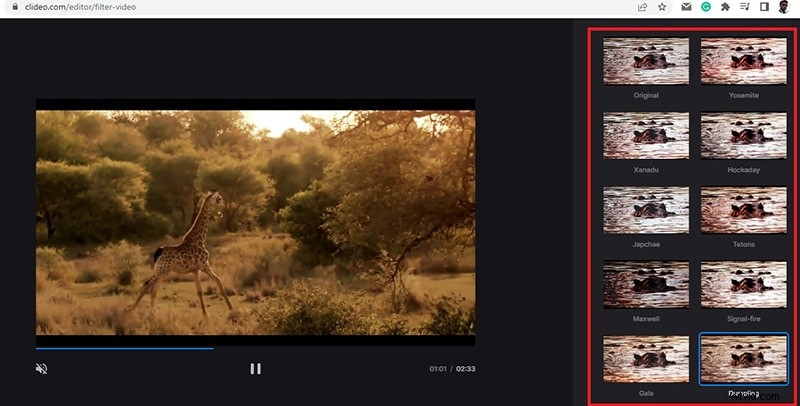
Step 3: After uploading, the filter options appear on the right. Play the video to see real‑time previews.
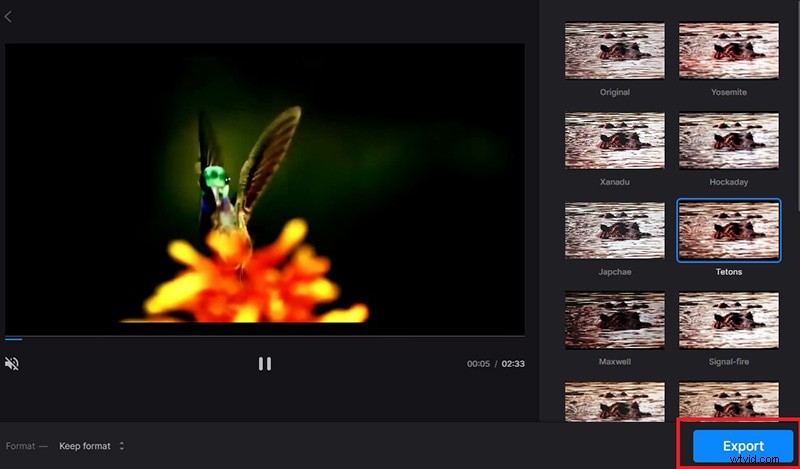
Step 4: Finalize a filter, then click Export to save the modified video to your hard drive.
Way 2. Veed.io Video Filters
Veed.io offers a comprehensive library of color‑grading presets and creative effects that work across most file formats. It’s ideal for social‑media creators who need a polished look in minutes.
Follow the steps below to apply a filter online:
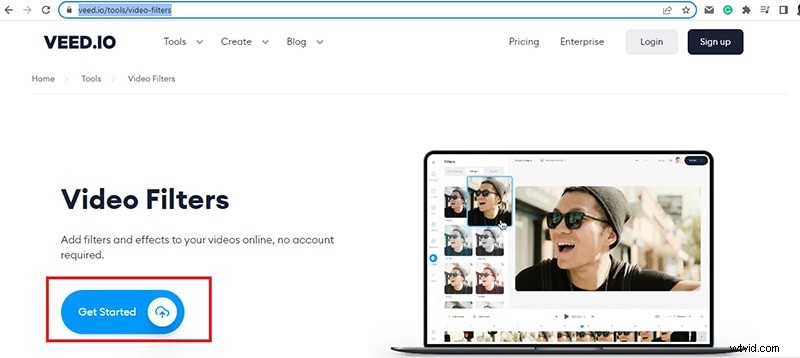
Step 1: Go to veed.io/tools/video-filters and click Get Started.
Step 2: Drag and drop your video file or click Browse to upload.
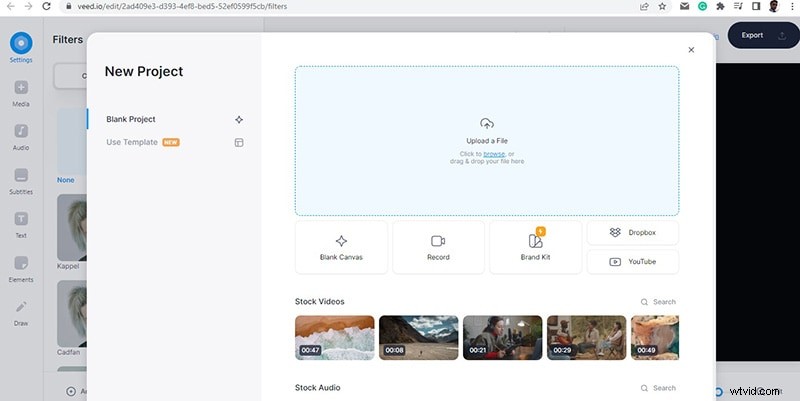
Step 3: On the left, the Color Grading and Effects tabs display the available filters.
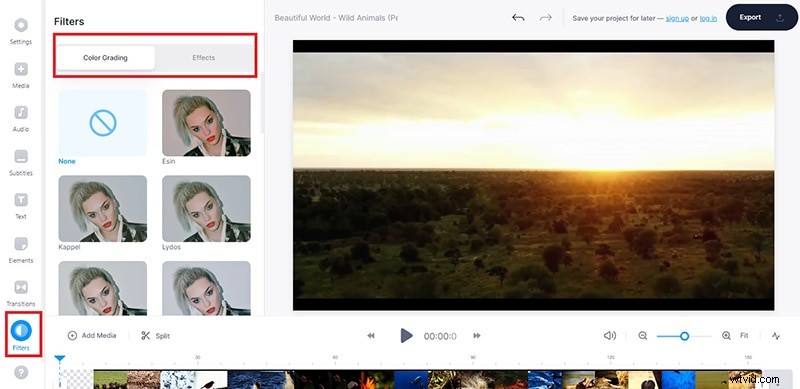
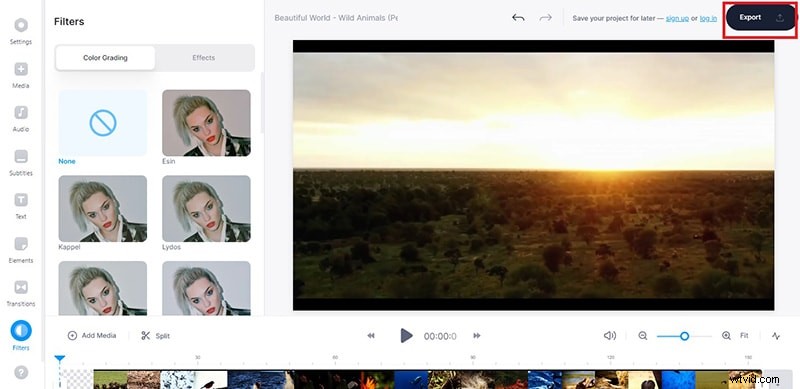
Step 4: Click a filter to preview it live, then hit Export to download the edited video.
Way 3. Clipchamp Video Filter Editor
Clipchamp’s editor combines a robust filter library with a user‑friendly timeline. From outdoor shots to portrait footage, its presets cover every common scenario.
Steps to add a filter:
Step 1: Visit clipchamp.com/en/video-filters-editor and click Create with video filters now.
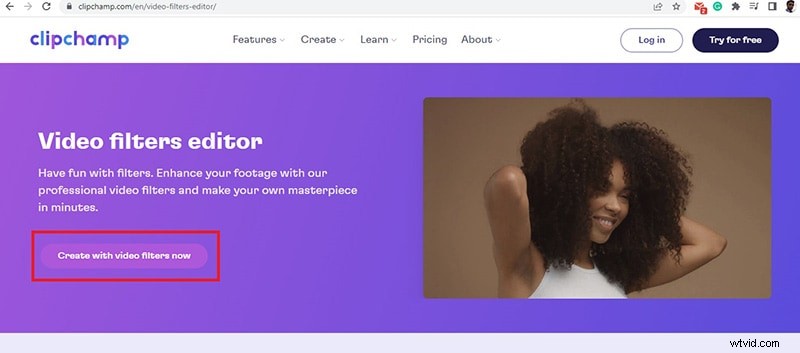
Step 2: Sign up or log in to access the editor.
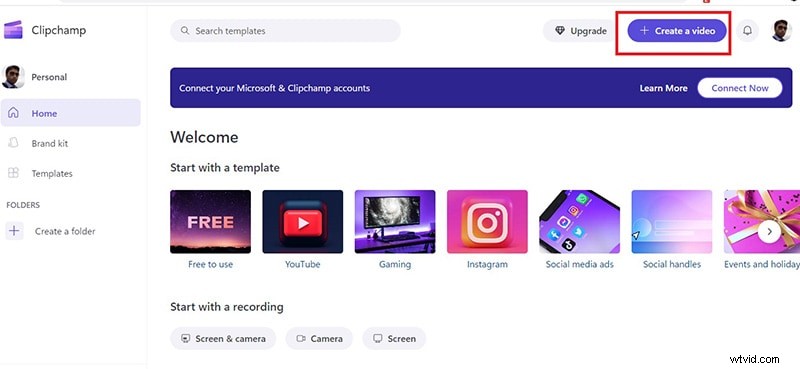
Step 3: Click Create a Video in the dashboard.
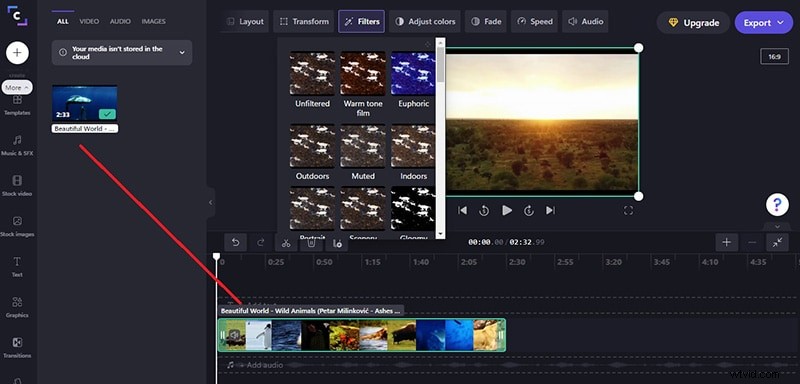
Step 4: Drag your video onto the canvas and then onto the timeline.
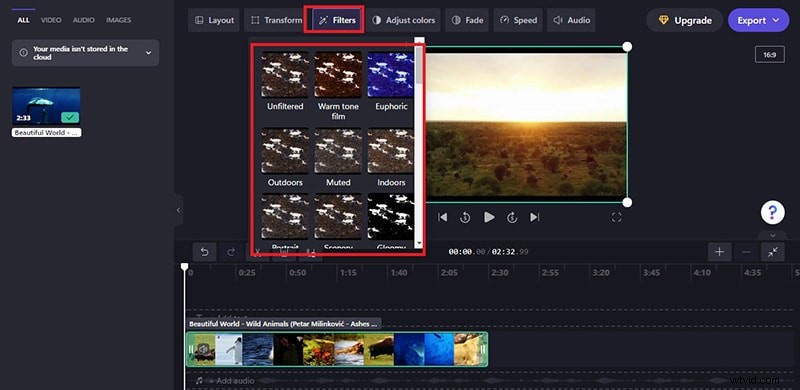
Step 5: Click the Filters button at the top, hover over each preset to preview it, then select the one you like.
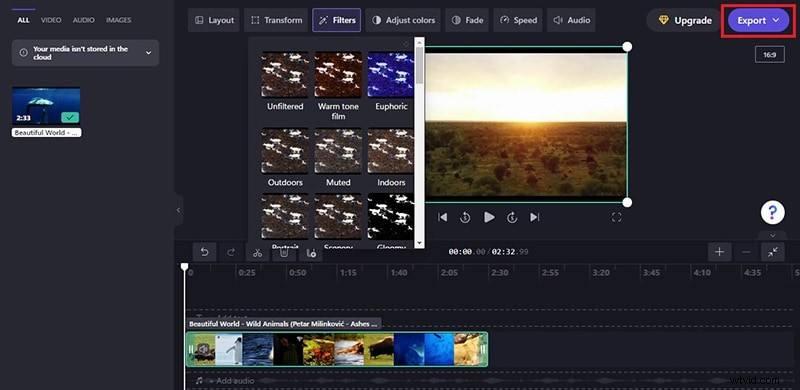
Step 6: Once satisfied, hit Export to render and download the video.
Way 4. FlexClip Video Filter Editor
FlexClip offers a straightforward, cloud‑based editor with over 20 filters. It’s free to use and leaves no watermark on the exported file.
Procedure:
Step 1: Open flexclip.com/tools/filter-video in your browser.
Step 2: Drag and drop your footage into the editor.
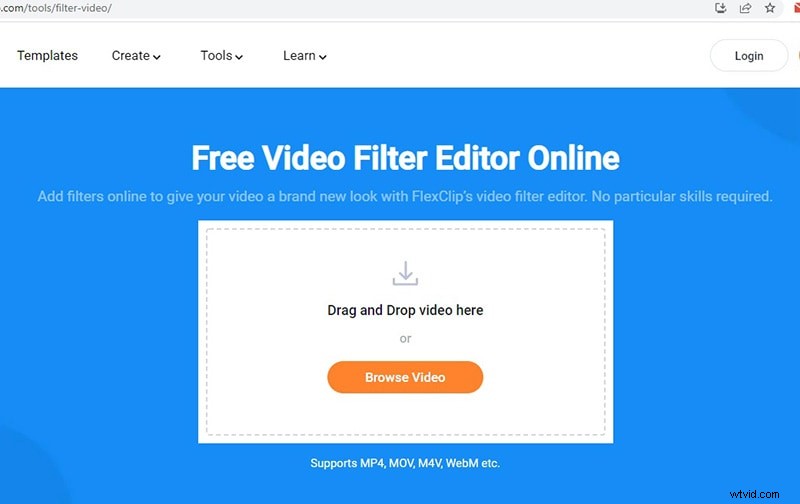
Step 3: All available filters appear on the left panel.
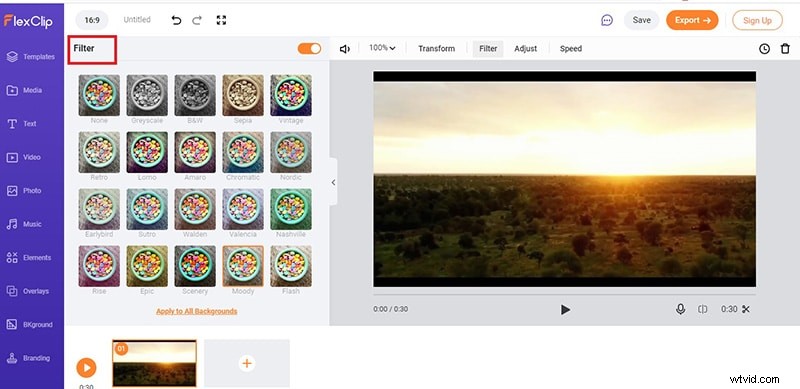
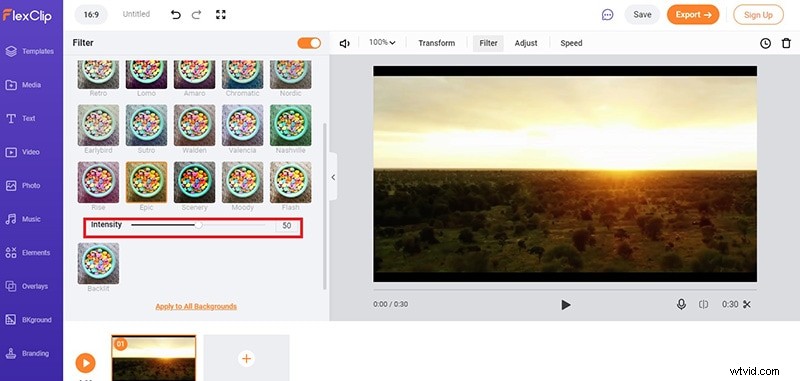
Step 4: Click each filter to apply it and adjust its intensity as desired.
Step 5: When ready, press Export to save the edited video.
Way 5. Kapwing Filter Video Editor
Kapwing is a versatile online editor that supports uploads from local drives and cloud storage. Its filter set covers everything from color grading to brightness adjustments.
Steps to use Kapwing:
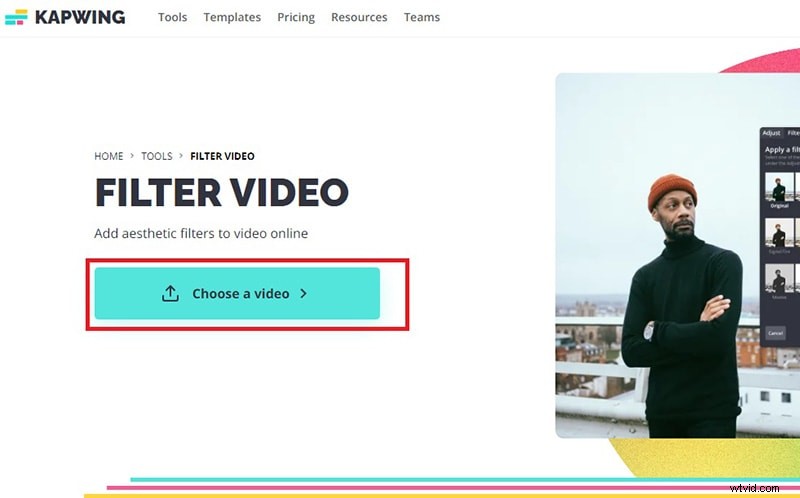
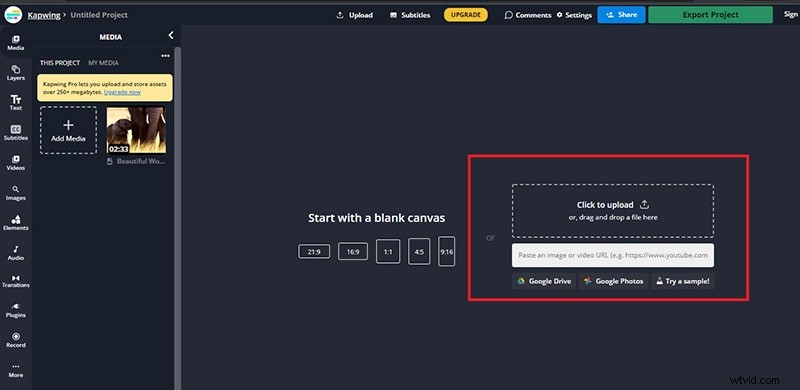
Step 1: Go to kapwing.com/tools/filter-video and click Choose a video.
Step 2: Drag and drop your file, or paste a Google Drive/Photos URL.
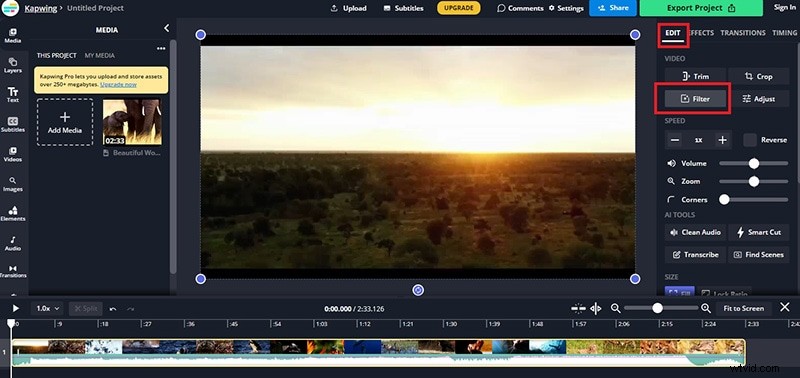
Step 3: Click the video, then open the Edit tab and select Filters under the Video section.
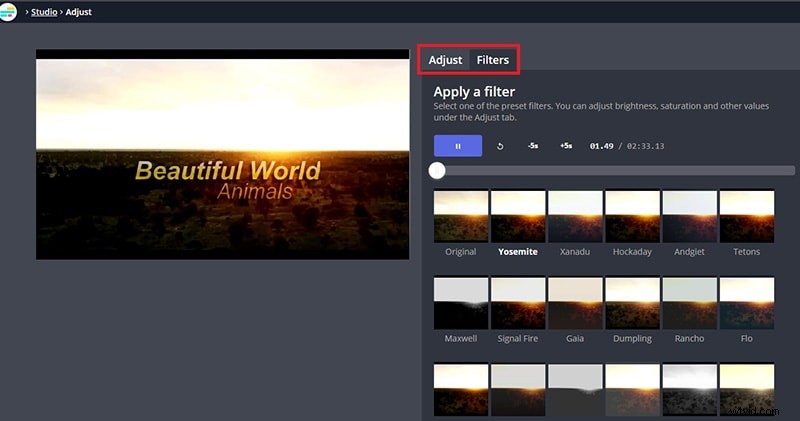
Step 4: Browse the presets, click to preview, and use the Adjust tab to fine‑tune.
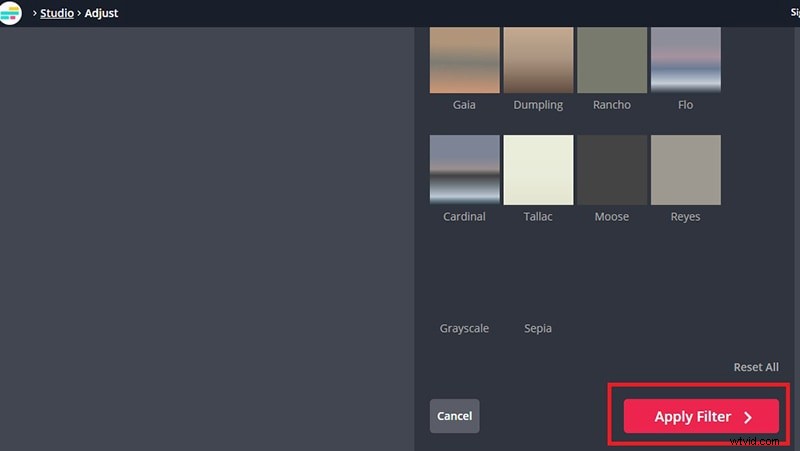
Step 5: Click Apply Filters, then hit Export Project to download.
Conclusion
Whether you’re polishing a quick vlog or preparing a polished commercial, online filter editors give you instant, high‑quality results without the overhead of desktop software. Try the tools above to find the one that best matches your workflow. If you eventually need a dedicated editor with advanced features, consider Wondershare Filmora.