
In this tutorial, we’ll walk you through Lightroom’s Adjustment Brush tool, the go‑to method for precise, local edits. For those seeking a quick solution, try our Cole’s Classroom adjustment brush presets—now on sale! Click here.
Have you ever had a photo that needed selective adjustments—some areas brightened, others toned down—while leaving the rest untouched? The Adjustment Brush is designed exactly for that. It lets you paint edits onto specific parts of an image, giving you granular control over your final result.
What is the Adjustment Brush Tool?
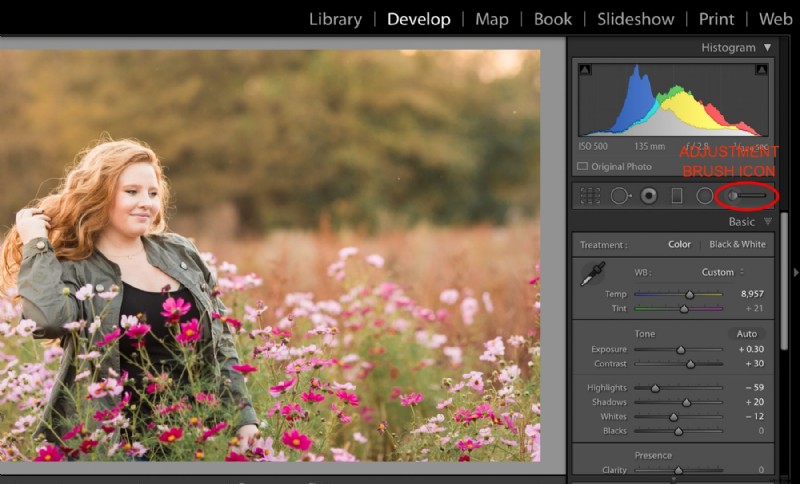
The Adjustment Brush in Lightroom Classic allows you to apply any of the Develop module sliders to only the areas you paint. After selecting the brush icon (or pressing K) you choose the sliders you want to tweak, then brush over the image. When finished, click “Done” in the preview window.
Adjustment Brush Presets
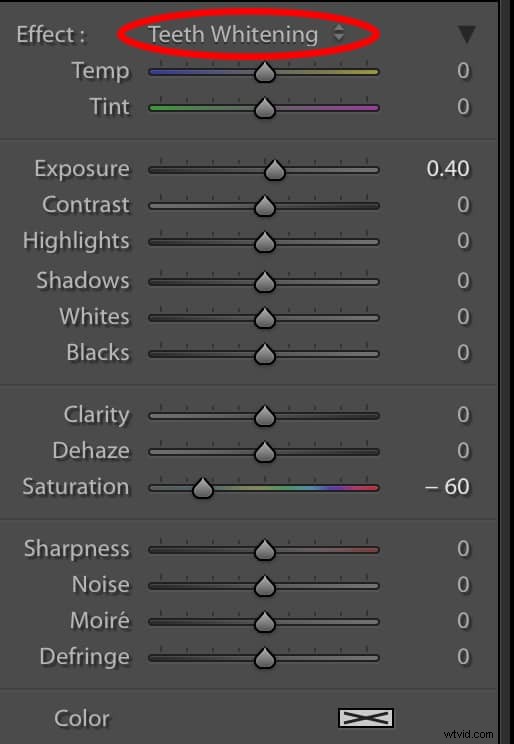
Lightroom presets are pre‑saved settings that let you apply consistent adjustments quickly. You can access brush presets from the drop‑down menu in the Adjustment panel—different from the global presets that affect the entire image.
Special Offer: Add “wow factor” and retouch photos without Photoshop in just three clicks—even if you’re new to editing. Join 54,000 photographers who trust our Polished Lightroom Adjustment Brushes Presets Collection and get them now at 80% off.
Brush Options
Lightroom Classic lets you work with two independent brushes (Brush A and Brush B) and radial filters. Each brush can have its own size, feather, and flow (opacity). Toggle between them with the / key.
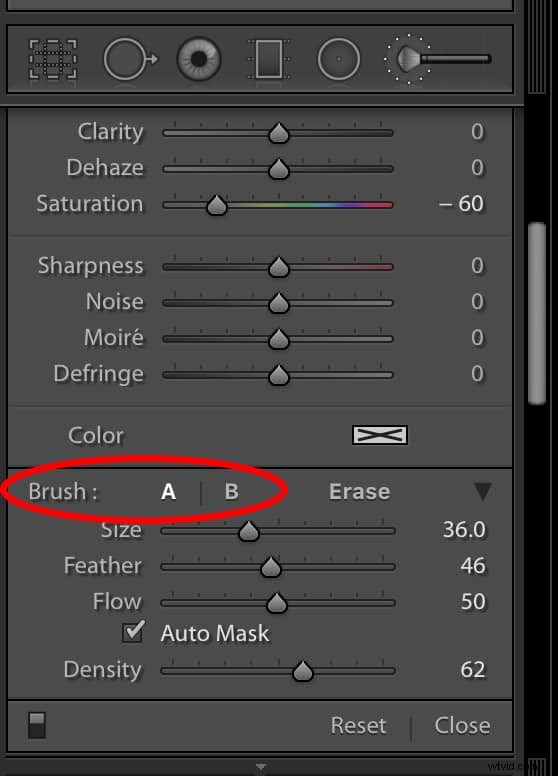
Using the Lightroom Adjustment Brush
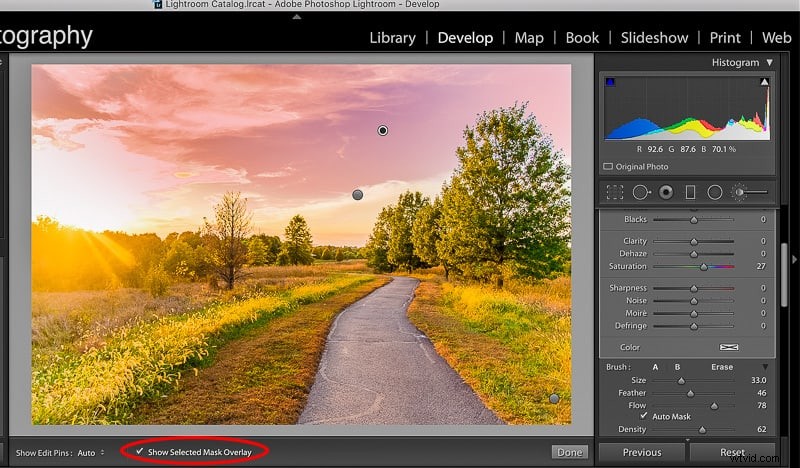
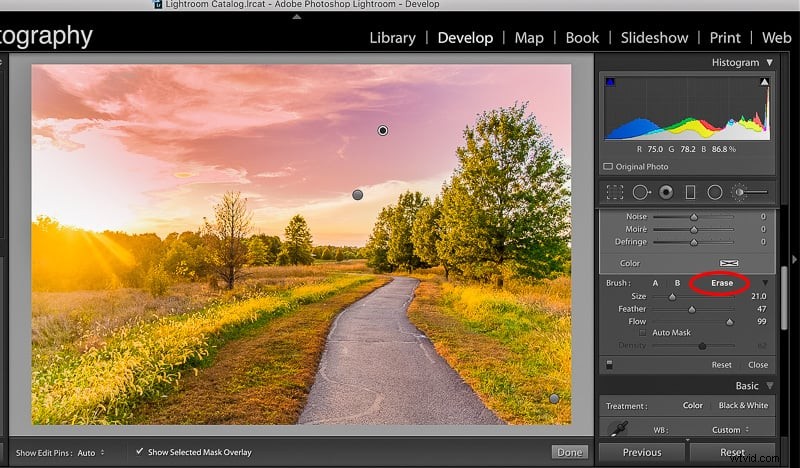
Seeing Where You’ve Brushed: Enable “Show Selected Mask Overlay” to view red outlines of the brushed areas. The pin for the active brush will have a black center.
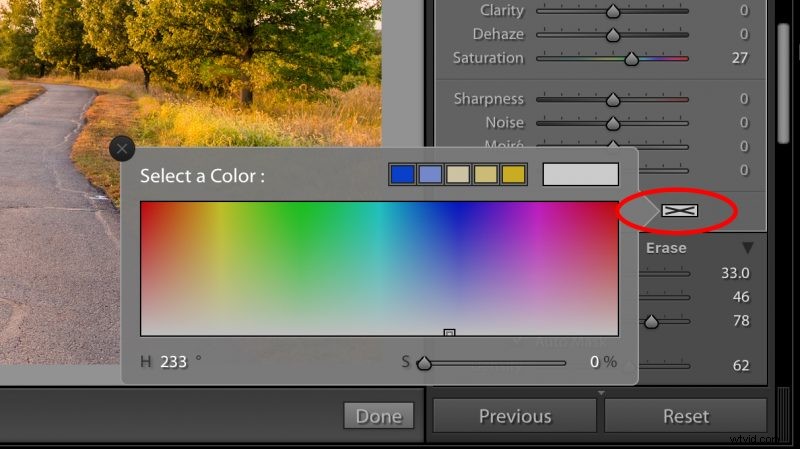
Brush with Color: Select a target color at the bottom of the brush panel to emphasize that hue—great for enhancing eyes, landscapes, or any specific element.
Changing Brush Size: Adjust the size via the slider, trackpad pinch, mouse wheel, or bracket keys.
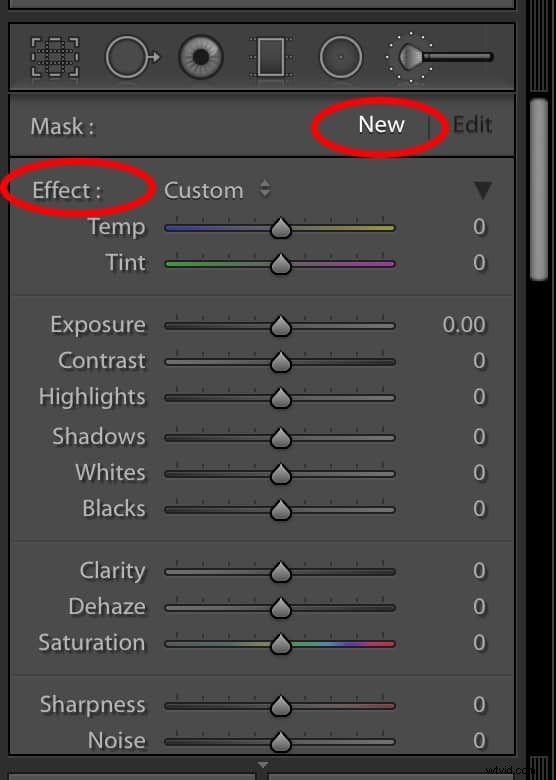
Starting a New Brush: Click New to begin a fresh adjustment. Double‑click Effect to reset all sliders, or choose a preset from the drop‑down.
Erasing Mistakes: Hold Option (Mac) or Alt (PC) to switch to the eraser (minus sign). To delete an entire brush, select it (pin with black center) and press Delete.
Special Offer: Add “wow factor” and retouch photos without Photoshop in just three clicks—even if you’re new to editing. Join 54,000 photographers who trust our Polished Lightroom Adjustment Brushes Presets Collection and get them now at 80% off.