Audio editing accounts for half of a video‑editing workflow. When the timeline is cluttered with numerous media tracks, the process can become confusing. Isolating the soundtrack allows you to focus on sound without affecting the video.
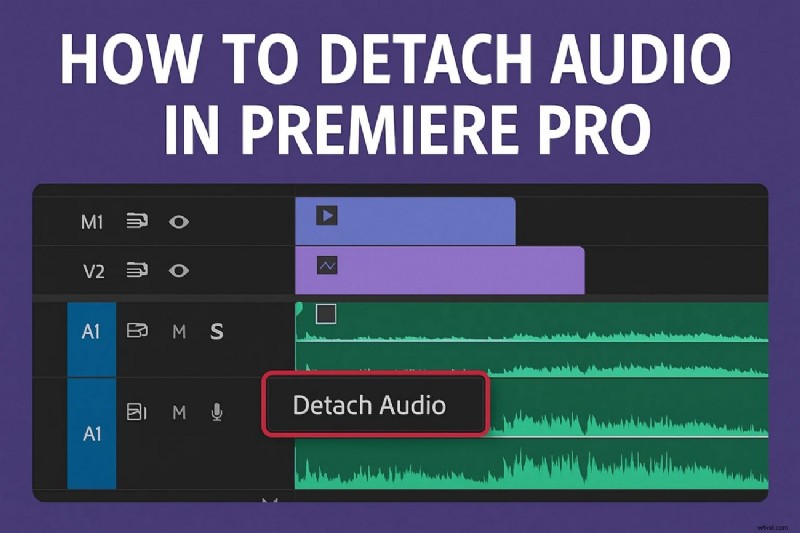
How to Detach Audio in Premiere Pro
Premiere Pro offers two reliable methods for separating audio from video: exporting audio only and unlinking the audio track. Both techniques give you full control over the audio clip once it’s isolated.
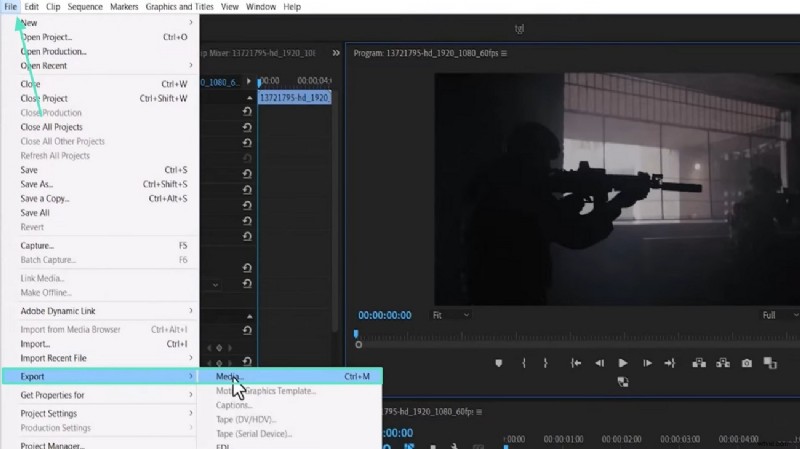
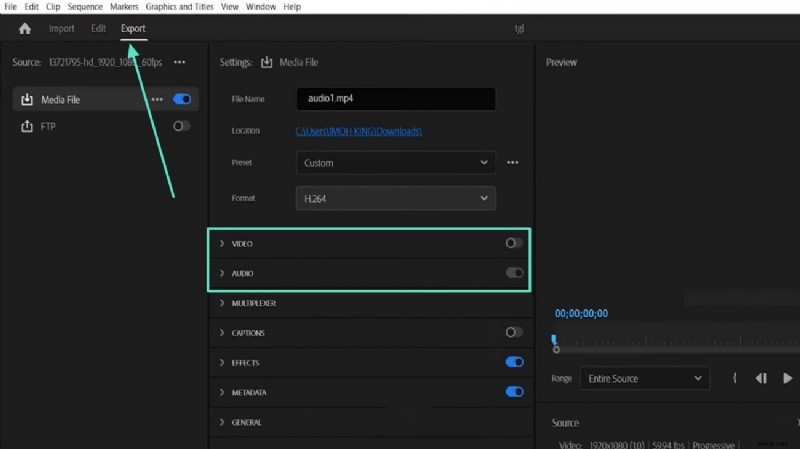
Method 1: Export Only the Audio
- Open the File menu and select Export > Media to launch the Export Settings dialog.
- In the dialog, uncheck the Video checkbox, then choose Format: MP3 (or another audio format).
- Click Export to save the audio file separately.
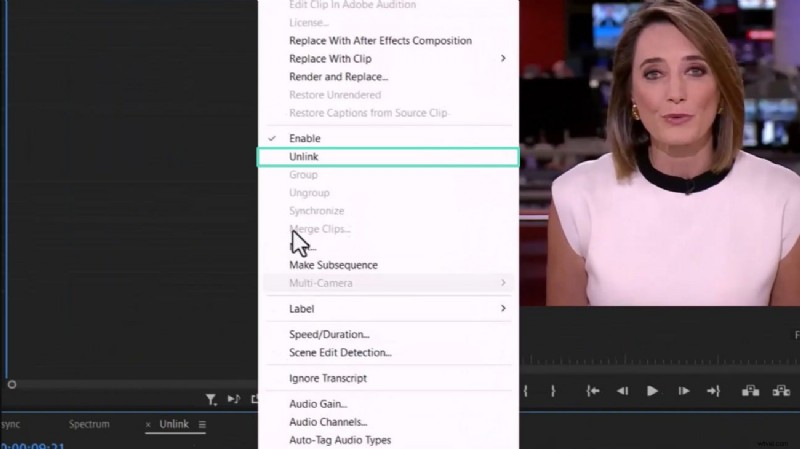
Method 2: Unlink the Audio Track
- Select the video clip on the timeline, press and hold Alt, then drag to create a duplicate that contains only audio.
- Right‑click the duplicated audio clip and choose Unlink to separate it from the video.
- You can now move, trim, or apply effects to the audio independently.
Alternative: Detach Audio with Wondershare Filmora
For beginners or those looking for a more intuitive interface, Filmora provides a quick way to isolate audio without extensive technical knowledge.
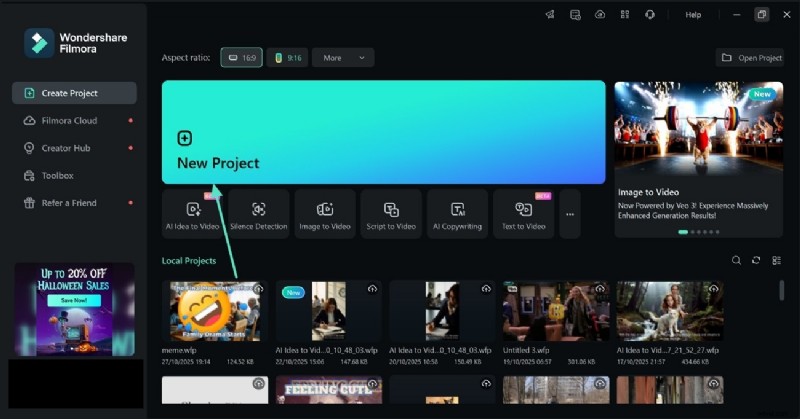
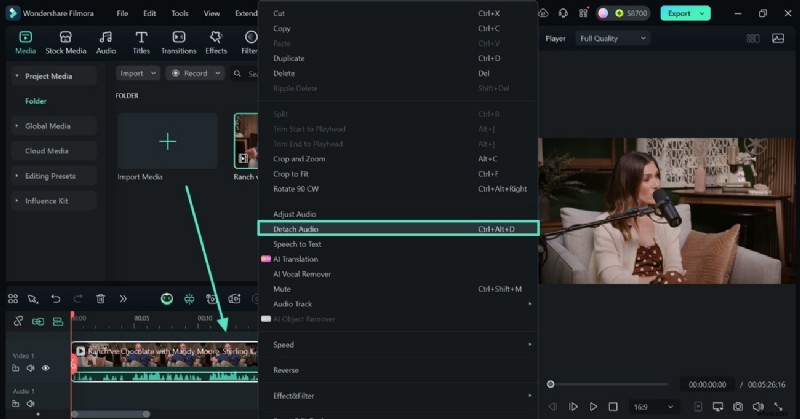
Method 1: Detach Audio from the Timeline
- Start a new project and import your video.
- Drag the clip to the timeline, right‑click it, and select Detach Audio. The audio and video become separate tracks.
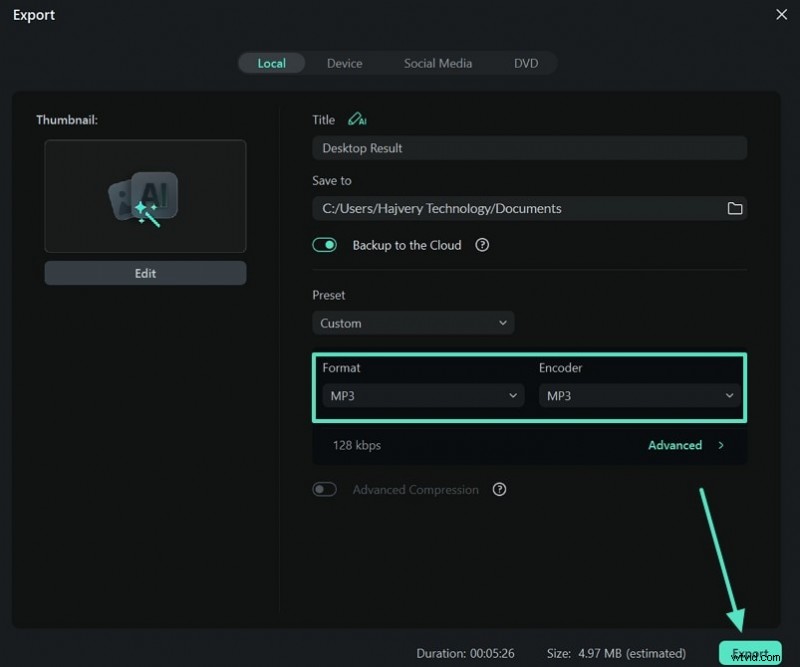
Method 2: Export Audio Only
- Click Export in Filmora’s toolbar.
- In the export window, choose an audio format (MP3, WAV, etc.) and click Export to save the audio file.

Why Detach Audio Matters
Separating audio enables precise editing: you can adjust levels, apply noise reduction, or sync new soundtracks without touching the visual elements. Premiere Pro is powerful for professionals, while Filmora offers a lightweight, beginner‑friendly alternative.