If you’re looking to create polished videos without hiring a professional editor, Windows Movie Maker 2012 offers a cost‑free, user‑friendly solution. It’s packed with intuitive tools that let you combine photos, audio, and video clips into a seamless final product—all from the comfort of your own home.
Because Windows Movie Maker 2012 was included in the discontinued Windows Essentials suite, it remains available for download from Microsoft’s official site. Below is a clear, step‑by‑step guide to get you from download to finished video in no time.
Table of Contents
- Key Features of Windows Movie Maker 2012
- How to Download and Install Windows Movie Maker 2012
- Getting Started: Editing Your First Video
- Alternative Video Editors for Windows PCs
- Conclusion
1. Key Features of Windows Movie Maker 2012
Windows Movie Maker 2012 delivers a range of features that rival many paid editors:
- Photo & Video Import – Supports a wide variety of file formats, making it easy to assemble a storyboard from your personal media library.
- Audio Integration – Add background music or narration from your hard drive, or download tracks directly from the web.
- Live Recording – Record webcam footage and microphone audio on the fly, then edit it right within the project.
- Timeline Editing – Drag and drop clips, reorder scenes, and trim footage using precise start/end points.
- Effects & Transitions – Apply a range of image effects and smooth transitions to give your video a professional polish.
- Credits & Titles – Insert opening and closing credits or custom titles to frame your story.
2. How to Download and Install Windows Movie Maker 2012
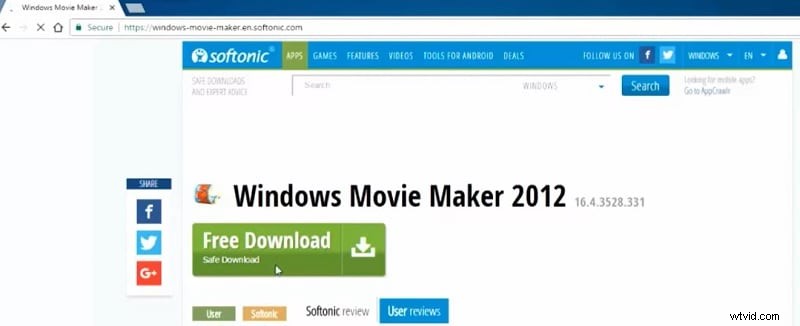
Although Windows Movie Maker 2012 is no longer sold as a standalone product, it can still be downloaded as part of the Windows Essentials suite. Follow these steps:
- Visit the Microsoft Windows Essentials download page and click the download button.
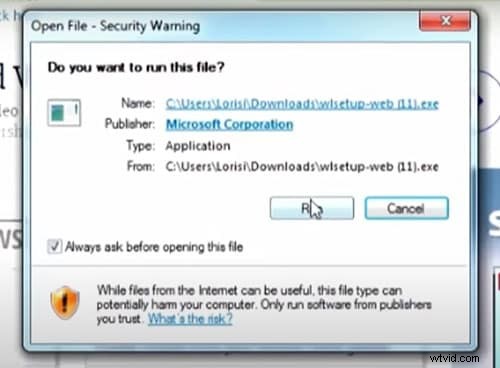
- Run the downloaded installer from your Downloads folder.
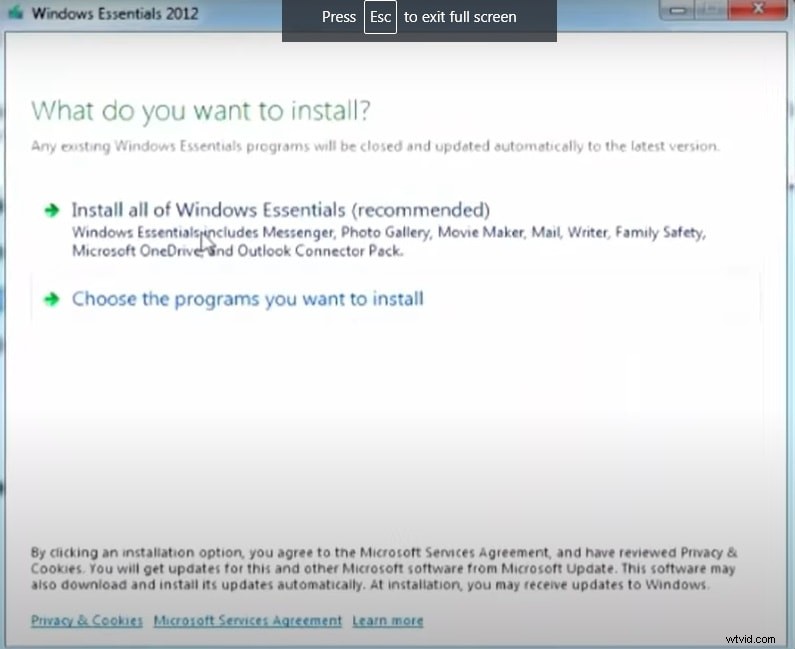
- When prompted, select Install all Windows Essentials to ensure Movie Maker is included.
- Complete the installation and launch Windows Movie Maker 2012 from the Start menu.
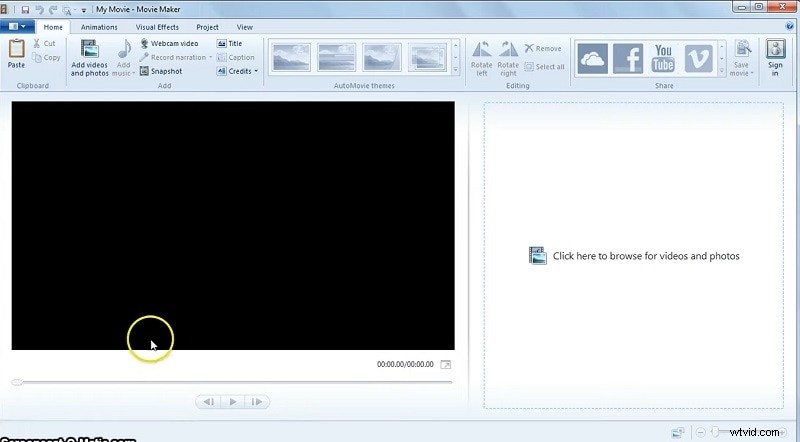
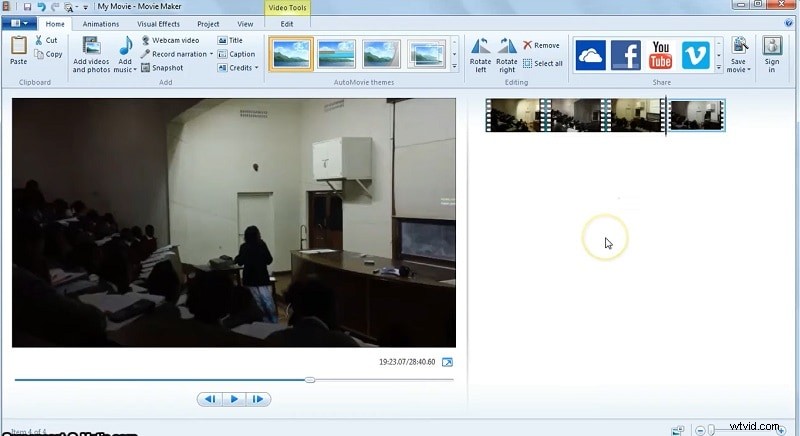
3. Getting Started: Editing Your First Video
Once installed, you can begin editing almost immediately. Here’s a quick workflow:
- Drag media files from your computer into the Storyboard area.
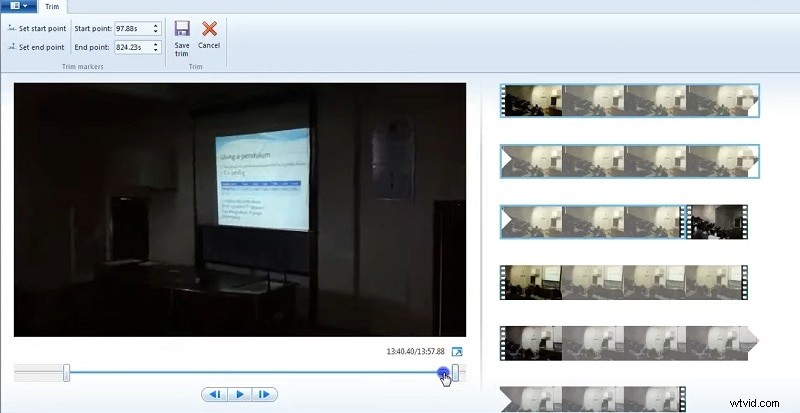
- Use the Trimming tool to remove unwanted sections: select the clip, set start and end points, or split the clip.
- Apply Transitions between clips for a smooth visual flow.
- Add Titles and Credits where desired.
- Preview your project and make any final adjustments.
- When satisfied, click Save Movie to export in your chosen format.
4. Alternative Video Editors for Windows PCs
If you’re exploring other free options, consider Filmora. It offers:
- Intuitive drag‑and‑drop editing.
- Audio‑video sync for crisp sound.
- Extensive transition and effect libraries.
- Easy title creation and image‑effects tools.
Download Filmora from its official site and follow a similar editing workflow: plan your sequence, trim clips, add transitions, titles, and effects, then export your finished video.

Conclusion
Windows Movie Maker 2012 remains a solid choice for anyone needing a free, straightforward video editor. With its range of features, you can produce high‑quality videos without technical expertise. Whether you stick with Movie Maker or try alternatives like Filmora, the key is to experiment, practice, and enjoy the creative process.