Have you ever found yourself in a similar situation? You're deep into editing a vlog, tutorial, or short film, and you need to cut a clip, tighten a pause, hit a beat, or something else, so you start dragging clip edges by hand. Within minutes, the timeline becomes a tangled mess with stray gaps, out-of-sync audio, and broken transitions. That's where the Premiere Pro Razor Tool comes in. It allows you to place precise cut points quickly and provides exact control over where scenes begin and end.
In this guide, you'll learn what the Razor Tool does, step-by-step usage, time-saving shortcuts, real scenarios for when (and when not) to use it, common pitfalls, and a simpler alternative for fast, clean cutting.
In this article
What Is the Razor Tool in Premiere Pro?
The Razor is a specific timeline tool that cuts a clip into separate segments at the exact frame you click, working much like a surgeon's scalpel. With it, you can cut any clip on the timeline, whether it's a video file, audio file, or an adjustment layer. You can cut one clip, multiple selected clips, or, using a different command, all tracks near the playhead.
You can find it in the toolbar as a Razor icon or press C on your keyboard to switch from Selection to Razor. It's important because these strategic cuts give you precise control for jump cuts, beat edits, isolating moments for transitions, and building rhythmic pacing.
Step-by-Step: How to Use the Razor Tool
If you want to learn how to use the razor tool in Premiere Pro, just follow the steps.
- Download and install Premiere Pro on your PC or laptop.
- Open Premiere Pro and import a video that you would like to work on. Then, add it to the timeline.
- Click to activate the Razor tool in the timeline menu. You can also type the letter C on your keyboard. That's the Razor tool shortcut in Premiere Pro.
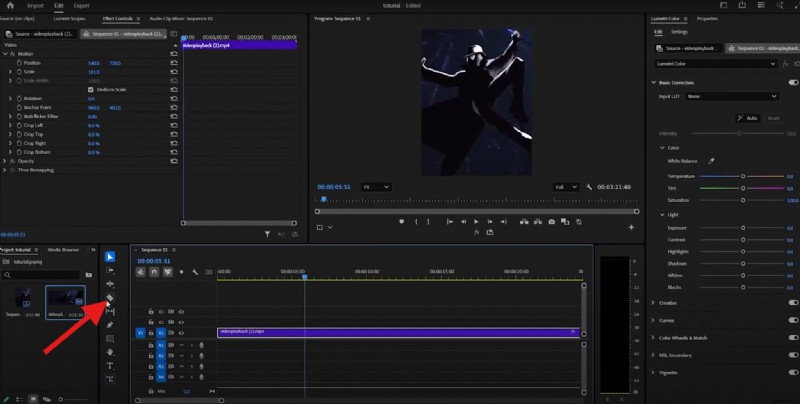
- Now, with the Razor selected, hover over the frame of the video where you want to make the cut and simply click. That will split the video into two parts.
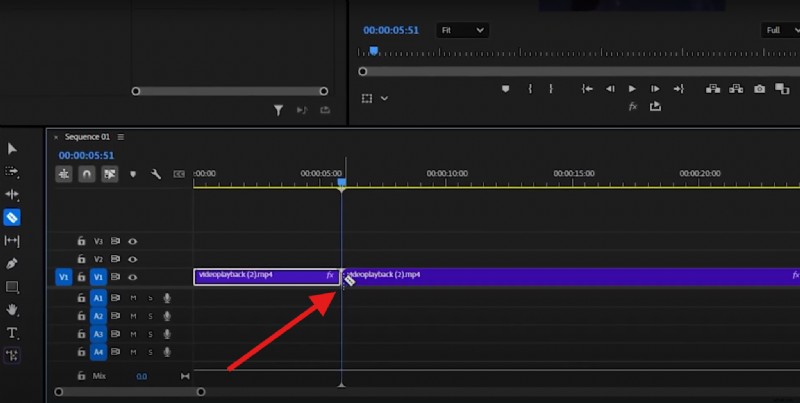
And that's about it. You can then edit the cut video as two separate clips. You can trim them, move them, add effects and transitions, and do so much more. Learn other video editing techniques for Premiere Pro, like the track select tool, J-cut and L-cut in Premiere Pro, three-point editing, and more.
Real Editing Scenarios: When to Use the Razor Tool
Now that you know how to use the Razor tool in Premiere Pro, let's examine some situations where it actually comes in handy.
- You can chop out bloopers in talking-head footage to tighten delivery without re-timing the entire take.
- You can also cut to music beats manually when you want exact frame-level control (or to override auto beat-detection AI mistakes).
- You can create jump cuts for fast-paced edits, which is excellent for education, commentary, TikTok, and TY Shorts.
- The Razor tool can isolate sections, and you can apply speed ramps, zooms, color filters, or directional audio effects to just that specific moment.
- Finally, you can split a long clip into multiple shots and mix in B-roll footage, titles, or other graphics.
Razor Tool Shortcuts You Need to Know
To help you work more efficiently in Premiere Pro, we have prepared this easy-to-use table with important keyboard shortcuts connected to the Razor tool.
| Action | Keyboard Shortcut | When to Use |
| Razor Tool | C | Manual precision cuts |
| Return to Selection Tool | V | After cutting |
| Add Edit at Playhead | Ctrl+K (Windows) / Cmd+K (Mac) | Cut without switching tools |
| Ripple Delete | Shift+Delete | Clean up gaps after cuts |
Pro Tip: If you want to split across layers, use Ctrl+Shift+K on Windows or Command+Shift+K on macOS to select all tracks, and then use the Razor tool to cut all of them simultaneously.
Difficulties of Using Premiere Pro Razor Tool
Premiere Pro is a software solution designed for experienced professionals, and if you are new to the field, you might encounter some difficulties.
- Over-cutting: You have made too many slices, and this creates clutter and complicates revisions.
- Micro-gaps & black frames: If you miss and cut a clip at a frame that is not exactly aligned, you will leave visible glitches. That's why you should use the ripple delete feature. It removes a selected clip and automatically closes the gap between clips by shifting all later clips to the left.
- Audio pop/clicks: If you cut an audio file in the middle, this can cause distracting audio clicks. To solve this, use tiny audio fades or move cuts to quieter frames.
- Out-of-sync Audio and Video: Cutting a video but not the audio (or vice versa) when clips are unlinked can slowly but surely desynchronize the audio from the video.
- Adjustment layer chaos: Accidentally slicing adjustment layers or music can ruin the look and ambience of a video.
Filmora: A Simpler Alternative to Premiere Pro's Razor Tool
If your goal is to cut videos quickly and cleanly (especially for YouTube, TikTok Shorts, or social media content), Wondershare Filmora streamlines the process significantly. Filmora excels at one-click splits at the playhead. You just place the playhead at the frame where you want to make a cut and click. Additionally, Filmora offers a quick split feature that allows you to split a long video into multiple shorts in seconds without needing to move the playback panel.
Filmora also features a clean, non-linear timeline that offers magnetic alignment, helping you avoid those pesky micro-gaps.
Here's how Filmora's Razor tool works.
- Download and install Filmora on your Windows or Mac device.
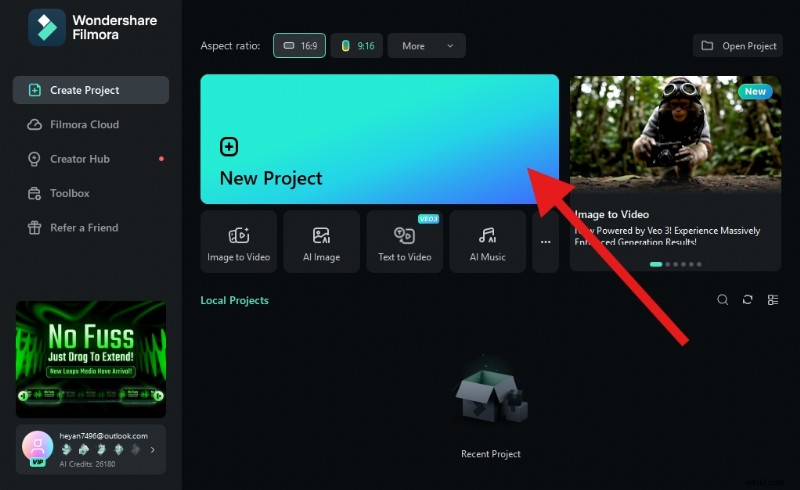
- Open Filmora and create a New Project.
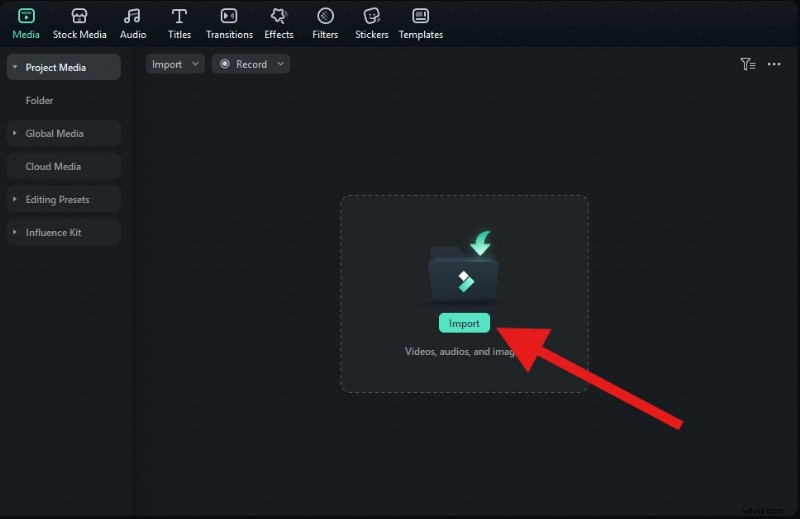
- Click Import and select a video from your device.
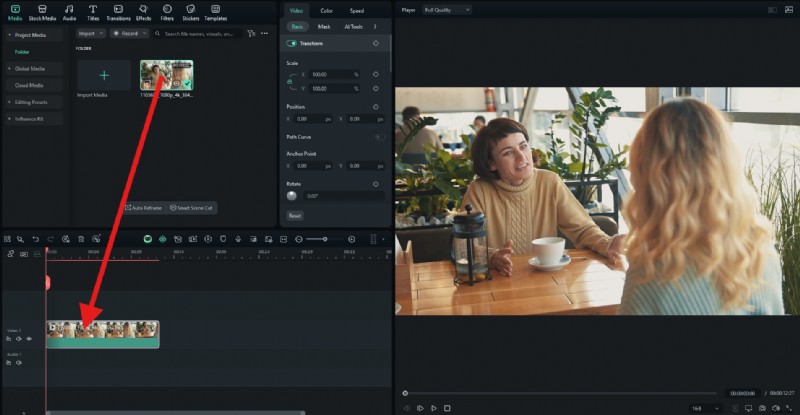
- You can now drag the video to the editing timeline.
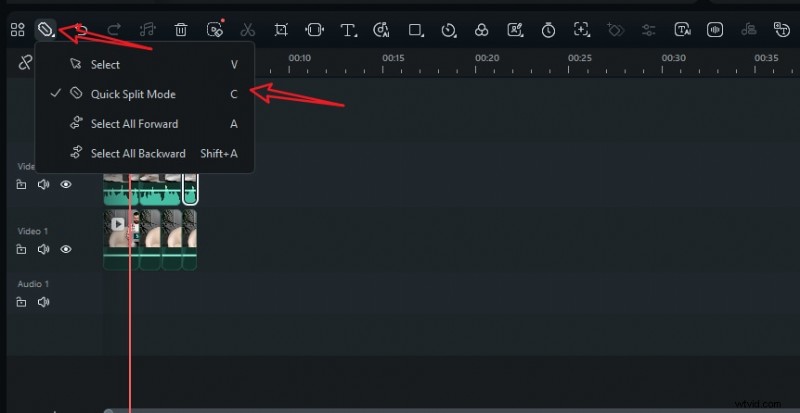
- If you prefer a quick split mode, activate the Quick Split Mode feature on the panel. Or press C on your keyboard. Then, split the video anywhere you stay on the timeline by single-clicking.
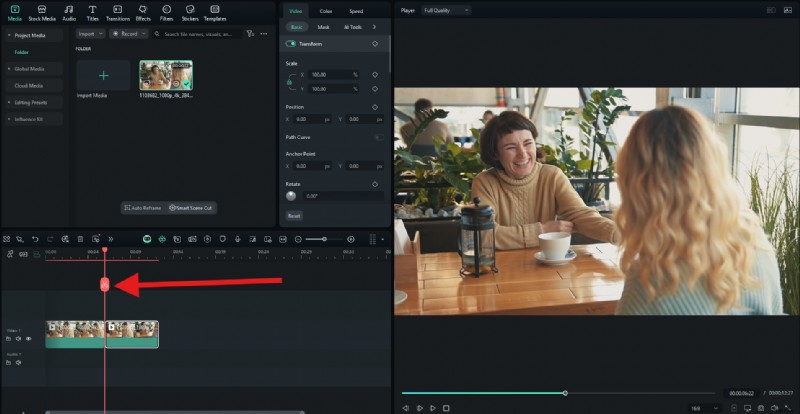
- If you prefer splitting the video with the playhead, move it to the desired position and click the Scissors icon to make the cut. You can also use Ctrl+B (or Cmd+B on Mac).
And that's the entire tutorial. It's easier than Premiere Pro, and if you want to continue your video editing journey, you will have a much easier time in Filmora than in Premiere Pro.
Why Choose Filmora Over Premiere Pro for Basic Editing?
To help you understand why Filmora is a more straightforward choice, we have prepared an easy comparison table that puts Filmora and Premiere Pro side by side.
| Features | Premiere Pro Razor Tool | Filmora |
| Tool visibility | Requires switching to Razor or using Add Edit without switching | Split icon always visible; cut at playhead in one click or via |
| Shortcut complexity | Multiple paradigms (tool swap vs. add edit; track targeting; custom bindings) | Single, memorable split shortcut; fewer decisions per cut |
| Batch splitting | Possible with Add Edit to All Tracks / Razor All Tracks, usually needs custom binding | Split at playhead affects selected clip(s); multi-select for "batch-like" behavior |
| Learning curve | Powerful but steeper; easy to overslice or desync when starting out | Beginner-friendly; magnetic timeline reduces gaps and keeps edits clean |
Creative Suggestion: You can combine splits with a quick fade-to-black effect, speed ramping, or zoom-in presets to stylize important moments in seconds in Filmora. You don't have to switch tools or anything.
Wrap-Up: Precision Cutting, Your Way
The Premiere Pro Razor Tool is powerful, but it requires thoughtful use, effective shortcuts, and clean ripple editing habits. But if you prefer a cleaner, quicker cutting experience, especially for content, reels, and rapid turnarounds, Filmora gets you there with fewer clicks and a gentler learning curve.
Download Filmora today and start slicing your clips like a pro, without ever touching a razor. You can also try the Filmora Mobile app, which is available for both Android and iOS.

Filmora
⭐⭐⭐⭐⭐
The Best AI-powered Video Editing Software and App