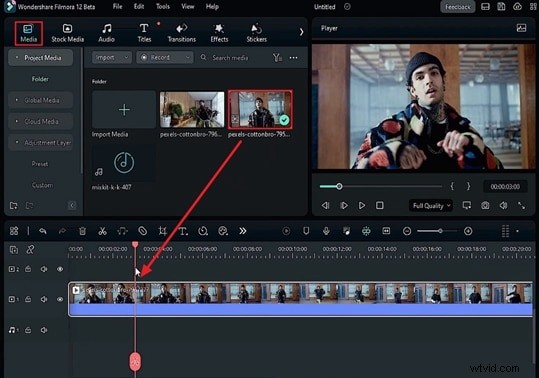
1. Import Your Footage
Launch Filmora and navigate to the Media tab. Drag and drop your two video files—one representing the pre‑transition footage and the other the post‑transition clip—into the media library. Once imported, place the first clip onto the timeline and position the playhead at the exact point where you want the Shake Blur transition to begin.
2. Fine‑Tune the Clip
Open the Video tab on the right panel and select the Basic settings. Lock the Scale toggle to prevent unintended resizing, then adjust the X and Y values to match your project’s aspect ratio. Use the Split tool to divide the clip at the playhead, creating two separate segments. Trim the second segment as needed, remove any unused portions, and zoom in on the timeline for precise editing.
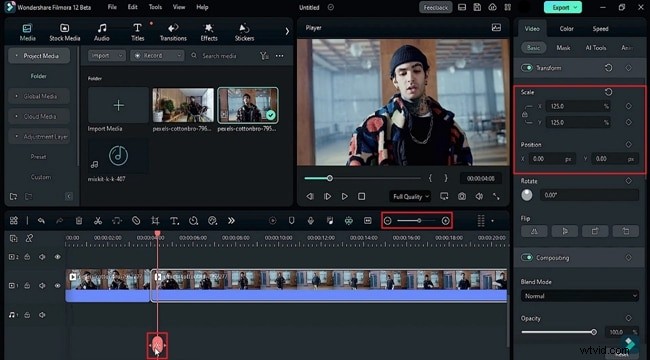
After these steps, your footage is ready for the Shake Blur effect.