Tomato Basil icon
Looking for a new still life project? Try shooting raw fruits or vegetables. They’re readily available, can be beautiful, cost little, and—unlike cooked or frozen food—they can hold their shape, color, and attractiveness for days or even weeks at a time. And you can still eat them when the shoot is over.
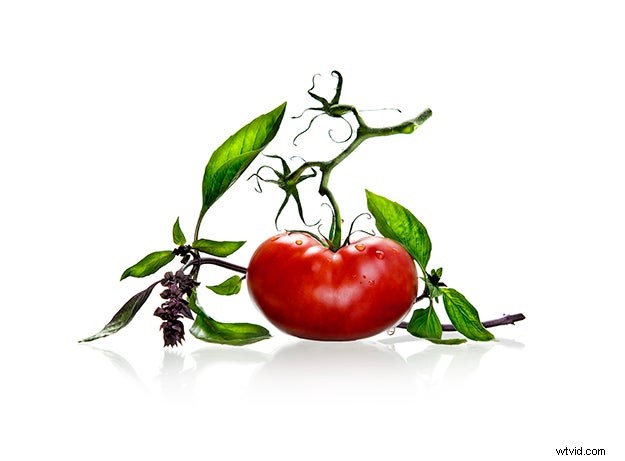
“The best food photography starts with the subject itself,” says Sue Tallon, the San Francisco-based pro who shot this tomato with basil. “I didn’t decide one day that I wanted to shoot a cool picture of a tomato. Instead, I saw the tomato and more importantly its wonderful, wiry stems and knew immediately that I had to photograph it.”
The takeaway? Don’t start your still life project until you’re inspired by a subject with the right combination of form, color, and character. Find a fruit or vegetable that you want to immortalize, and you’re ready to start. “If you’re new to still life photography, I suggest that you keep it simple,” says Tallon. “Focus on beautiful things and don’t clutter the image with unimportant objects. Pick a simple subject and let everything else in the shot fall away.”
Looking for a new still life project? Try shooting raw fruits or vegetables. They’re readily available, can be beautiful, cost little, and—unlike cooked or frozen food—they can hold their shape, color, and attractiveness for days or even weeks at a time. And you can still eat them when the shoot is over.
“The best food photography starts with the subject itself,” says Sue Tallon, the San Francisco-based pro who shot this tomato with basil. “I didn’t decide one day that I wanted to shoot a cool picture of a tomato. Instead, I saw the tomato and more importantly its wonderful, wiry stems and knew immediately that I had to photograph it.”
The takeaway? Don’t start your still life project until you’re inspired by a subject with the right combination of form, color, and character. Find a fruit or vegetable that you want to immortalize, and you’re ready to start. “If you’re new to still life photography, I suggest that you keep it simple,” says Tallon. “Focus on beautiful things and don’t clutter the image with unimportant objects. Pick a simple subject and let everything else in the shot fall away.”
Also, pay attention to your lighting, says Tallon. “Light your food to produce nice reflections off its shiny surfaces.” Light from above to help suggest your subject’s shape. “Use window light at first to get the hang of what makes beautiful light. Then figure out what mood you want: dark and moody with deep soft shadows, or bright and blown out with washed out highlights and very open shadow areas. You have to learn how to recognize beautiful light before you can make it,” says the photographer.
Step 1
Source your subjects. Visit the best food markets and look long and hard for the right specimens. “Some fruits and vegetables have real personality or something that feels particularly interesting,” says Tallon. “That’s what you’re looking for. This tomato had a voluptuous shape and more importantly that beautiful stem! It reminded me of a Tim Burton character—all wiry and awkward.”
Step 2
Gather your gear. Almost any DSLR or ILC and macro lens will do. To add a flattering sense of compression, use a 100mm or 180mm macro. If you want to exaggerate the roundness of a fruit or vegetable, a wider macro (i.e., 60mm) will do the trick.
Step 3
Build your set. Place the camera so you’re shooting straight into the subject. As for lighting, simple window lighting will often work. Tallon, however, placed a strobe light in a softbox above the tomato to produce the white reflections, a back light to brighten the white background, and two fill lights in front to lighten shadows. “Unless you want to convey a dark or mysterious look, avoid dark shadows,” she says.
Step 4
Finesse your setup. Tallon didn’t want the tomato to appear to be floating freely in space, but needed it to appear anchored to a surface. To give it that anchored feeling, she created reflections underneath the tomato with the help of a sheet of clear, highly reflective Plexiglas placed on her white tabletop.
Final Step
Set exposure, shoot, then edit. Tallon wanted a fully sharp subject from front to back and so set a minimum lens aperture (f/22) for the shot. After shooting, she took her tomato into Adobe Photoshop CS6. “Postproduction was all about cleaning up the white background to make it pure white with no detail and removing any dust, marks, or distracting details from my subject, while slightly pumping up its color and impact,” says Tallon.
The Gear
Canon EOS-1D X: Tallon originally shot with the Canon EOS-1Ds Mark II (since replaced by the 1D X). Its 16.7MP sensor captured all the detail she needed for her vegetable still life. $5,300, street
Canon EF 100mm f/2.8L IS USM macro: “I positioned the lens so that I was shooting straight into the subject for an iconic point of view” says Tallon. $800, street