In the fast-paced world of digital filmmaking, it can be easy to underestimate the value of a properly calibrated monitor on set.
Whether we like to admit it or not, relying on your monitor more than your scope at one point or another during a shoot is more likely than we might care to admit. Although it’s essential to use your scopes and other tools to expose properly, there is still a lot of value and peace of mind that comes with having a monitor that displays true.
Calibrating your monitor can save you time in post-production — and on set with your director and clients. Nothing is worse than major inconsistencies in color or image between a variety of monitors — and wasting time explaining to the less technically savvy not to worry about it. You can ensure that what you’re seeing is what you’re getting on your screens with this straightforward calibration technique.
Calibration
There are two approaches to calibration. You can use an external tool (the more expensive option), or you can do it manually with color bars. This article will focus on using color bars.
Before you start your calibration, there are a couple things to keep in mind. Ambient light affects the contrast and overall look of your monitor (and thus your calibration accuracy), so ideally, find a location for your director’s monitor that’s shielded from ambient light throughout the day. (This is also why you tend to see the DIT on set in their own tent.)
Before you calibrate a computer, you’ll want to turn it on and let it warm up for a few minutes. Then, follow these steps.
1. After your monitor is warmed up and connected to your camera, you need to send the HD NTSC Color Bars from the camera to your monitor. Some monitors will have the option built into their menus, but it’s typically best to send the color bars yourself when you can.
(Side note: if you’re shooting on an HDSLR and don’t want to miss out on the fun, check out this video by Richard Harrington on how to get color bars on your cameras.)
2. Adjust your “Brightness,” “Contrast” (also called “Picture”), and “Phase” to their midpoint or factory settings. On Panasonic monitors, for example, you usually see this indicated by the tally marks on the screen changing color (blue) or becoming bold to indicate that you’ve reached the “middle.” Sometimes, there is also a factory reset option in the menu.
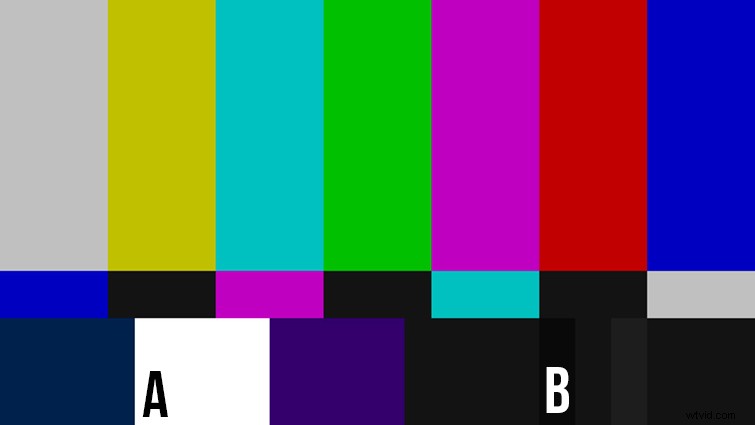
4. I tend to start loosely with contrast and bounce between contrast and brightness until I’ve landed in a good place. For most of the calibration, you’ll be looking at the 100% White Chip (labeled A above) and the PLUGES Bars (labeled B above), which are the three bars of different gradation beneath the red bar (left is 3.5 IRE, middle is 7.5 IRE, and right is 11.5 IRE, just for reference).
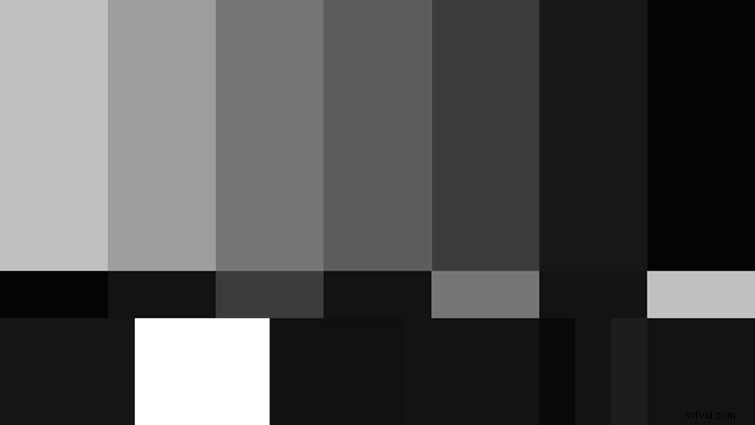
If it makes it easier to see, you can also bring the “Chroma” all the way down to make the screen black and white so you can focus on the change in the bars.
Focusing on the 100% white chip, increase your contrast level until the white chip no longer seems to get brighter. Once you’ve hit that point, pull back a couple notches. Also make sure your 100% white chip is not bleeding into its surrounding bars.
5. Next, you are going to adjust the PLUGE bars (labeled B above) to find your brightness. You’ll want to adjust the brightness until the left two PLUGE bars disappear into the 0% black field (to their left) and the far right PLUGE bar sits just a step above that 0% black. I tend to bring it down until I cannot see that right bar, then nudge it up until I catch a hint of it. (Reference the figure below.)
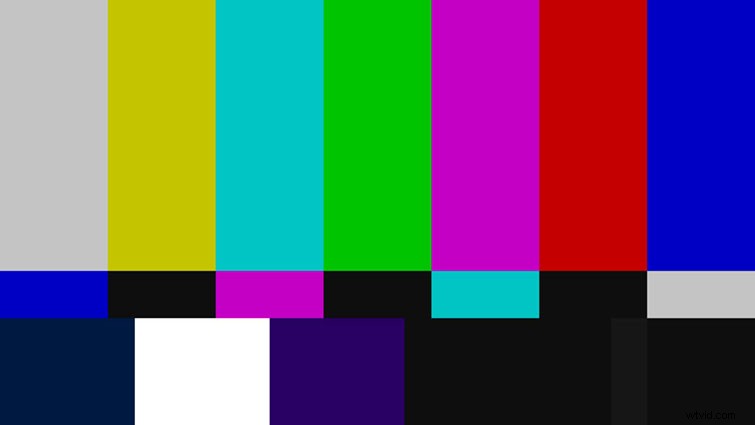
6. Now jump back and tweak your contrast to make sure your 100% White Chip didn’t start to bleed. You’ll jump back and forth between the contrast and brightness until you’ve found a satisfactory level between these two goals.
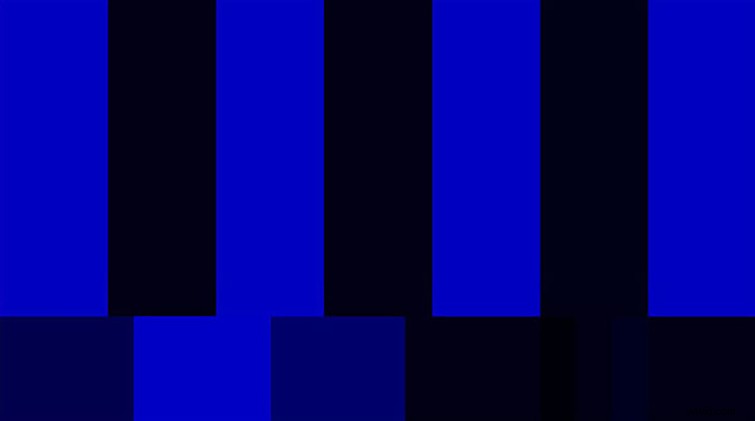
7. The last adjustment is your chroma. To check this, you’ll need to switch your monitor into its “Blue Only” feature. If your monitor doesn’t have a “Blue Only” feature (dig around: sometimes it’s difficult to find), you can complete this step by switching your monitor into its monochrome setting.
Basically, you want all the longer, alternating blue bars to be one continuous bar. If the chroma is incorrect, you will see a small band of a different shade of blue at the bottom of these bars (see below). Adjust your chroma until those bars disappear into the larger bars.
Incorrect:

Correct:
8. After this, go back and double-check your brightness and contrast with the PLUGE bars and 100% white chip, and then you should be good to go!