When lighting a set, you need to find creative ways to hide and motivate lights. In this short film, we lit an entire scene just once. Here’s how.
We recently released a short film to show how to work with some explosion and compositing effects. However, when it came to the actual production, we had a very short timeframe. We purposefully wrote it and planned it in a way that would make it easy to produce (and edit). That way we could spend most of the time working on the effects.
This also meant we needed to shoot extremely quickly and plan the lighting effectively. We decided to light the scene in a 360-degree-friendly way. So, no matter where we placed the camera in the scene, all of the lights we used would properly light the set. To do this, we had to use all practical lighting and find ways to hide it from the camera.
This was all relatively easy with this particular short film since the characters are tied to chairs. If there is a walk-and-talk in your scene, or if your characters are moving around quite a bit, this can all be a bit more difficult. However, if you know what look you want and you think it through, you can light any scene this way.
If you haven’t seen the short yet, check it out.
Practicals
For this short, we did a lot with practicals. We had a whole box of various work-lights and flashlights that we hid around the scene. For the most part, these weren’t anything more than set dressing and some little points of light for the bokeh and flaring. We shot most of the short with a cinemorph anamophic adapter, so any flares we got were intentional.
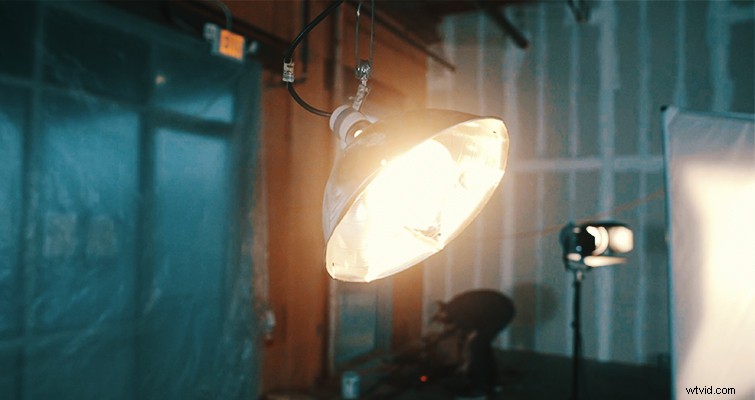
Beyond that, we used a few tungsten practicals in the scene. One of them was an old vanity light that I got at Home Depot — we added some photoflood bulbs. For the opening shot, we had a LED bulb light hanging down into the frame, and we painted it slightly yellow to create an old, dingy look.
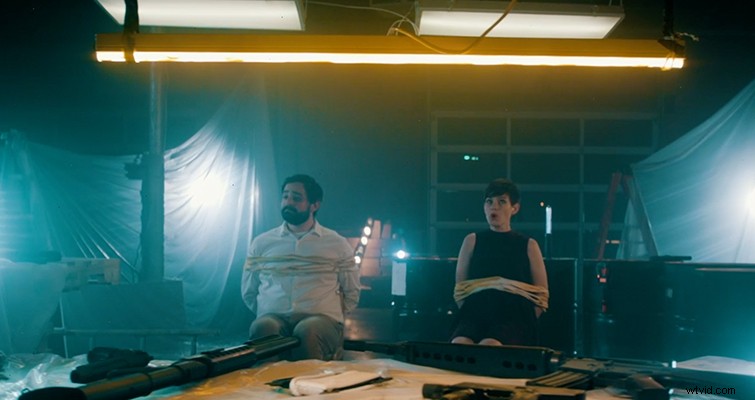
Perhaps the most noticeable practical in the scene was just a basic clamp light. It provided a nice hard edge on the female character, and it also built out the feel of a secluded hideout.
We also took another (very optional) step with this light and attached it to an old light board that I had laying around. I think I originally purchased this particular board for less than $100 bucks, and I’ve used it more times than I can count. I highly recommend owning one. Using the board, I was able to program a really subtle flicker for the lights (on both the clamp light and the vanity light).
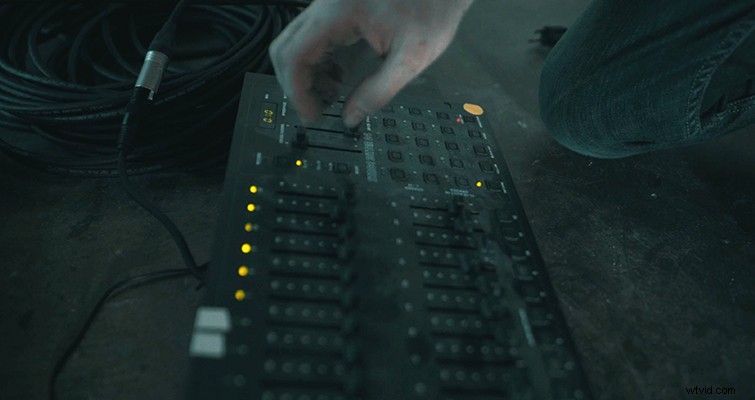
This helped to build the vibe, but it also allowed me to dim the lights to a level that looked good on camera. Most of the time, I wanted the tungsten practicals dimmed to around 20%. Then I built the flicker on top of that.
Hidden Lights
This method won’t always be possible, depending on your scene, but it’s always great to find ways to hide and diffuse your lights.
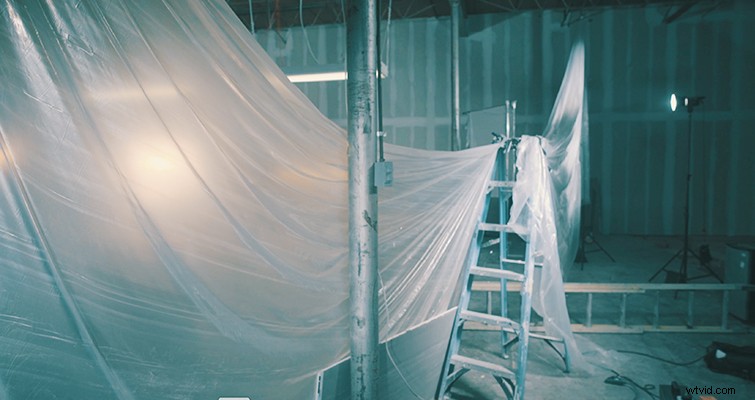
In this case, we were able to kill two birds with one stone by diffusing the lights and hiding them at the same time. We did this by hanging plastic painting drop cloths all around the scene. This way, the lights would just become nice, big, hot points of light in the background. As far as the viewer is concerned, these could just be work-lights or overhead fixtures in the distance.
This plastic drop cloth also diffused all the light really well. We were able to use a couple of Aputure 120Ds to fill the entire scene with a blue ambient light.
Haze
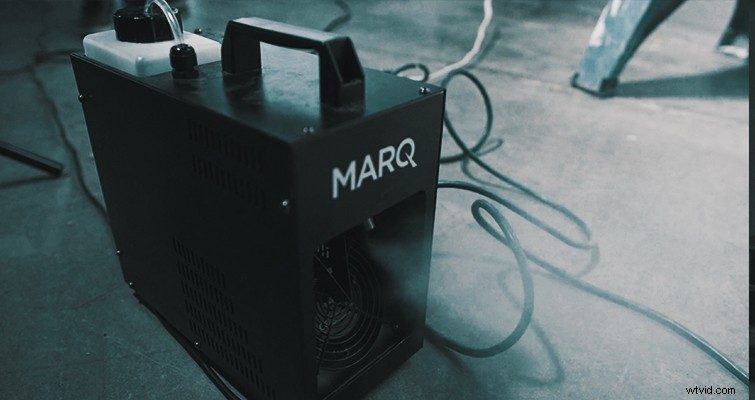
Haze is fun.
Who doesn’t want to add haze to a scene? While it may not always be right for your story, if you can use haze in your scene, it has quite a few benefits. One of which is that it adds volume to the lights. All of your lights will be putting out nice beams — as subtle or noticeable as you want. This means there’s a good chance that even if you point your camera directly into a light, all you’re really going to see is a bright orb, adding another way to hide lights or motivate them as practicals.
Haze also diffuses the light in your scene. It spreads light around, and it can make it softer — and give you more control over how hard or soft your sources are.