Explore these few low-budget tips on how to transform a blank, white wall into a dynamic, video-worthy background.
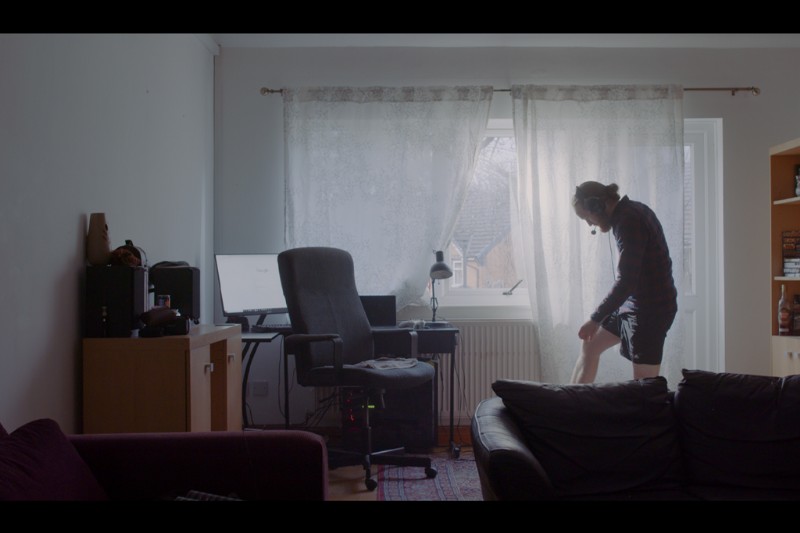
So, you’ve arrived at your friend’s house who has politely allowed you to film there, but it looks a little something like this.
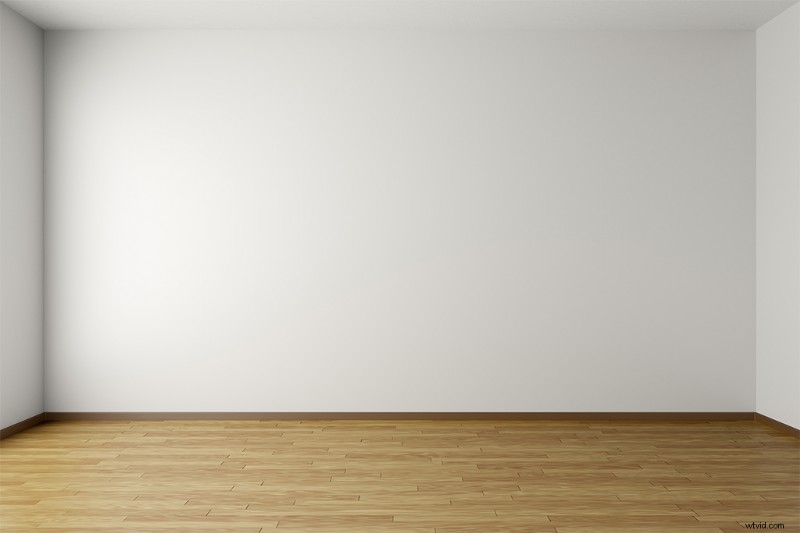
Bare, white walls—a filmmaker’s worst nightmare, ranking just below corrupted media. In the video tutorial below, I run through a few tips on reducing the monotonous nature of plain, white walls.
Filming Against White Walls
White walls, or magnolia walls, are not particularly the best background to film against when creating narrative content. While you could have an expensive camera and an expensive lens, one of the sure-fire elements of a low-budget is a space with no depth or set design. As soon as someone is placed directly against a blank white wall, you know it’s a student film.
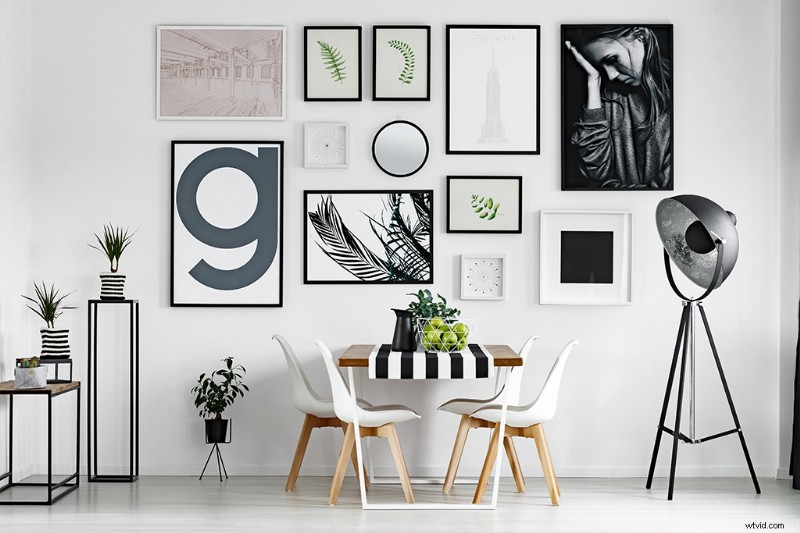
Of course, if possible, hanging just a few pictures with multicolored elements would be enough to diversify the background. But, for the sake of the tutorial, let’s say the location is a rented property, where you can’t put up wallpaper, paint, or nail things into the wall. While there’s not much at a low-budget level we can do to nullify the lack of excitement these walls promote, there are a few tips to employ.
Introduce Shadows
The first step towards working with a white wall is to stop it from becoming a source of attention. By nature, it’s a giant reflective surface and one that you don’t want to overpower your scene.
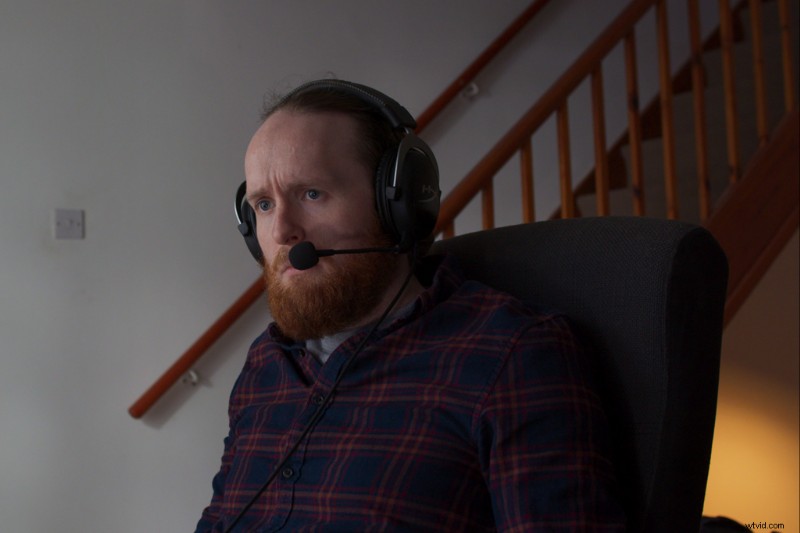
As everyone’s favorite cinematography guru David Mullen suggests, you don’t want to light a blank, white wall. Instead, we need to look for the area that is only lit by the dim fall-off of the lights, like in the image below.
However, sometimes we can’t pull the actors away from the wall due to a small location space. Instead, what we should do is start introducing a range of tonality across the wall by shaping the light. We can do this by introducing a flag or other various lighting modifiers—even elements of the scene itself, such as blinds. In doing so, we can start cutting into the light and create some shadow along the white wall.
However, you don’t want to add just a singular block of shadow to a small section of the wall. Instead, try to position the modifiers so the white wall dips in and out of shadow.
By dispersing and blocking the light in intervals, we can create a varied range of tonality across the wall, without touching the wall itself.
However, when dispersing light and flagging to create patches of dark and light regions isn’t an option due to lack of space, we can look at using properties of the room itself to break up the white wall’s boring nature.
Using the Shape of the Room
This shot just has far too much plain wall space. It doesn’t look good and emits the “student film” feel.
Instead of filming the desk against the wall, we brought the desk out to film into the room’s stairs, and the line of the stairs nullifies the monotonous white wall.
Now, of course, having the stairs in your living room is quite a unique circumstance. If you don’t have something similar, I recommend that you shoot into the L of the room (where the two walls connect).
While it won’t have the prominent lead-in lines like a handrail would have, it’ll still create a handful of subtle lines throughout the composition.
If we jump back to the first picture (better viewed in the video tutorial), you’ll see that we still had two plain white patches that weren’t doing anything visually appealing on either side of the rail. If you can’t get the right angle to film into the room, or it’s not practical to film against a visual component of your location, look to also use color temperature to break up the white wall.
We broke that up by placing a 3200K lamp in the corner. This gives us another visual separation along with the wall.
As noted in the introduction, unless you have the budget or permission to redecorate or the space to fully bring your actors away from the wall, there aren’t many tips—aside from the ones mentioned—that we can use to bring a white wall to life.
Cover image via PavelShynkarou.
Looking for additional “fix it” tips? Check out these articles:
- DIY Filmmaking: 7 New Hacks to Help Your Shots — and Sanity
- From Composition to Dehaze: Professional Tips for Filming at the Coast
- The Art of Using Backgrounds in Photography and Video
- Top 10 DIY Lighting Rig Tutorials to Light Up Your Set
- Video Tutorial: Three Tips for Salvaging Overexposed Video