Want to learn how to screen record on a Chromebook? You’ve come to the right place. There are several ways to record your screen on a Chromebook, including internal tools like Chromebook's Capture Mode. One way to record your screen without leaving your Chrome browser is by using Clipchamp’s screen recorder. It's easy to use, fast and free! Learn how to use the best online screen recorder for Chromebook with our step by step guide below.
Screen record on Chromebook using Clipchamp
Before we get started on how to screen record on a Chromebook, we highly recommend updating your Chromebook system to the latest version. Make sure you’re also successfully connected to the internet. This will ensure the best performance and make the process run smoothly. Now let’s get started on how to record screen on Chromebook.

Step 1. Log into Clipchamp to start screen record Chromebook
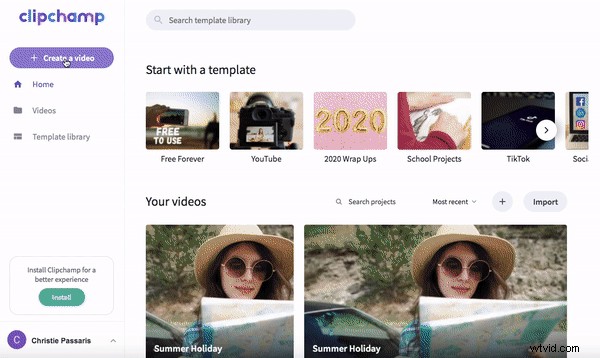
Can you screen record on a Chromebook? Yes! Head over to Clipchamp and log into your account. If you do not have an existing account, sign up today for free.

Step 2. Create a new project
To screen record on Chromebook, you will have to create a new project first. Click Create a video and then select the format you would like to use. You can always alter the format later on if you change your mind. We have chosen 16:9 widescreen for the purposes of this tutorial. The editor homepage will automatically open.
Step 3. How to record your screen on Chromebook
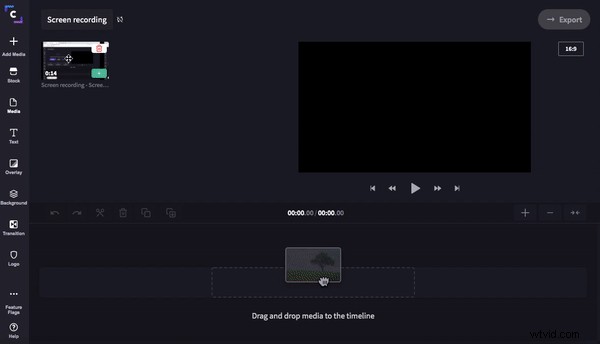
Click Screen Record to initiate your recording. A red record button and timer will appear in the bottom left corner of your editor. To start recording, click the red button. Audio is automatically turned on. You can mute the audio if you wish by clicking the small microphone icon. Screen recording on Chromebook is that easy!
Three sharing screen options will appear, you can choose from ‘Your Entire Screen’, ‘Application Window’ or ‘Chrome Tab’. We have chosen the Application Window option. Click on the Chrome tab we want to screen record using your Chromebook. A sharing window will appear at the bottom of your screen to tell you when you are recording.
Once you are finished recording your desired screen / open tab, click the blue Stop Sharing button at the bottom of your screen. Head back over to the editor. A preview window of your screen recording will automatically appear. Click Add to Project or Retake Recording if you are not happy with it. An automatic save window will appear, save your screen recording before continuing.

Step 4. Edit your screen record on Chromebook
You have now successfully learned how to screen record on Chromebook! The next few steps will be further editing tips and how to save your project to share.
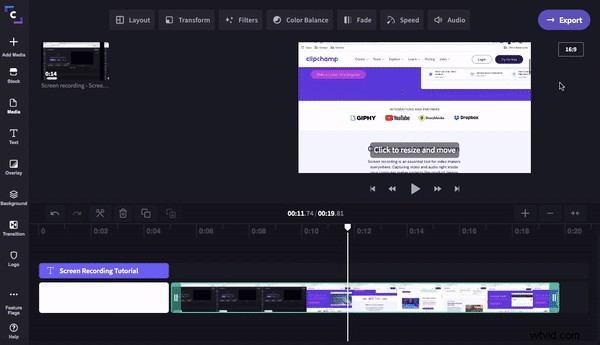
Drag and drop your project onto the timeline. Add text, backgrounds, transitions, stock and edit the colour scheme if you desire. We have demonstrated how to add in a title and background. Click Background, then drag and drop a background onto the timeline. Click Text, then drag and drop a title onto the timeline above your background. Rename your title by the Text tab and type in your new title name. You can change the colours under the Colour tab. Adding text is a great way to spice up your video, and make it more informative.
If you’re still wanting further help on how to edit a video on Chromebook, check out our ‘Using the Create video editor on a Chromebook’ FAQ. This tutorial will help you understand how to add media files from your Chromebook to video editor if you’re having trouble doing so.
Step 5. Share your screen recording
Record, Edit, Share! Screen recording on a Chromebook is that easy.
The final step is to export your project and share it with others. Once you are happy with your screen recorded project, click Export in the top right corner. A pop out window will appear with saving options. We recommend saving your video in 1080p resolution for the best playback, as well as clicking Maximum compression. Share your video directly with friends by sending your project via email or social media. You can also save your video to your computer, YouTube or Box.
Now you can screen record without leaving your browser!
You should now be confident about how to record your screen on Chromebook. Clipchamp’s screen recording feature is fast, free, and extremely user friendly. Why use Chromebooks Capture Mode when Clipchamp’s screen recording feature lets you directly edit your recording in seconds? Try it out today.
Of course, any Chromebook editing experience isn’t complete without downloading our newly launched Clipchamp Chromebook Google Play App. Our new app empowers everyday Chromebook editors, be sure to try it out with our Google Drive integration to simplify your video creation workflow.