Most, if not all, have seen the picture profile settings in our cameras. These can include settings for Landscapes, Portraits, or even Cine-style formats for filmmakers looking to achieve that cinematic look. But what do these mean and how do they affect our final image?Regardless of which camera system you use, picture profiles can be defined as customizable presets that apply in-camera processing to your photos. As it turns out however, how these settings are applied can have a dramatic effect on your final image but not always the final say in post.
Examples
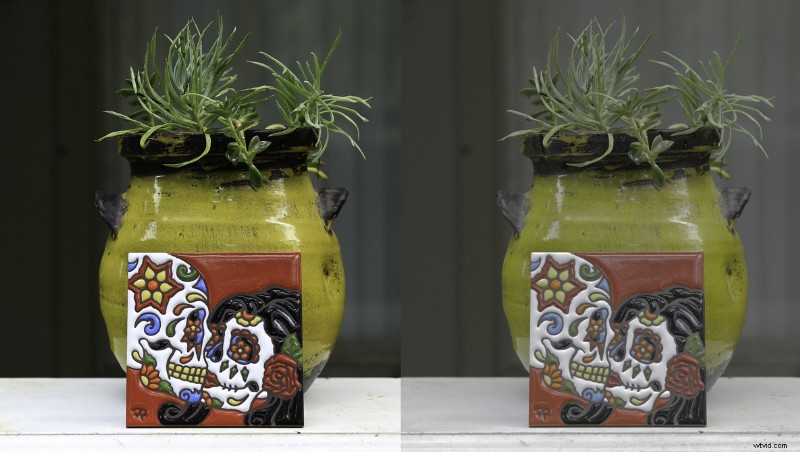
In general, picture profiles take the data from your image and automatically apply contrast, color tone, saturation, and sharpness settings to your image to give you a certain look right in camera. Here are some examples I took this morning using my Canon 6D. My camera settings were f4.0, 1/40th of a second, ISO 100, JPEG (for reasons I will explain later), and I used a simple, yet vibrant subject, to emphasize the color levels and differences in tone between profiles. Obviously, different camera manufacturers will have different profiles or different names for similar profiles but in general, you will find these to be the norm. It should also be mentioned that it was a solidly overcast day so my white balance remained set at 6000K.
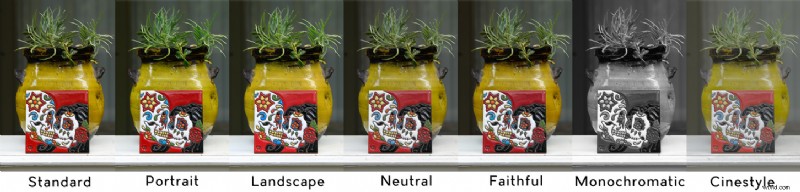
If you look closely, you will immediately notice that certain profiles, such as Landscape, provide a much higher level of saturation than others such as Neutral. This will be evident most in the green and red colors for this particular shot. More importantly, you will see a difference in tonality and “crispiness” depending on the profile use. Neutral and faithful have noticeably far less of both than most of the others with the exception of Cinestyle (which will be explained later). Monochromatic is self-explanatory but the rest should provide subtle differences that are visible to the unaided eye. Of course, you probably knew all of this already right?
Raw vs. JPEG?
One of the lesser known aspects of using a picture profile is what happens in camera with when shooting raw vs. JPEG. When you snap a picture with a particular profile selected, your camera automatically processes it as a JPEG with that profile applied for viewing on your LCD. This happens regardless of whether you are shooting raw or JPEG. However, the profile used for shooting DOES come into play when you enter the post processing phase.
If you shot your image in JPEG, that picture profile will be baked into the image with very little room for adjustment. It will appear exactly as it did on camera which makes editing more efficient, uses less storage space, and may be exactly the type of workflow you require. Shooting in raw however does allow for that flexibility as the profile is not baked in but rather, used only as a guide while shooting. With a raw format, you can import the image into your preferred editing software and it will appear relatively flat and unadjusted, almost as if shot in a neutral style. This advantageous for many reasons, primarily the flexibility it allows with creative styling, but it comes at the cost of greater storage requirements and time to process.
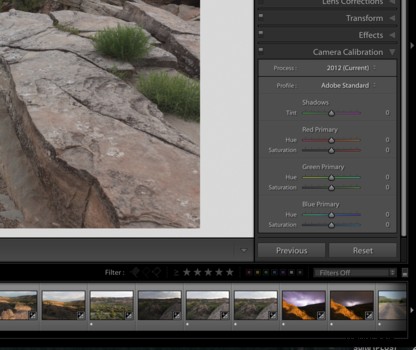
Suppose you liked what you saw in camera but like to have raw files for discrete adjustments in post? Lightroom offers a feature in its develop module which allows you to apply a color profile similar to what you saw in camera. It is located under the "Camera Calibration" tab on the right side of the Develop module at the very bottom of the sidebar. While it does not offer all the same options as in camera, it is a good start and an efficient way to speed up a raw workflow.
Using Profiles in Videography
Probably a more relevant approach for discussing profiles in today’s world is their application in video work which can be far more daunting and restrictive. The discussion of video profiles throughout the past few years has been centered around very flat, “logarithmic” styles which claim to improve dynamic range and allow for enhanced post processing for cinematic styling. These typically include Sony’s S-LOG profiles and the C-LOG/Cinestyle profiles of Canon’s pro cinema cameras and DSLR’s respectively. For many years these profiles were reserved for higher end models of cameras yet, with today’s increased interest in shooting video in addition to stills, these profiles are becoming widely available in smaller, hybrid cameras such as Sony’s A7Rii or Canon’s line of DSLR’s.
But what exactly are these flat profiles and how do they translate to creating your image? In short, these profiles offer exceptional tonal reproduction in both the high-lights and low-lights. In other words, they help expose the brightest part of your scene while still keeping the detail in the shadows. Hence, improved dynamic range. The result of which are extremely flat, washed out images that frankly look awful on the surface. How they do this is a topic for another article so please pardon my brief explanation of a very complex topic.
To any experienced photographer or video shooter, dynamic range, or the lack thereof, is a common barrier for most digital cameras and one of the primary reasons techniques such as exposure blending exists. As camera technology improves, so does their dynamic range but in practical terms most sensors will struggle to see as the human eye does and in certain scenes, you have to decide to sacrifice the details in either the darkest areas or the lightest. A common rule of thumb is to expose for the highlights as details lost in the brightest parts of an image are non-recoverable in comparison to the darkest parts which can be recovered, to an extent, with the introduction of noise.
Choosing the right profile matters even more to videographers as the data captured by most video rated cameras is not raw and therefore, fairly inflexible in post. Setting your white balance precisely, choosing a picture profile, and determining the correct exposure are far more important when it comes to video work as there is simply not much wiggle room in post processing. It is essentially the equivalent of JPEG file. Pushing the exposure too far or adjusting the color temp one direction or another will almost immediately produce undesirable artifacts and unless you are shooting with an expensive and data hungry camera that films in raw, you will be hard pressed to alter much of your scene in post.
Flat, S-LOG style profiles are good alternatives to overcoming this issue as they allow you to capture more data from any given scene which in turns provides greater latitude in post for corrections. Cool effects called LUTS, or Look Up Tables, are often used in conjunction with flat profiles to provide a very cinematic look with little adjustments to the image itself. They can be applied to the cut with a simple one click step and are specific to camera as well as profile types such as S-LOG.
The key take away here is that when shooting video, choose your settings wisely as they will be difficult to adjust later on.
What Profile Should You Choose?
There is no right or wrong answer here as it really depends on the type of shots you are taking and their intended use. If you are on a family vacation and simply want snapshots, one might argue shooting in JPEG with a profile that suits your scene to avoid a lot of post work later.
To most heavy shooters though, raw is the way to go. It won’t matter what profile you choose and if you remember liking the one you did, simply load it to the file in post.
The most important example of using profiles relates to video and I would highly encourage anyone filming to make an informed decision before choosing. Get set for your shot and perhaps film a few takes using different styles to determine what works best. The results will be far superior and you will thank yourself once in post.
I hope this article helped anyone confused about profiles in camera. Happy to answer any questions or comments you may have.