The state of California is simply unmatched when it comes to beautiful, picturesque imagery in the United States. As the birthplace and home of timelapse photographer Hal Bergman, it was his goal to compile as much of the visual wonders California has to offer in to a tight four-minutes time. His newest video, aptly titled “California,” combines four years of filming in to a marvelous treat for the eyes that any citizen of the world can appreciate. Beyond the video, Hal also speaks to Fstoppers about the behind-the-scenes work and equipment used in the making.
I was deeply impressed with Hal’s ability to shoot top-notch landscape compositions while still holding true to the timelapse medium. As a writer for Fstoppers, I view a lot of timelapse videos, and what I’ve found is that many people think they can hide average compositional work with the neat-o factor of timelapse. Hal has been shooting timelapse for five years, now working nearly full-time with timelapse projects. His dedication to the craft of both photography and movie-making is apparent in “California.”
Other than client work, Hal contributes his timelapses to Getty Images, Dissolve, and creates the photography for Magic Window Timelapse Screensaver (Mac).
When asked about the technical information behind the video, his response really shined through with how much time he spends with his equipment and the second-nature bond he has with timelapse photography. Starting with the camera gear, he’s working with a Canon 5D Mark II, a Canon 6D, and a Canon Digital Rebel T4i. “I mostly use the 6D and the Rebel nowadays, mostly because shooting timelapses has a tendency to kill shutters and hardware really quickly, so I try not to use expensive bodies for timelapse,” explains Hal. I know this usually comes as a shock to beginners, but even if you are professionally working in photography, you do not need the priciest of gear. You need gear that finishes the job with intended results. Though Hal admits that the T4i has its weaknesses, “The dynamic range isn't as good as it's full-frame brothers, so it's difficult to ramp day-to-night shots with or get a clean shot at night, so that's where the 6D comes in.”

Hal also told me that he is impressed with the WiFi feature on his Canon 6D. “When I bought the 6D, I initially shrugged off the WiFi functionality as some needless feature I wouldn't use. Let me tell you, for timelapses it is perfect.” Its biggest use for Hal is when he has his dolly set up in a strange configuration and it becomes difficult to see the LCD screen. With WiFi, he can see all the images on his phone as they are shot, making sure they are precisely what he wants. “I can also ramp the shutter speed as the ambient light changes without touching the camera, which is huge. Stabilizing shots in post is the bane of my existence, and touching the camera during a shot I know I want to keep will mean a long night at the computer.” Still, Hal believes there’s room for improvement in the WiFi software, calling it “rough around the edges,” so he isn’t using it all the time quite yet.

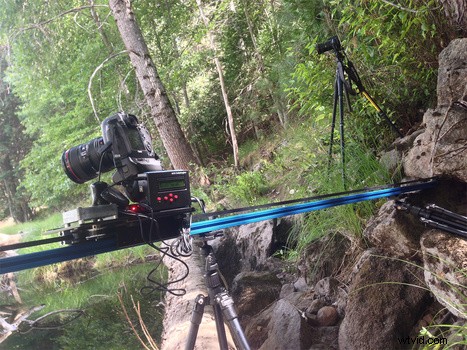
For “California,” a Dynamic Perception Stage Zero dolly is utilized. Hal mentions levelheadedly, “It's a pretty bulky beast and I'd love to have a Stage One, but at the end of the day this has the same ability to pull off incredible motion shots.” Also appreciated was the money saved going with the less-expensive model, giving Hal leftover funds to afford a flight to France and the UK where he had the chance to actually use his chosen dolly. As for transporting the Stage Zero, Hal responds that he mostly carries it around on foot or uses a van. In situations where he can’t easily walk or drive to a location, notably in major cities, Hal astoundingly manages to strap the dolly to his bicycle for the mobility that he needs.

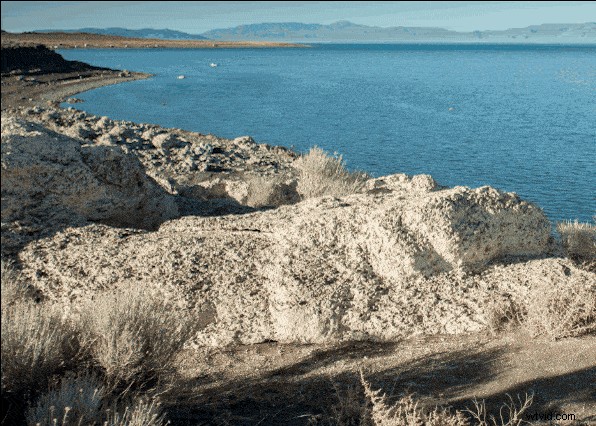
As one can imagine, making a video such as “California” takes tremendous planning and faces unique challenges. The two biggest challenges for Hal in the making of this video, as well as his other non-client features, are location access and media storage. “It's very difficult to shoot timelapse guerilla-style, so having a connection to non-public places to shoot is going to be key to getting the most interesting shots,” he reveals. As an example of his hardships during filming, Hal told me the police showed up and questioned him while shooting the container ship in the harbor. Having access granted through friends and healthy client relationships allowed him to get the vital downtown Los Angeles and San Francisco rooftop vista shots.
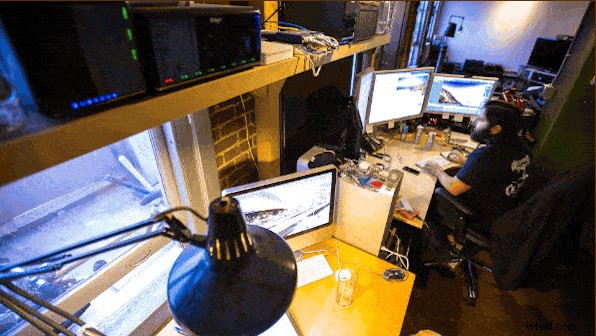
As for the media storage issue, Hal admits it’s something he still struggles with. “I shoot everything in RAW. At the moment I've got a 27TB Synology NAS as my primary storage, and two Drobos that it backs up to. The 4K masters are also backed up to the cloud. Most of the Yosemite and Death Valley shots were done in a single week, and I managed to fill up a 1TB hard drive on that one trip.” Hal continues on to remark, “Storage is cheap, until you need a ton of it.”
Hal’s software workflow is a culmination of five-years experience working with timelapse. First, he imports all the RAW files in to Adobe Lightroom. He then uses the LRTimelapse tool to keyframe and tween the XMP metadata adjustments, and also smooth out his exposure adjustments. Hal credits the software and tutorials by Gunther on LRTimelapse.com for helping to solve his previous inelegant solutions for post-processing issues, such as ramping-flicker and adjusting white-balance from daylight to tungsten city lights. Once he finishes working inside Lightroom and LRTimelapse, Hal brings the folder of RAWs with matching XMP files into Adobe After Effects as an image sequence. From there, “I’ll do any cropping, zooming, or panning in After Effects, and output my clip from there as a 4K ProRes file.”
The result of his four-year endeavor: simply glorious. Below you can find even more behind-the-scenes photos Hal sent over to us.


All images were contributed by Hal Bergman and used with permission.