 I’m Rendy Cipta Muliawan – travel photographer and videographer based in Indonesia. I really love to travel all around Indonesia to witness its natural beauty, and often share my photos and videos through social media. Back in 2013, I flew my first DJI Phantom and I realized this can provide a beautiful perspective from the sky. Today I use both DJI Phantom 3 Professional and DJI Inspire 1 to create my aerial work. This flying camera can create amazing aerial photos and videos, aerial panoramas and also 360-degree panoramas.
In this short article, I would like to share how I create simple 360-degree aerial photography.
The process is surprisingly simple but so much fun. The most important thing is to find a good location with great objects. Just remember, good lighting condition is the key. I always shoot RAW in 4:3 format using manual mode with lower ISO. It’s the best way to get more information in colors, quality and correct the exposure in post.
1. Tegenungan Waterfall – Bali
 Aperture:2.8 Shutter Speed:1/160s ISO:100 Type:Phantom 3 Professional
I fly my DJI Phantom 3 Professional and let it hover for a few moments to look around and re-check my exposure settings. Then I make a simple decision to choose correct exposure; sometimes I shoot a little bit under exposure to save the highlight and shadow area depending on the light situation.
Aperture:2.8 Shutter Speed:1/160s ISO:100 Type:Phantom 3 Professional
I fly my DJI Phantom 3 Professional and let it hover for a few moments to look around and re-check my exposure settings. Then I make a simple decision to choose correct exposure; sometimes I shoot a little bit under exposure to save the highlight and shadow area depending on the light situation. Here is the example of an Equirectangular Image in order to show you of the images stitched together. This hidden waterfall is a good sample of finding a good location to shoot.
2. Sunrise at Mount Batur
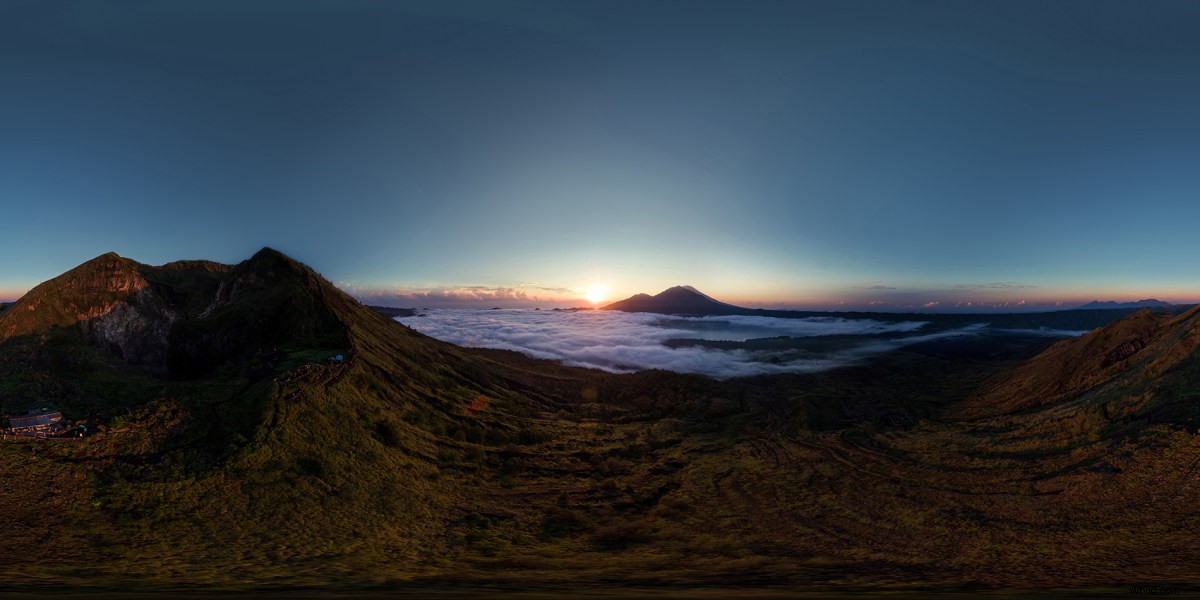 Aperture:2.8 Shutter Speed:1/100s ISO:100 Type:Phantom 3 Professional
After all the conditions are right, I start to take the pictures. I used the Grid Function (Rule of Thirds) under the Tools Camera in DJI Go App to guide me in keeping a constant frame. There are 4 rows of photos I should take in total. I used the lower third of the frame (Rule of Third) straight to horizon level any tilt, then rotate to the right until 360-degrees and take pictures at intervals of 1/3 overlapse. It is important to keep the aircraft steady.
Aperture:2.8 Shutter Speed:1/100s ISO:100 Type:Phantom 3 Professional
After all the conditions are right, I start to take the pictures. I used the Grid Function (Rule of Thirds) under the Tools Camera in DJI Go App to guide me in keeping a constant frame. There are 4 rows of photos I should take in total. I used the lower third of the frame (Rule of Third) straight to horizon level any tilt, then rotate to the right until 360-degrees and take pictures at intervals of 1/3 overlapse. It is important to keep the aircraft steady. After finishing the first row with the same point/objects in the frame, I adjust the camera angle by tilting down around 40 degree down with the horizon line a little bit touching the upper frame and do the same movement. The third row, I tilt down my camera angle by 70 degrees. The last row is just tilting down the camera angle and take one image straight down and rotate 180 degree for another image. In general, it will produce around 17-22 images in total.
Sometimes getting higher up to the mountain then wait for the right moment to catch the sunrise and give some depth.
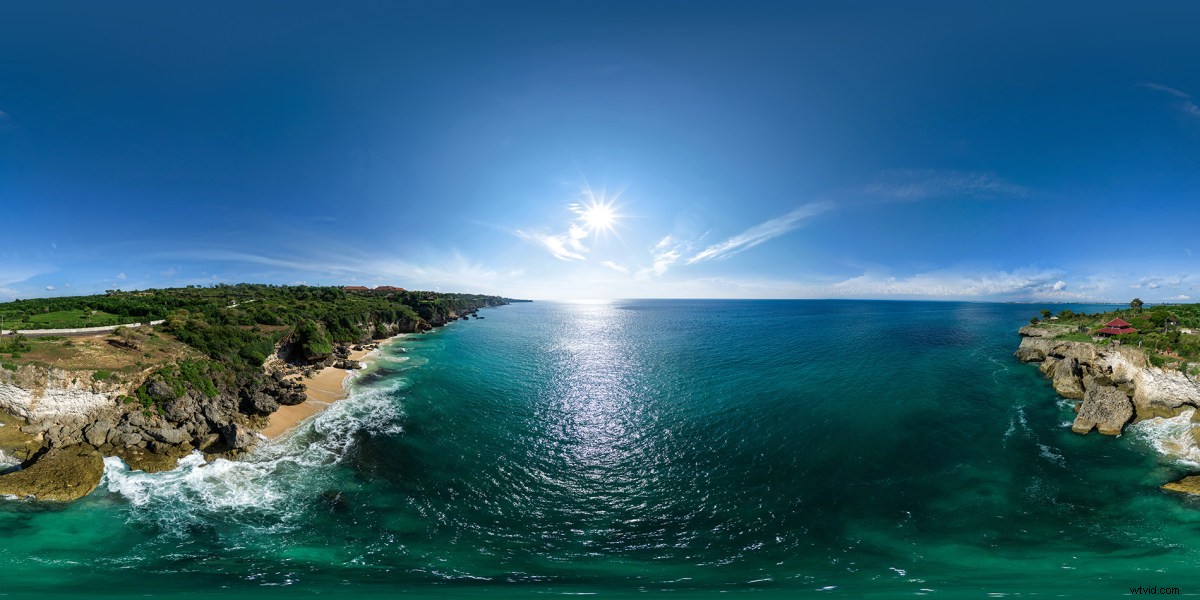
3. Sunset over Balangan Beach – Bali
 Aperture:2.8 Shutter Speed:1/40s ISO:100 Type:Phantom 3 Professional
Once I get back home, I always organize every single place that need to be proceed in one folder in order to create a good file management. I typically use Adobe Lightroom CC 2015 to correct the white balance, exposure and the colors. Another software I used is Autopano Giga from Kolor to stitch all of my image to be one big size photo, an Equirectangular Image. In addition, I also use Adobe Photoshop CC 2015 to blend the sky.
Aperture:2.8 Shutter Speed:1/40s ISO:100 Type:Phantom 3 Professional
Once I get back home, I always organize every single place that need to be proceed in one folder in order to create a good file management. I typically use Adobe Lightroom CC 2015 to correct the white balance, exposure and the colors. Another software I used is Autopano Giga from Kolor to stitch all of my image to be one big size photo, an Equirectangular Image. In addition, I also use Adobe Photoshop CC 2015 to blend the sky.I really love sunset, but I don’t want to enjoy it myself. So I decided to shoot and share it with you and that’s how 360-degree Aerial Photography turn into a Virtual Reality work, share the experience.
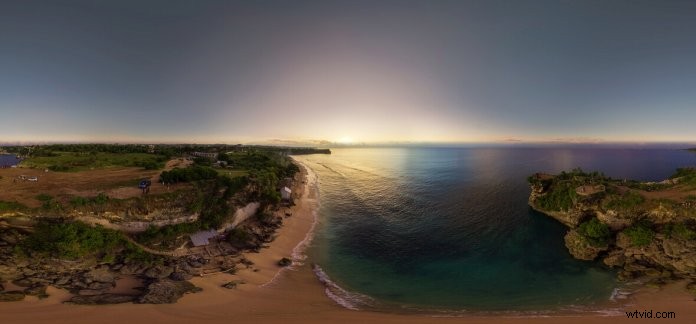
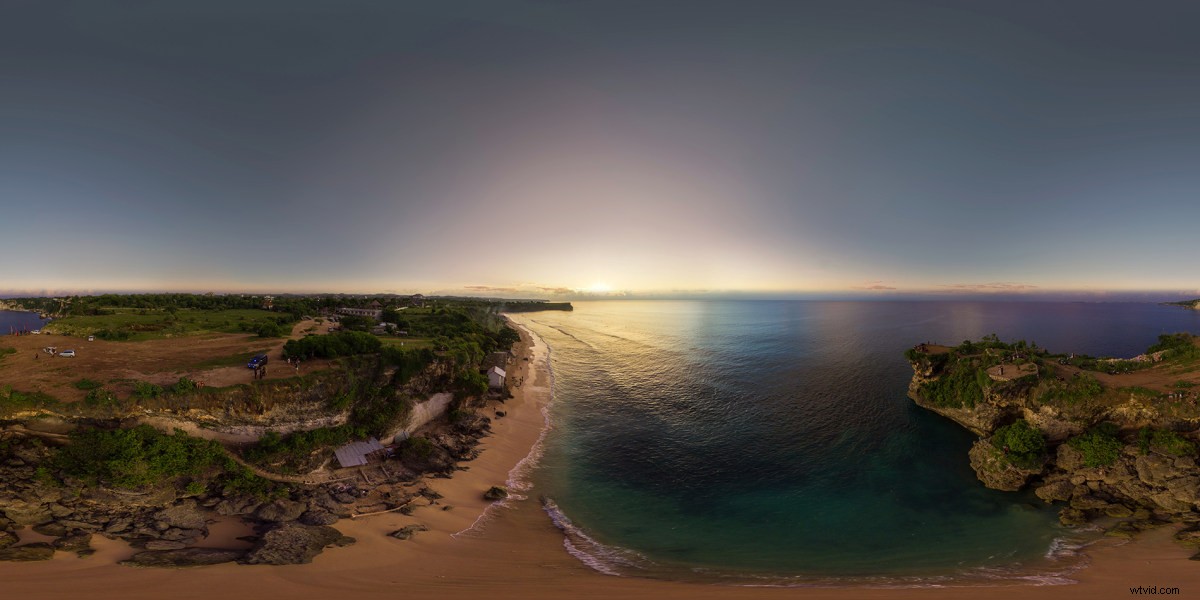
4. Sightseeing of Tegal Wangi Beach – Bali
 Aperture:2.8 Shutter Speed:1/500s ISO:100 Type:Phantom 3 Professional
a little bit higher to see around the beach or the place you loved. The morning scenery usually more calm at the beach. So, just get out and shot! 😉
Aperture:2.8 Shutter Speed:1/500s ISO:100 Type:Phantom 3 Professional
a little bit higher to see around the beach or the place you loved. The morning scenery usually more calm at the beach. So, just get out and shot! 😉Last but not least, you need to upload the equirectangular image to Skypixel.com in 360-degree Pano section. It automatically processes the equirectangular image to full 360-degree panorama, Virtual Reality (VR) mode and capabilities allow you to enjoy the scenery with additional VR gear.
Author:Rendy Cipta Muliawan Article From:SkyPixel All the footage is captured by Phantom 3 Progessional Check the Deals!