What Is Auto Exposure Bracketing (AEB)?
Every camera sensor has a limited dynamic range, which means they can only capture detail within a specific brightness range. The exposure that is selected at the time of shooting is equal to the mid-point of this range, and the camera sensor can capture details that are brighter or darker than this point.
While auto-exposure settings can be useful, high-contrast images can result in clipping, where excessively dark or bright sections appear in the image. These clipped sections of the image lack detail and can be difficult to restore in post-processing.
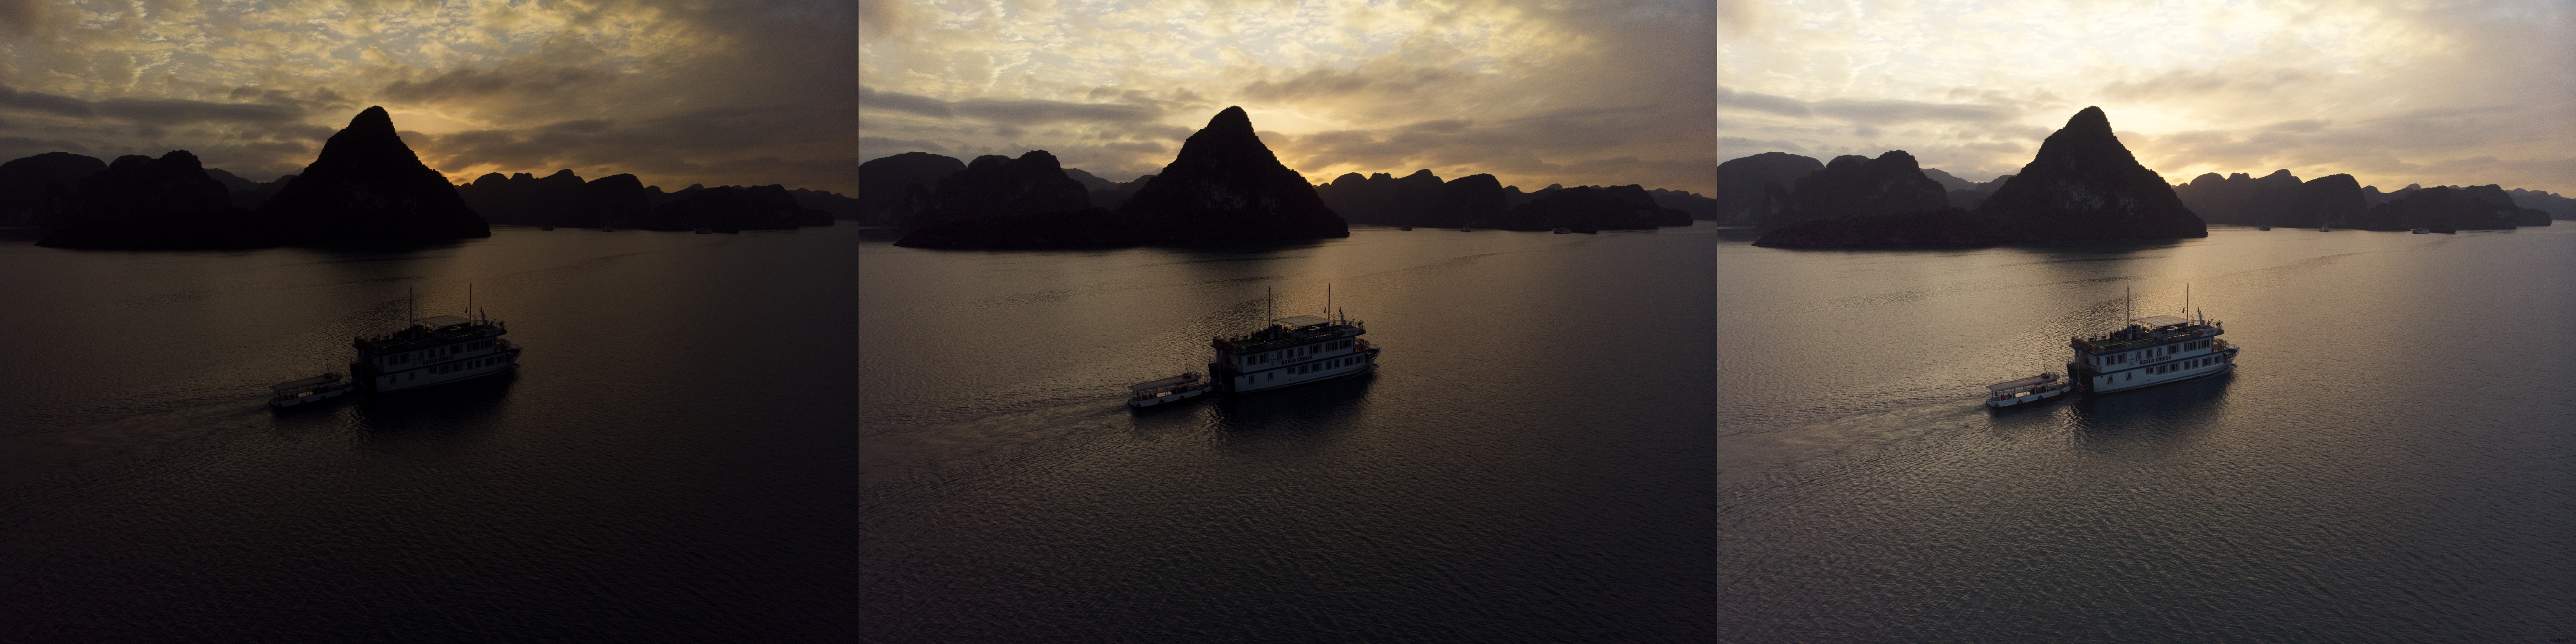
This is where bracketing comes in. Auto Exposure Bracketing (AEB) is the process of taking multiple shots of the same image with different exposure settings. When the AEB function is selected in DJI GO 4 your drone will automatically shoot 3-5 photos at different exposures. The different exposures will be combined to produce a detailed and engaging image.
Taking multiple exposures for drone photography is good practice for two main reasons. Firstly, it limits your reliance on a smartphone’s screen for image exposure. Taking into account sunshine, shadows, smartphone brightness, and other factors, it can be difficult to determine the exposure from your smartphone screen. By shooting multiple exposures, AEB provides some leeway to ensure you end up with the perfect shot.
The second reason to use AEB is to create High Dynamic Range (HDR) images. These are images that are composed of multiple exposures to create a detailed shot.
How To Create An HDR Image In Photoshop
In this quick Photoshop tutorial, we are going to use three images taken at different exposures from Vietnam’s Ha Long Bay to create an HDR image.
-
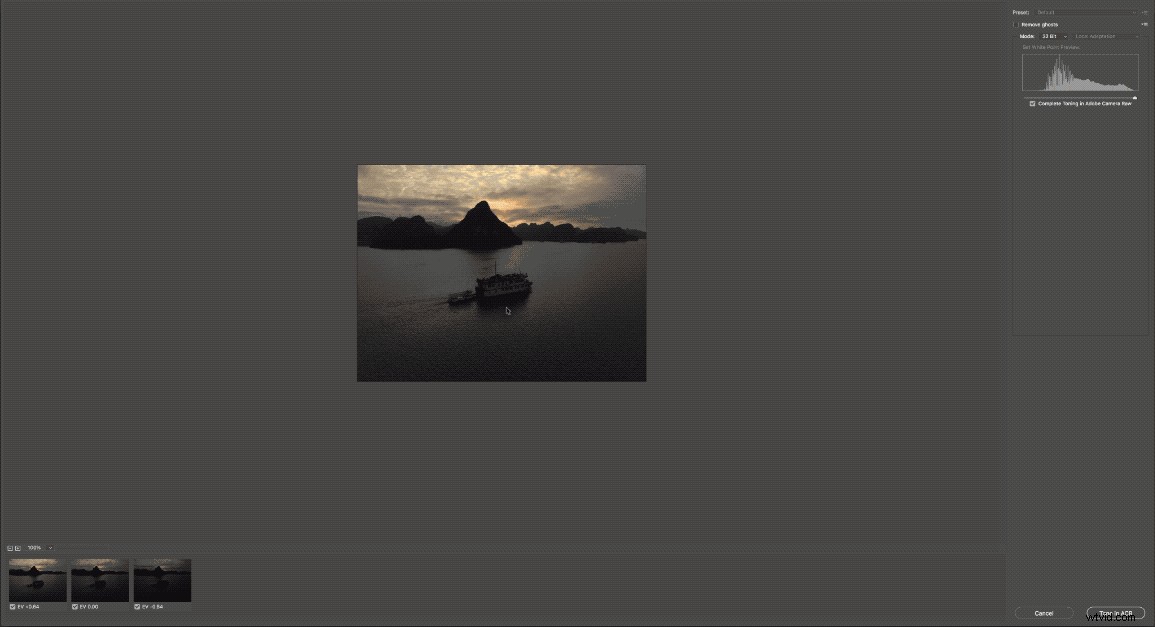
- Open up Photoshop, select File > Automate > Merge to HDR Pro. In the pop-up, select the images you want to merge. Choose “Select to automatically align source images” to avoid an unwanted ghosting effect.
-
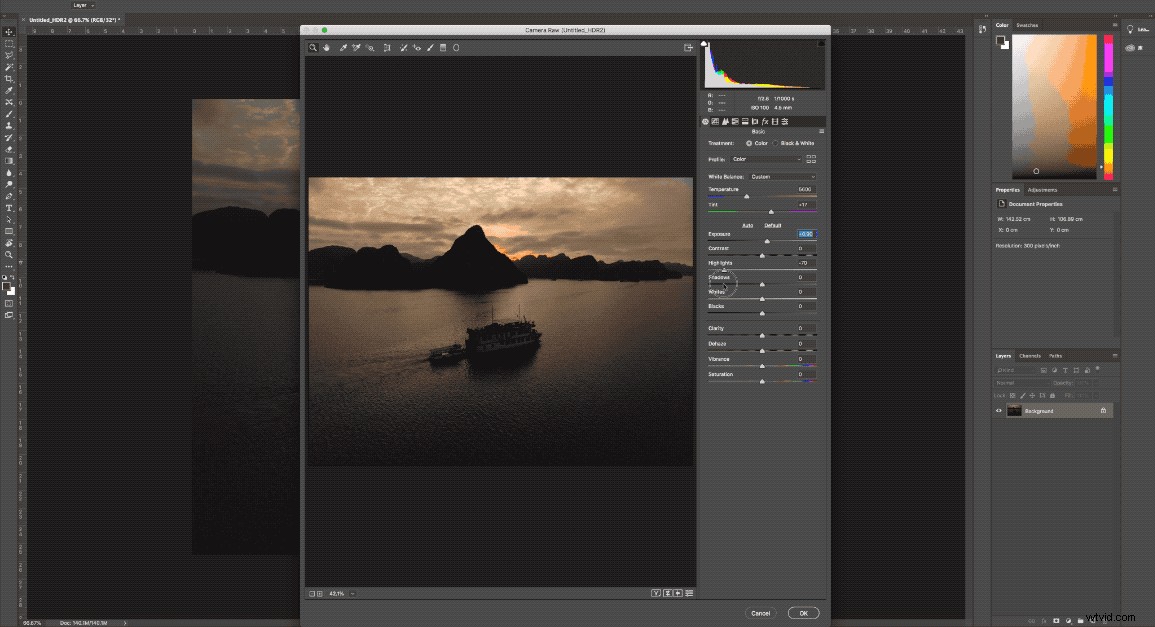
- Photoshop will automatically combine the different shots to create an HDR image.
-
- Saving the image in 32-bit format will allow you to use the full range of tools available in Adobe Camera Raw to edit the photo without compromising image quality.
Whether you are blending exposures for an HDR image or shooting multiple exposures, the AEB feature in DJI Go ensures you get the perfect shot every time.

For more tips and tutorials to help you get the most out of your DJI products, follow DJI Support on Facebook, Twitter, and subscribe to our YouTube channel.