
Give a photo the look of a hand coloring in Lightroom
Before there were color photos there were black and white photos, colored by hand using paints or dyes. Today, courtesy of any good photo-editing program, you can apply your own hand coloring effect to your photos.
Here’s how to apply the look of hand coloring in Lightroom.
To get started, open the image in the Lightroom Develop module. You will want to make the usual basic edits to the image so it shows a good tonal range and contrast.
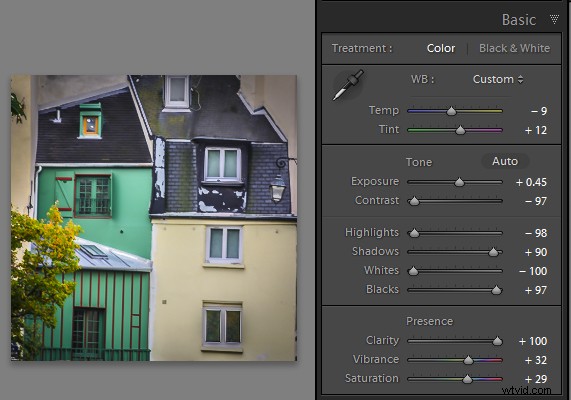
Before colorizing the image, make sure to adjust the tonal range and contrast
Then convert the image to a black and white by clicking B&W panel and adjust how the underlying colors in the image are converted to black and white using the sliders. Lighter areas will show the color better and darker areas will show a more subtle tint.
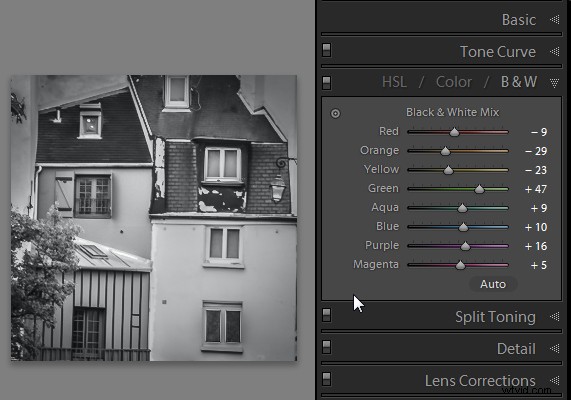
Use the B&W panel to create a grayscale or monochromatic image
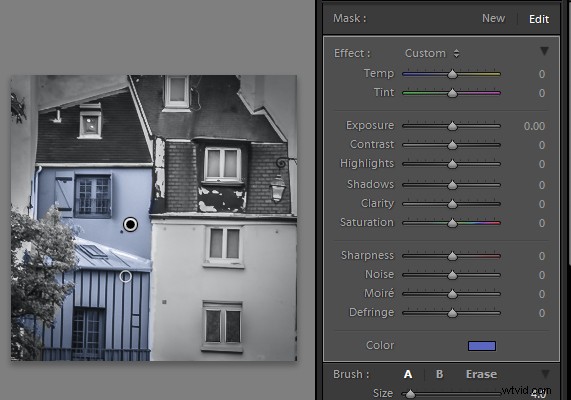
When you’re ready to add color to the image, click the Adjustment Brush and return all the sliders to zero by double clicking on the word Effect at the top of the panel (circle in red below).
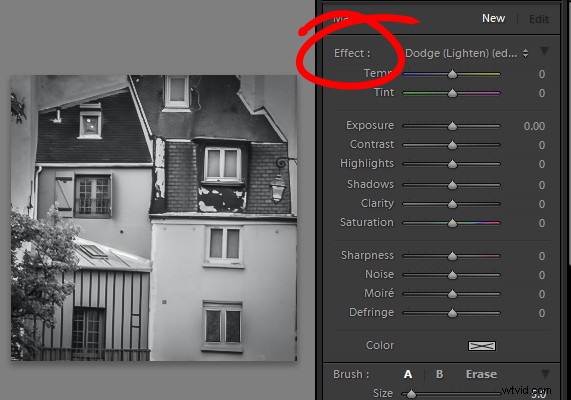
Double click Effect to reset all the Adjustment Brush sliders
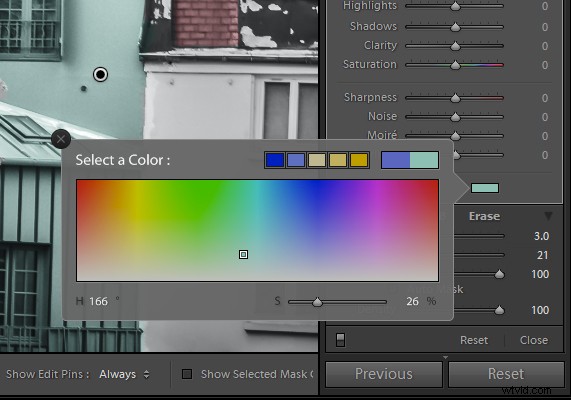
Click on the color sampler and choose a color to use.
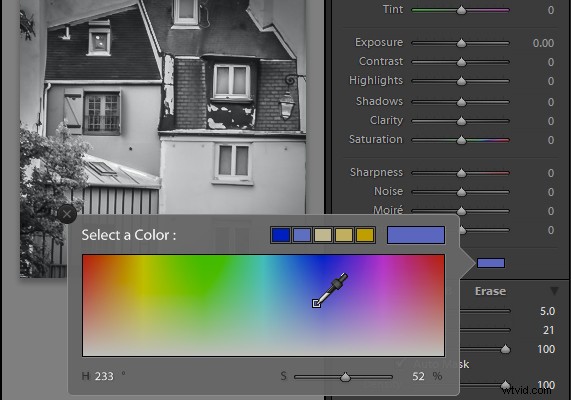
Select a color to tint the image with from the Color selector as shown here
Now click on the area that you want to recolor to set an Edit Point. Paint over the area to apply the color to it. As you paint with the Adjustment Brush a layer of partially opaque color is applied to the image.
Select the Auto Mask checkbox if you are working on an area of the image that has distinct edges. Doing this makes it easier to limit the painting to only the desired area. The roof tops and buildings here are good examples of areas with distinct edges.

Selecting Auto Mask helps paint in areas with defined edges (stay within the “lines”)
When painting an area that is less defined, disable the Auto Mask checkbox. The tree in this image has less defined edges so you should disable Auto Mask when coloring this area.
The buildings have defined edges so use Auto Mask when painting them. The tree does not, so disable Auto Mask when painting it.
If you mistakenly paint over an area and want to undo the painting click the Erase brush link or hold Alt to select Erase and paint to remove the mistake.
To zoom into the image press Z on the keyboard and click on the image to zoom in or out. To move the image hold the spacebar so the mouse pointer turns into a hand and drag on the image.
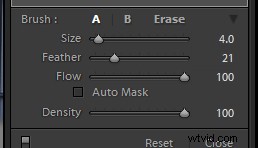
Size the brush using the Size slider
To resize the brush either use the [ and ] keys on the keyboard or adjust the size using the Size slider.
When you have finished working with the first color, click New to set a new Edit Point. Select a different Color and paint that onto the image.
Continue creating a new Edit Point for each color until the coloring is complete.
If desired, you can alter a color or adjust a painted area by selecting the Adjustment Brush and then click the Edit Pin for that adjustment. You can then change the color using the color picker.
Give a photo the look of a hand tinted image in Lightroom
Do you have some other tips:
If you have some other ways of doing this technique in Lightroom please share. Or share your images if you give it a try!
For more Lightroom tips and tutorials try these:
- Processing an Image in Lightroom 5 – a Video Tutorial
- 6 of Lightroom’s Hidden Treasures
- Why Lazy Photographers Should Use Lightroom Smart Collections
- 3 Uses for the Radial Filter Tool in Lightroom 5
- Lightroom 5 Tips – Hidden Gems