I showed you how to convert your photos to black and white in Lightroom in an earlier article. But, considering it dealt purely with global adjustments, the piece only gives you half the story. Global adjustments get you started, but in order to get the best black and white conversion possible you need to make local adjustments as well. This article will show you how to do this.
First, a couple of definitions:
Global adjustments: Any adjustments (to brightness, contrast etc.) that affect the entire image.
Local adjustments: Adjustments that affect only part of the photo.
Before I show you how to make local adjustments, let’s think about why you would do so. Certain things pull the eye more than others. For example, when you look at a photo with people in it, your eye will go straight to them, even if they are small in the frame. This is probably down to human curiosity more than anything, but it works.
Two other things that pull the eye are highlights and contrast. The idea behind making local adjustments is that you can alter the brightness or contrast of certain areas in the frame to influence where the eye goes. This creates a better, more beautiful photo.
Dodging and burning
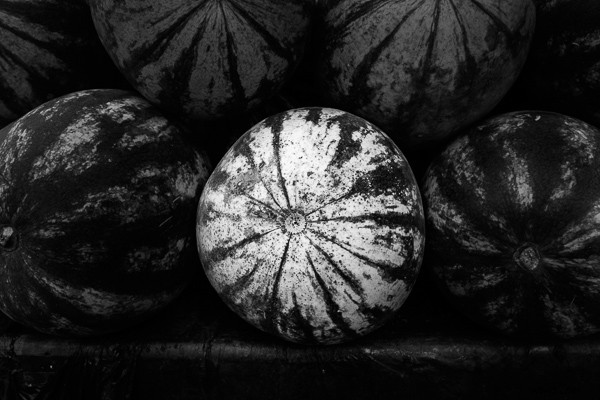
Here’s the photo we’re going to work with in today’s article. I’ve already converted it to black and white using global adjustments.
As you can see, it lacks a focal point. It also contains lots of beautiful textures which will look great in black and white if we can bring them out.
In order to make effective local adjustments you need to decide what you want to achieve before you start. Here, I decided to make the central watermelon the focal point of the composition. Decision made, it’s just a question of how to achieve it.
Dodging and burning
Although Lightroom itself doesn’t use these terms, you will find them referred to time and again in post-processing. Dodging is the act of making part of the photo lighter, and burning is the act of making it darker. They originated in the chemical darkroom and are also done in photo editing programs like Photoshop.
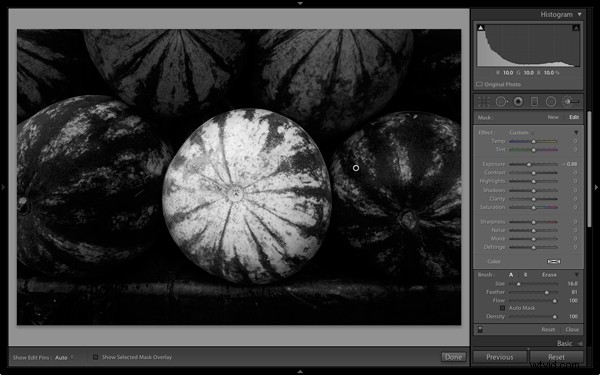
The first step to achieving my aim of making the central watermelon the focal point, is to make the rest of the photo darker. I did that by placing a Radial Filter over the central watermelon and moving the Exposure slider left.
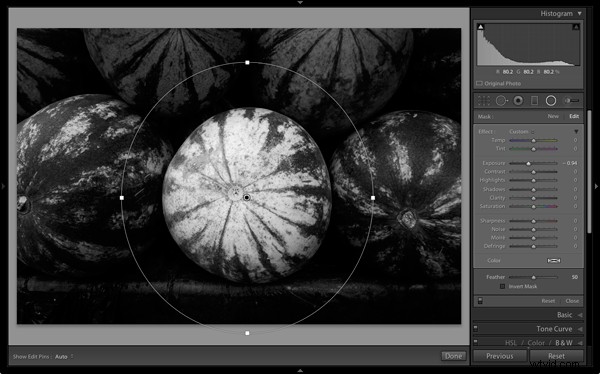
Note: The Radial Filter is new to Lightroom 5. If you have an earlier version of Lightroom, you can use either Post-crop Vignetting or the Adjustment Brush instead.
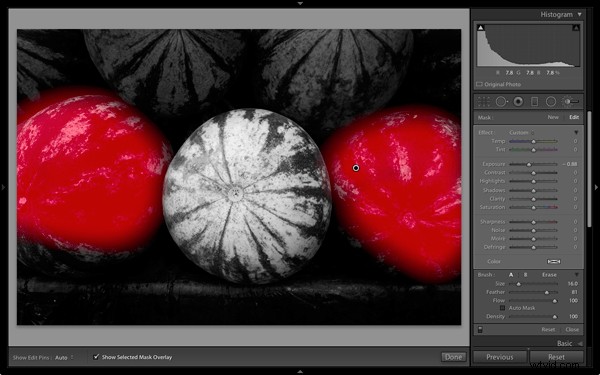
The two watermelons either side of the central one are a little too bright. So I used the Adjustment Brush to select (mask) them and moved the Exposure slider left to make them darker. The screenshot below shows the area covered by the mask. Note how I only painted the top parts of the watermelons as the bottom part was already dark.
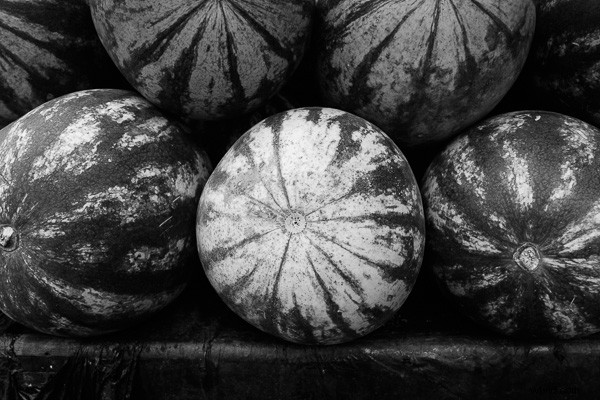
This is the result of the local adjustment.
Contrast and Clarity
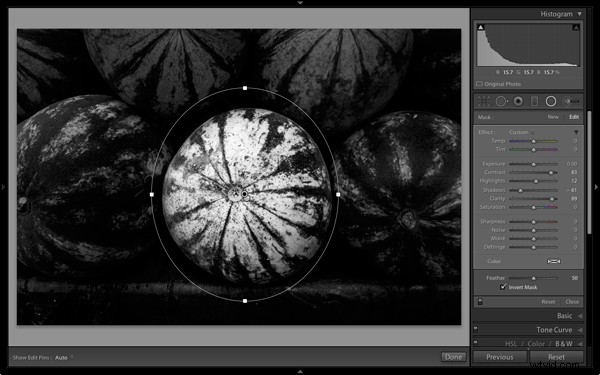
The next step is to improve the appearance of the central watermelon. I can do that by increasing contrast to bring out the beautiful textures of its skin.
I placed another Radial Filter over the watermelon (you could also use the Adjustment Brush) and ticked the Invert Mask box so the adjustment was applied inside, rather than outside, the filter. Then I increased Contrast and Clarity, and moved the Highlights slider right and the Shadows slider left. The result is a big increase in contrast, bringing out the texture of the watermelon’s skin. Here’s the result.
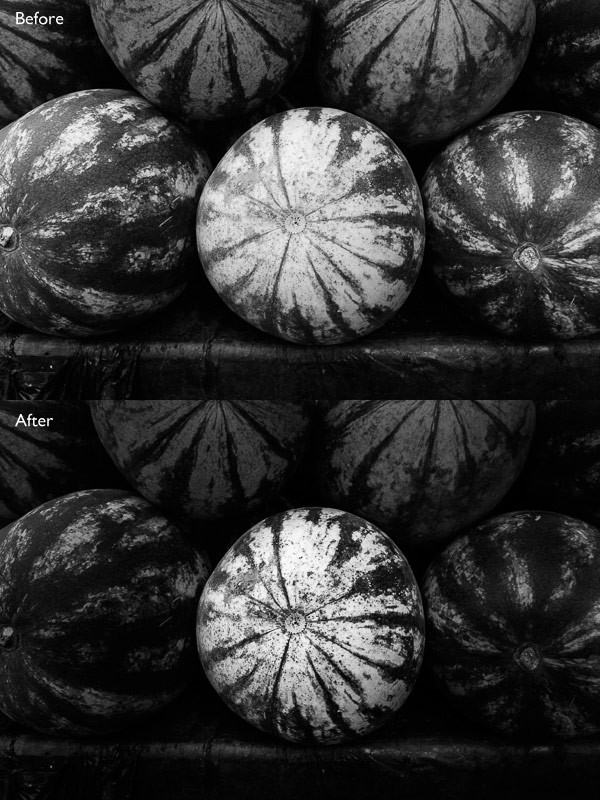
Here are the before and after views so you can see the difference, which is entirely down to the local adjustments.
That completes my overview of using local adjustments in Lightroom. As you can see, the local adjustments turned an average photo into a much stronger one. There is nothing overly complicated about it, it’s more a matter of training your eye to see in black and white and then deciding how to use the tools that Lightroom gives you to realize your vision.
I’m curious to hear how you use local adjustment when you convert your photos to black and white. Please let us know in the comments.
Mastering Lightroom: Book Three – Black & White
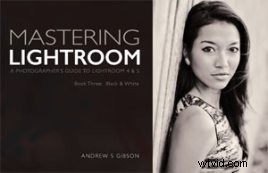 My ebook Mastering Lightroom: Book Three – Black & White goes into the topic of black and white in depth. It explains everything you need to know to make dramatic and beautiful monochrome conversions in Lightroom, including how to use the most popular black and white plug-ins. Click the link to visit my website and learn more.