One reason that Capture One is such a versatile and efficient RAW editor is the ability it gives you to work in Layers. It combines the ease of working in Lightroom with the functionality of Photoshop Layers.
If you’re new to the software, learning to work with layers in Capture One will elevate your photos and help you in creating a more efficient workflow.
What are layers?
Layers help you make targeted adjustments to certain areas of a photo. They are similar to Local Adjustments in Lightroom. You can make tweaks to color, exposure, clarity and other adjustments you’d typically make in a RAW editor, as well as more complicated edits.
Capture One’s Layers tool enables you to combine brush adjustments, gradients, and repairs to masked areas using multiple layers.
How to get started with Layers
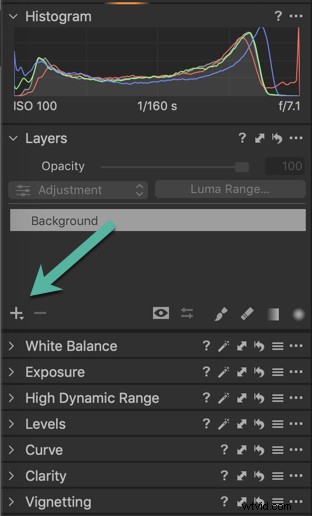
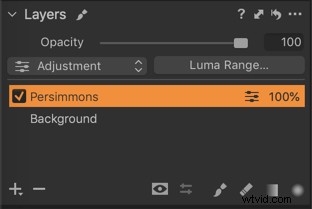
The Layers option is indicated by the + Plus Icon in the Layers panel under the Histogram, which can be found in the Exposure tab. Layers can also be found in the top of the screen in the menu bar and has its own dropdown. Click on the Plus icon to create a new layer.
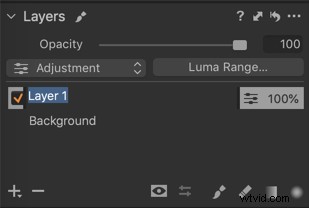
When creating or working on multiple layers, it’s a good idea to name each layer in a way that tells you what adjustments you made to the layer. Double click the layer to rename it.
Notice that if you make a new layer and start making adjustments, nothing will happen to the image. You need to create a Mask to determine where on the layer the adjustments will be applied.
There are different ways to create masks: for this article, I’ll focus on the brush tool to brush in Masks. You can find the brush tool in the lower right of the Layers panel.
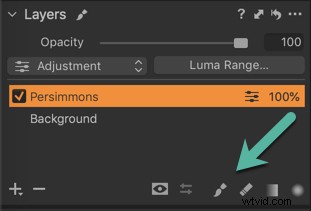
You can also use the shortcut B.
To change the settings on the brush, simply right-click on the photo.
Note that a soft brush is usually desired.
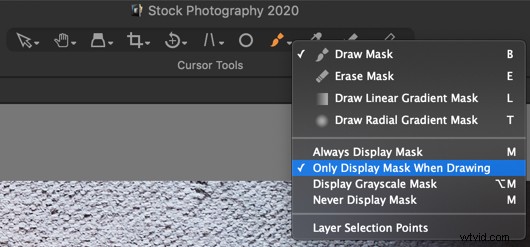
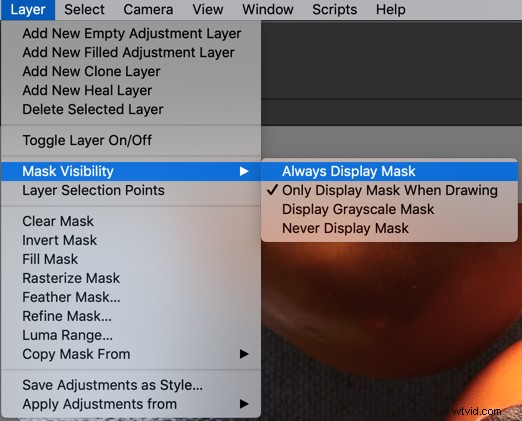
The mask can be seen in red and will, by default, only show when you’re actually brushing on the image.
The shortcut M will toggle this setting, to show or hide. You can also choose to keep your Mask on. Options for the Mask are available in the Brush Panel dropdown in the tools panel at the top of the Capture One workspace.
There is also a Layers panel in the Capture One Menu tab. The great thing about Capture One is that there are several places where you can access any given tool all from one workspace, instead of having to switch Modules, as you do in Lightroom.
If you select too much or spill over into an area that you don’t want included in the adjustment, you can select the Erase brush and subtract the area where you didn’t intend to brush. You can also use the shortcut E.

The square bracket keys [ ] on your keyboard will help you change the size of your brush quickly.
Once you have made an adjustment, toggle off the color so you can see the effect, and if you need to make any further adjustments. That’s why it’s a good idea to have the mask show only when you’re brushing over your image.
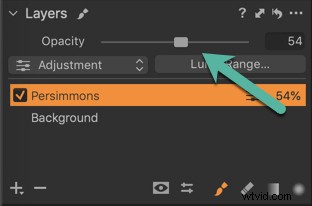
Notice that every time you brush over the same area, the effect is stronger.
Reduce the opacity if you want to lessen the effect.
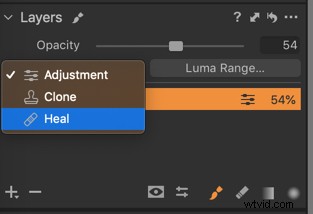
Heal Layers
Another type of layer is a Heal layer, which can be used to cover or conceal objects in your photo. It’s a very useful tool when working with layers in Capture One.
Clone Layer will copy pixels from a source point to destination, however, it is not as efficient. The Heal layer is more dynamic; it will update according to changes made to the background layer or other layers.
You can use the Heal layer to fix blemishes by copying and pasting pixels from a different part of the images.
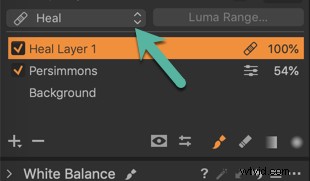
To start a new Heal layer, choose New Heal layer from the dropdown beside the Plus icon or choose it from the choices in the left-hand dropdown over where your named layers are located.
Using Healing requires you to create a source point.
Create source point by clicking Alt and then clicking once on the photo.
Heal layers will intelligently blend the area with surrounding pixels.
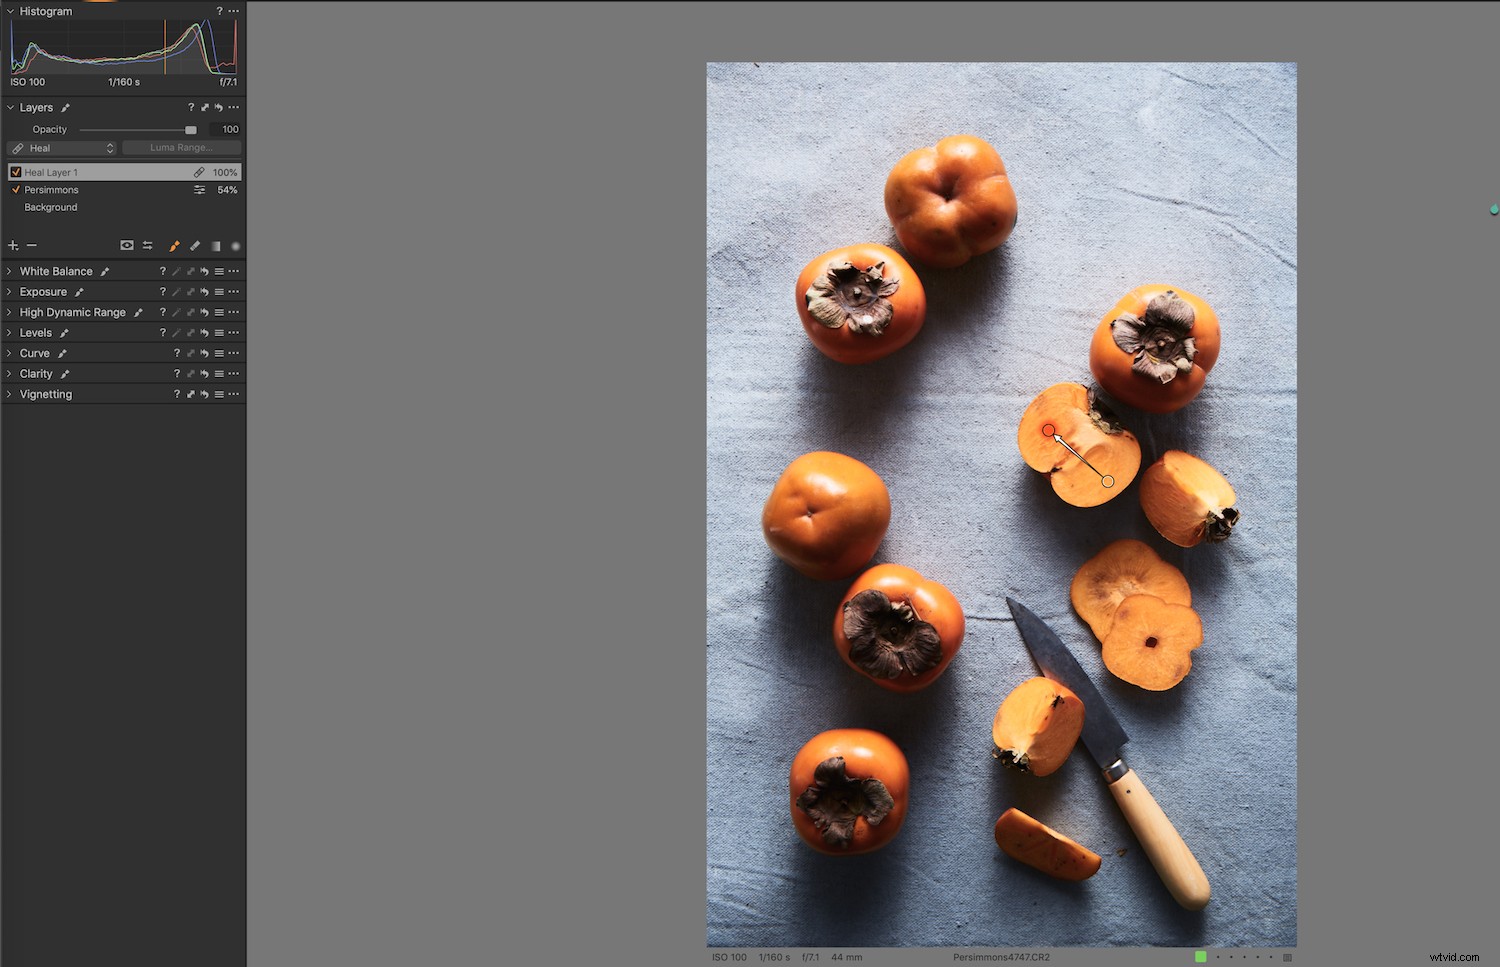
Now brush on the photo.
It will take the area from the source point and cover the object or blemish.
If the appearance of the target area does not match the surrounding pixels, click on the source point and drag it anywhere within the same image in the Viewer.

Conclusion
Capture One is a powerful program that can help take your editing to the next level. The ability to work with layers in Capture One is one way to do that. If you’ve been on the fence about whether to make the switch from Lightroom, they have a free 30-day trial available for you to check out.