For today’s photographer, post-processing is a critical element of image making. Sure, when you first get started with digital photography, you might shoot in JPG mode and allow the camera to make decisions about things like color and contrast. But when you’re ready to take control of your images, it’s time to shoot in RAW format and make the important decisions about how you want your final image to look yourself.
When you first start shooting in RAW, you might think your images look a bit gray and bland. That’s because the decisions that the camera was making before are now left up to you. That can be a bit daunting! But here are some tips to help you avoid the most common post-processing mistakes and make sure you are helping your images and not hurting them.
Remember, the purpose of post-processing is not to fix bad photos, but to bring out the best in good photos.
Mistake #1 – Lightening shadows too much
Always try to get the best exposure possible in camera. You’ll get a better result when you start out with a good exposure rather than relying on the highlights and shadows sliders in post-processing to balance it.
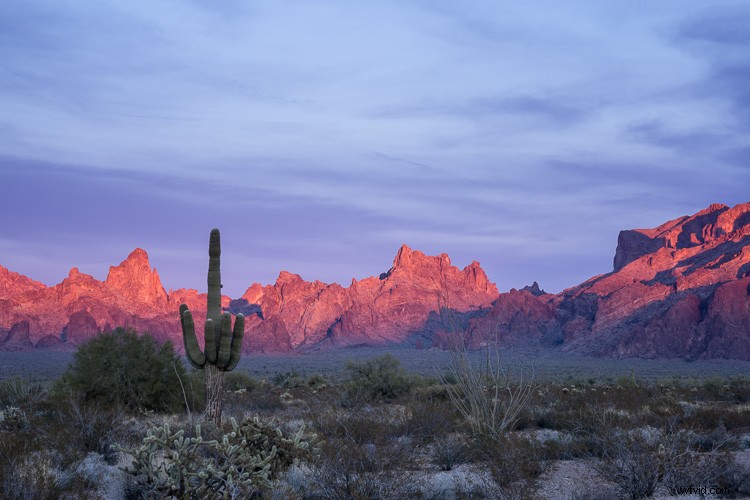
That said, sometimes you will still want to use the shadows slider to lighten your shadows to bring more detail in the darker areas of your image. Just be careful not to overdo it, or you’ll end up with an image that no longer looks natural.
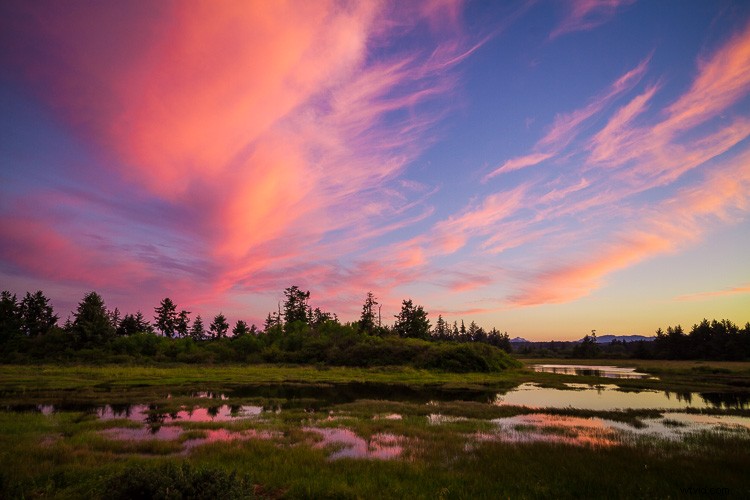
This is overdone, the shadows have been pulled too far here and it no longer looks natural. Notice it also introduced noise into the sky.
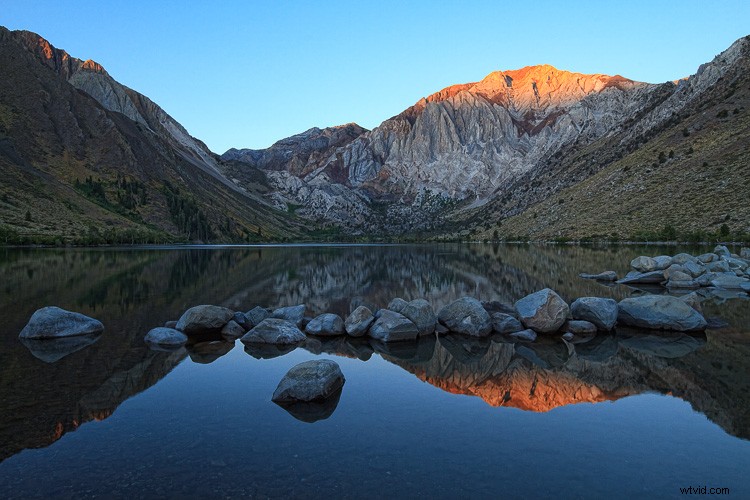
Shadow adjustment in moderation is better.
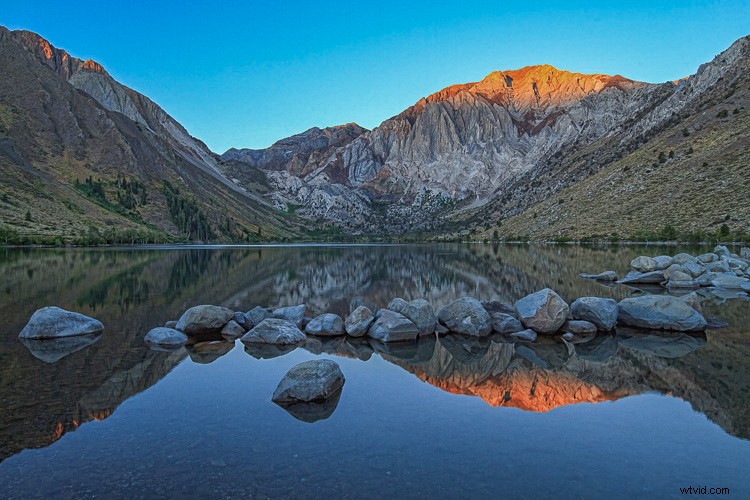
If you try to equalize the brightness of the highlights and shadows, you’ll end up with a photo that not only looks unnatural, but the lack of contrast will make the image look boring. Contrast is a good thing! This is especially true when you have a scene with a reflection. The reflection should always be darker than the scene it is reflecting, as it is in nature.
Mistake #2 – Over saturation
Another way to create an unnatural looking image is to over saturate everything. It’s a tempting thing to do because a little bump in saturation and vibrance makes such a big difference. Again, just don’t overdo it. A little goes a long way.
Before you touch those sliders, spend a bit of time thinking about your image and the colors in it. Sometimes adding saturation globally is not the best idea, especially if you have a scene that contains many different colors. Instead, consider using the HSL (Hue/Saturation/Luminosity) panel, choose Saturation, and use the target tool to add saturation to one color in your scene. For example, you might want to add saturation to the main subject to draw attention to it.
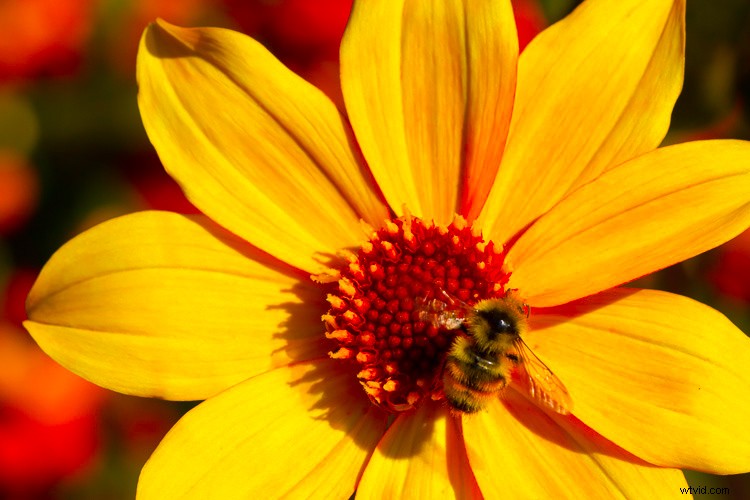
Over saturation leaves the colors looking odd.
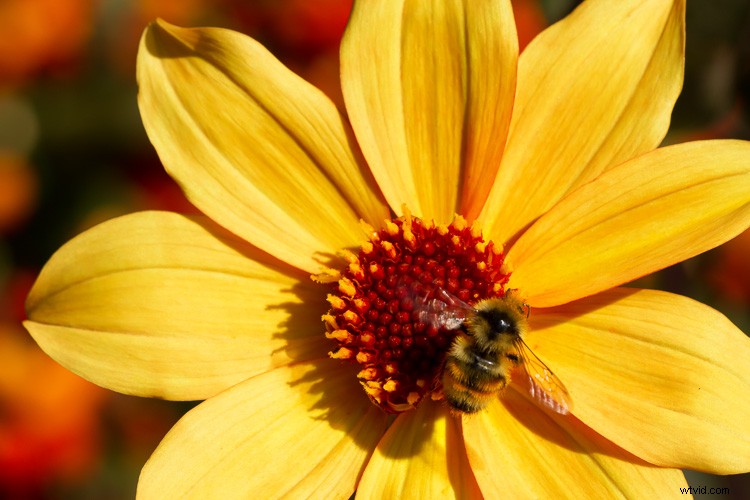
Better saturation levels.
Mistake #3 – Over sharpening
First of all, never use sharpening to try to fix a photo that is out of focus. It just doesn’t work. Sharpening cannot fix blur. However, if you have an image that is in focus, adding a bit of sharpening can make it extra crisp and realistic.
Again, consider adding sharpening locally (to one select area) not globally, especially if you have areas of your scene that are purposely out of focus, such as when you have a shallow depth of field. Also, the sky usually looks better when it is smooth, so you don’t want to add sharpening there. Keep in mind that adding sharpening will increase noise, which is another reason not to add it globally. Rather, just add it to the main subject or areas of your scene with a lot of detail.

This has been over sharpened, you can see artifacts throughout the image here.

Better level of sharpening.
In Adobe Camera Raw, use the Detail panel to add sharpening. Then, hold down the option (or alt) key and use the masking slider. As you move the slider, the areas that appear black do not have sharpening applied and areas that are white do. This is an effective way to add sharpening to the areas of your image that have details. Another option is to use the adjustment brush to brush sharpening on where you want it.
Mistake #4 – Over cropping
The crop tool is a handy way to refine your composition, remove unwanted elements on the edges of the frame, and make sure your horizon line is straight. But don’t use it to remove all the “negative space” in your scene.
You don’t need to fill the frame with your subject. A little breathing room keeps the image interesting. Think about creating a balance between the space taken up by your subject and the space around it. This is not necessarily an equal balance.
Cropped too tight on the subject.
Cropped to leave negative space and lead your eye to the subject.
Mistake #5 – Too much Noise Reduction
Sometimes the nature of the light requires the use of a high ISO. Perhaps you need both a small aperture and a high shutter speed for your scene, so increasing the ISO is the only way to get a good exposure. That’s okay. The noise caused by using a high ISO can be reduced in post-processing using the noise reduction slider.
But nobody said that all images must have no noise. Not all images have to be perfectly smooth looking. Especially if there is a lot of detail and texture in your subject. Using too much noise reduction can create blurry splotches in areas that were previously sharp.
Too much noise reduction has been applied here and overall the image now looks blurry.
Noise reduction scaled back.
You may have noticed a theme in these common mistakes. Don’t over do it! Small adjustments go a long way to bringing out the best qualities of your images, but taking it too far can just as easily ruin them.
After you process your image, take a break from it and look at something else. Maybe even give it a day to settle. Then, when you look at it again, it will be more obvious if you have taken the processing too far.