Many creators encounter flicker after filming, even when the footage looks flawless in-camera. Flicker usually stems from lighting, screen refresh rates, or camera settings, and can ruin an otherwise great clip.
CapCut’s built‑in “Remove Flickers” tool is available on both desktop and mobile. It smooths light and screen flicker, giving your video a cleaner, more stable appearance.
While CapCut’s anti‑flicker works well for mild issues, it may fall short on severe flicker. The following guide shows when to use CapCut’s feature and when to consider an alternative solution.

Part 1: Understanding Video Flicker
Knowing why flicker occurs helps you avoid it in future shoots and reduces the need for post‑production fixes.

- LED or Fluorescent Lights: These lights cycle rapidly. Cameras capture the cycles, producing flicker that the eye cannot see.
- Screen Recordings: When filming a phone or computer screen, the differing refresh mechanisms can create bands or flicker.
- Slow‑Motion Footage: Higher frame rates accentuate light flicker, making it more noticeable.
- Time‑Lapse Clips: Changing exposure over time can cause brightness jumps that appear as flicker.
Part 2: Removing Flicker with CapCut
CapCut’s anti‑flicker feature is part of the Pro plan, which costs roughly $19.99/month. The mobile and desktop interfaces differ slightly, but both follow the same workflow.
CapCut on Mobile
Using the mobile app is straightforward: a single slider adjusts the anti‑flicker strength. Follow this concise workflow, based on TutorialTV’s YouTube tutorial.
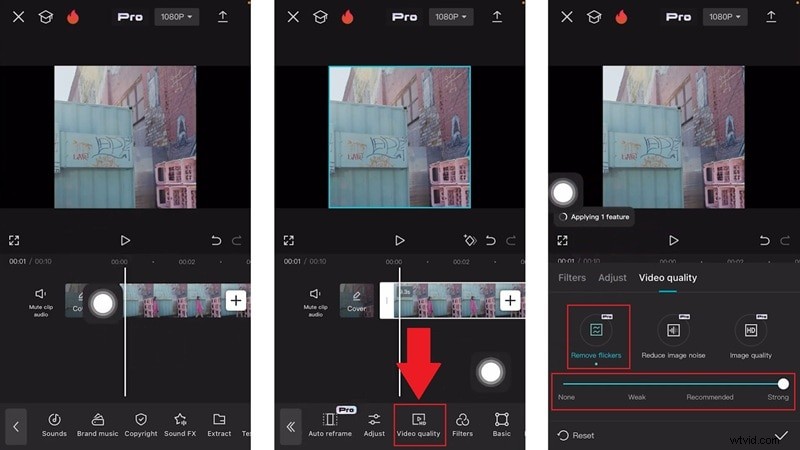
Step 1: Import your clip into CapCut and tap Video Quality from the menu.
Step 2: Select Removing Flicker and slide the control until the flicker is reduced to an acceptable level.
CapCut on Desktop
The desktop version offers more granular control with two distinct modes:
- Flashlight Mode: Ideal for sudden light changes or uneven brightness.
- Time‑Lapse Mode: Smooths gradual brightness shifts, perfect for time‑lapse videos.

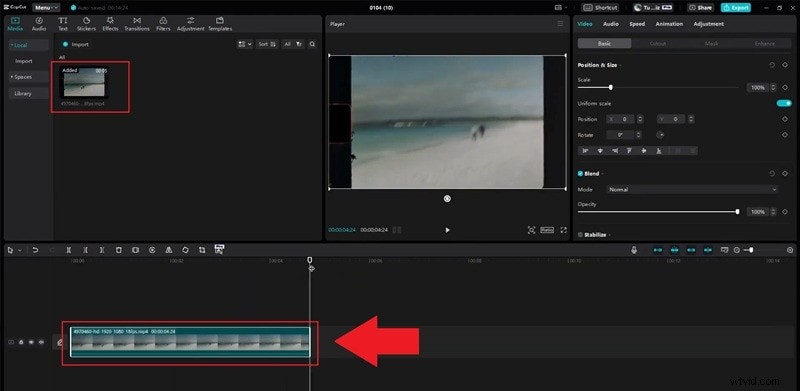
Step 1: Drag your clip into the timeline.
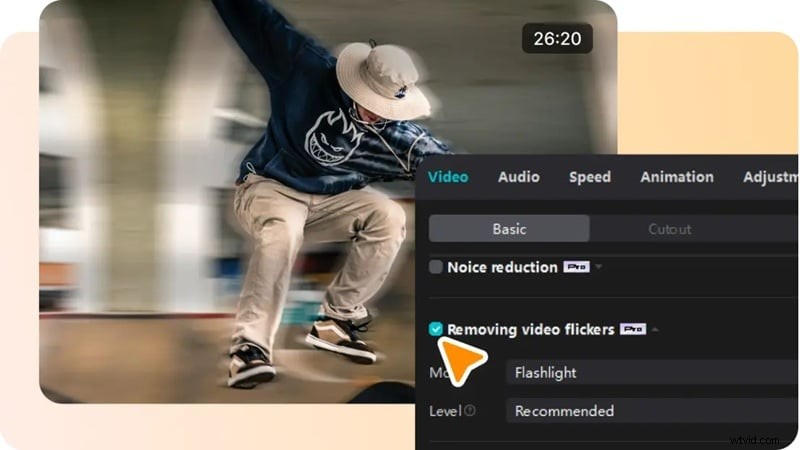
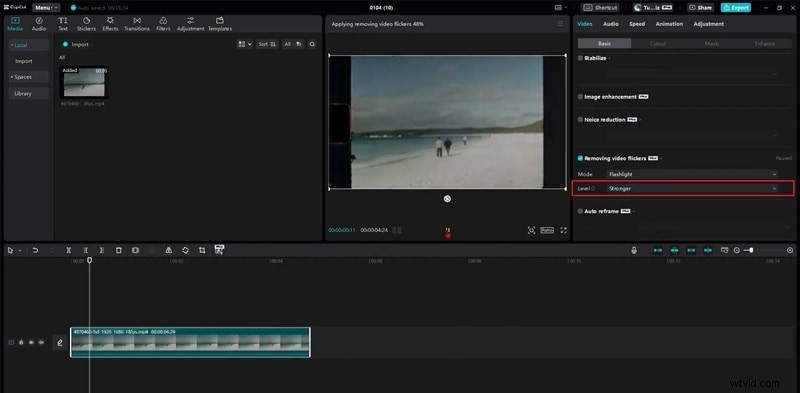
Step 2: In the Video panel, locate Removing video flickers and choose the Flashlight mode.

Step 3: Set the Level to Stronger, preview the clip, and confirm that flicker is removed.
Part 3: If CapCut’s Deflicker Fails, Try These Workarounds
When CapCut’s tool doesn’t fully resolve the issue, consider these quick fixes before moving to a third‑party editor.
- Re‑encode Your Clip: Export the video again using a standard frame rate and codec; unconventional formats can interfere with anti‑flicker processing.
- Disable AI Ultra HD or Hardware Acceleration: These settings can introduce processing glitches that worsen flicker.
- Increase Flicker Strength: On desktop, bump the level from Recommended to Stronger and preview again.

If these steps still don’t help, a dedicated deflicker tool like Filmora’s AI Flicker Removal can deliver more reliable results.

Why Filmora’s AI Deflicker Outperforms Manual Tweaks
- One‑Click Solution: Import the clip, hit Generate, and let AI handle the rest—no sliders or trial‑and‑error.
- Versatile Across Lighting Conditions: Works well with night scenes, indoor LED lighting, and other common flicker sources.
- Broad Clip Support: Handles standard footage, proxies, and overlays; clear about unsupported formats.
Filmora Deflicker Tutorial
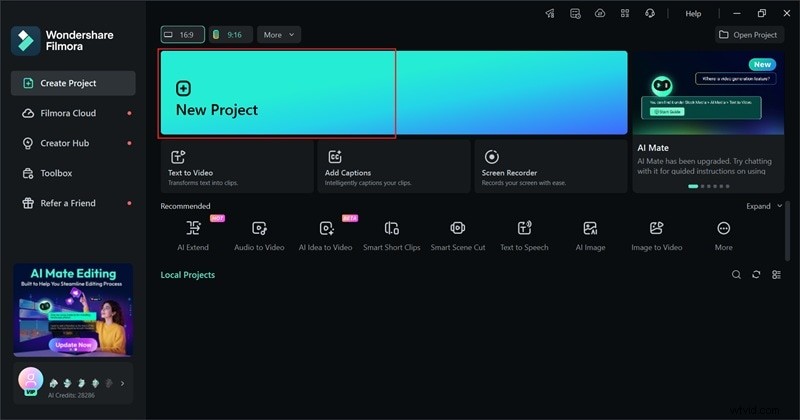
Step 1: Download the latest Filmora version, launch it, and create a New Project.
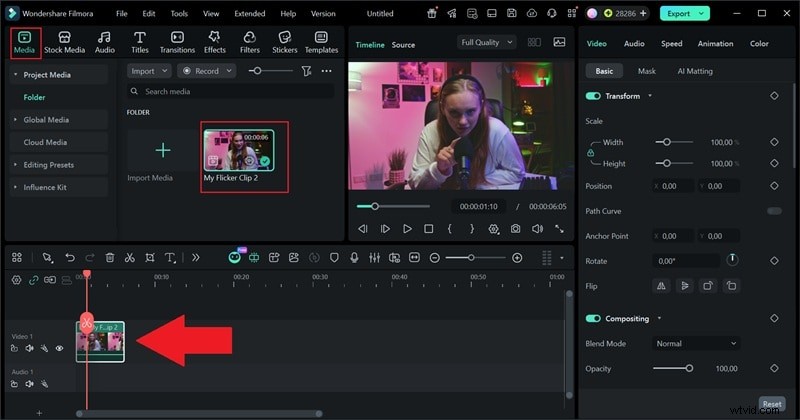
Step 2: Click Import in the Media panel, add your clip, and drop it onto the timeline.
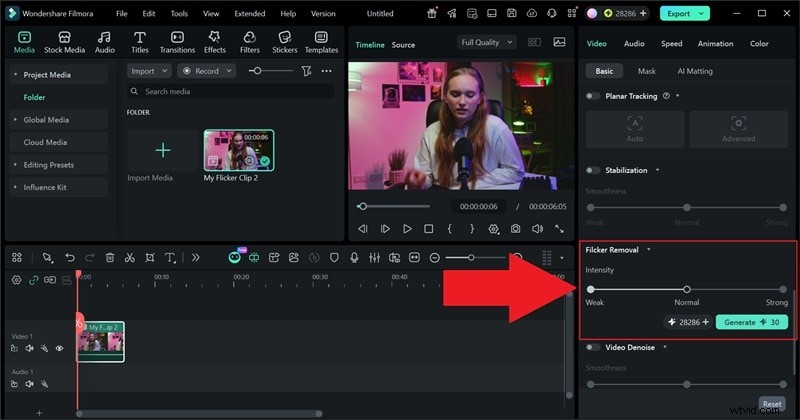
Step 3: In the Property panel, find Flicker Removal, choose the desired strength, and click Generate.
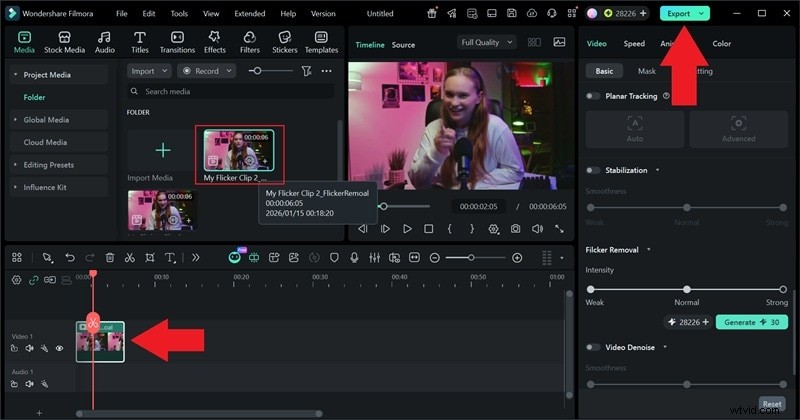
Step 4: Replace the original clip with the processed version, review the result, and export your final video.
Part 4: CapCut vs Filmora – Which Deflicker Tool Wins?
Both editors offer solid features, but their approach to flicker removal differs. The comparison below highlights key distinctions to help you choose the right tool for your workflow.
| Feature | CapCut | Filmora |
| Adjustment Controls | Strength slider | One‑click AI + optional strength slider |
| Deflicker Quality | Good for light‑to‑medium flicker | Strong for light‑to‑heavy flicker |
| Processing Speed | Fast on desktop, slower on mobile | Fast and consistent via cloud AI |
| Mobile Support | Yes | No |
| Export Quality | Great | Excellent |
| Artifact Control | May leave slight blur or ghosting | Generally cleaner with fewer artifacts |
| Best Use Case | Quick fixes, mobile edits | Tough flicker, cleaner final output |
- CapCut anti‑flicker excels with mild flicker and mobile workflows.
- Filmora AI deflicker is preferable for severe flicker and projects where output quality matters most.
- If convenience and speed on mobile are top priorities, choose CapCut.
- If you seek the cleanest result with minimal manual tweaking, Filmora is the stronger option.
Conclusion
Video flicker can be frustrating, but with CapCut’s built‑in tool you can often eliminate mild issues quickly on both desktop and mobile. When flicker is heavy or persistent, Filmora’s AI deflicker provides a powerful, one‑click solution that scans and smooths flicker patterns automatically.
Choosing the right tool depends on your workflow, device preference, and the severity of the flicker. For swift, mobile edits, CapCut is a solid choice; for demanding projects that require the highest quality and minimal trial and error, Filmora’s AI deflicker is the recommended path.

Filmora
AI Video Editing App & Software
Best tool for making videos anywhere for all creators!
Filmora – Remove Flicker From Videos with One Click Effortlessly